Ingredients
Serves 8-12 people
Meringue
6 egg whites at room temperature
12g cornstarch
300g sugar
2 tsp fresh lemon juice
Pinch of salt
1 tsp vanilla extract
Cream
25cl heavy whipping cream (cold from the fridge)
20 cl creme fraiche (cold from the fridge)
Pineau sauce
3 strawberries cut in half
1 tsp sugar
3 tbsp pineau red
1/2 cup water
few drops lemon juice for a touch of acidity
Strawberries
1.5 kilos of in season strawberries
1 tbsp of sugar
Equipment
Flat baking tray
Parchement paper
Large bowl for beating your egg whites
Medium bowl for beating your cream
Medium bowl for your cut up fruit
Preparation
The meringue
1- Preheat your oven to 120c/250f. Lay a piece of parchment paper on your baking tray. Make sure that the bowl you’re using for the egg whites is cleaned & dried with a clean towel. Be mindful not to leave your fingerprints inside the bowl as any fat residue (oil) can affect the fluffiness of your meringue.
2- Mix your cornflour in with your sugar. Press your lemon juice and have your vanilla extract ready. Set aside.
3- Crack your eggs and extract the egg whites. It’s very important not to let any yolks or pieces of yolk in with the egg whites as you will struggle to get a good fluffy meringue. Save your egg yolks to make something else like cream anglaise to accompany a chocolate cake.
4- Start beating slowly your egg whites on low. The idea is to slowly introduce “air” into the whites which form little bubbles that will eventually make the meringues fluffy. Add in your lemon juice and salt and continue beating on low for 2 or 3 minutes. Your mixture will look foamy at this point.
5- As the egg whites start to get a little thicker you may increase the speed to medium and start adding in your sugar by the spoonful and allowing it the mix. After a few minutes of this increas your speed to high. Add in your vanilla and continue adding your sugar by the spoonfuls and beating.
6- After a few more minutes of beating your meringues should be starting to look glossy and get thicker at this point. Once it’s quite thick, stop beating and pull out your beaters. If your meringues have a strong “hang” then they are ready.
7- With a rubber spatula pour out your meringue onto the center of your baking sheet. Spread it around to form a “nest” the size that you like. I usually go for about ____. For Pavlova’s you want the edges to be higher than the center – really like a nest. Pop it in the oven and set your timer for 1 hour.
8- Once your meringue is cooked, turn off your oven and crack open the door. Let your meringue “cool” in the oven for 30 minutes and then you can take it out and let it finish cooling on the counter.
The sauce
1- Once your mergingue is in the oven, start your sauce. In a small saucepan on medium heat, add your strawberries, pineau rouge, water and sugar. Bring it to a soft boil and then turn your heat down so it simmers. Give a stir and allow it to cook down to a tickish syrup consistency.
2- Taste it and make sure it is sweet enough for you. Pull it off the heat and strain it into a jar. Make sure to press the strawberry to get more flavor out of it. Add a few drops of lemon for touch of acidity.
The cream
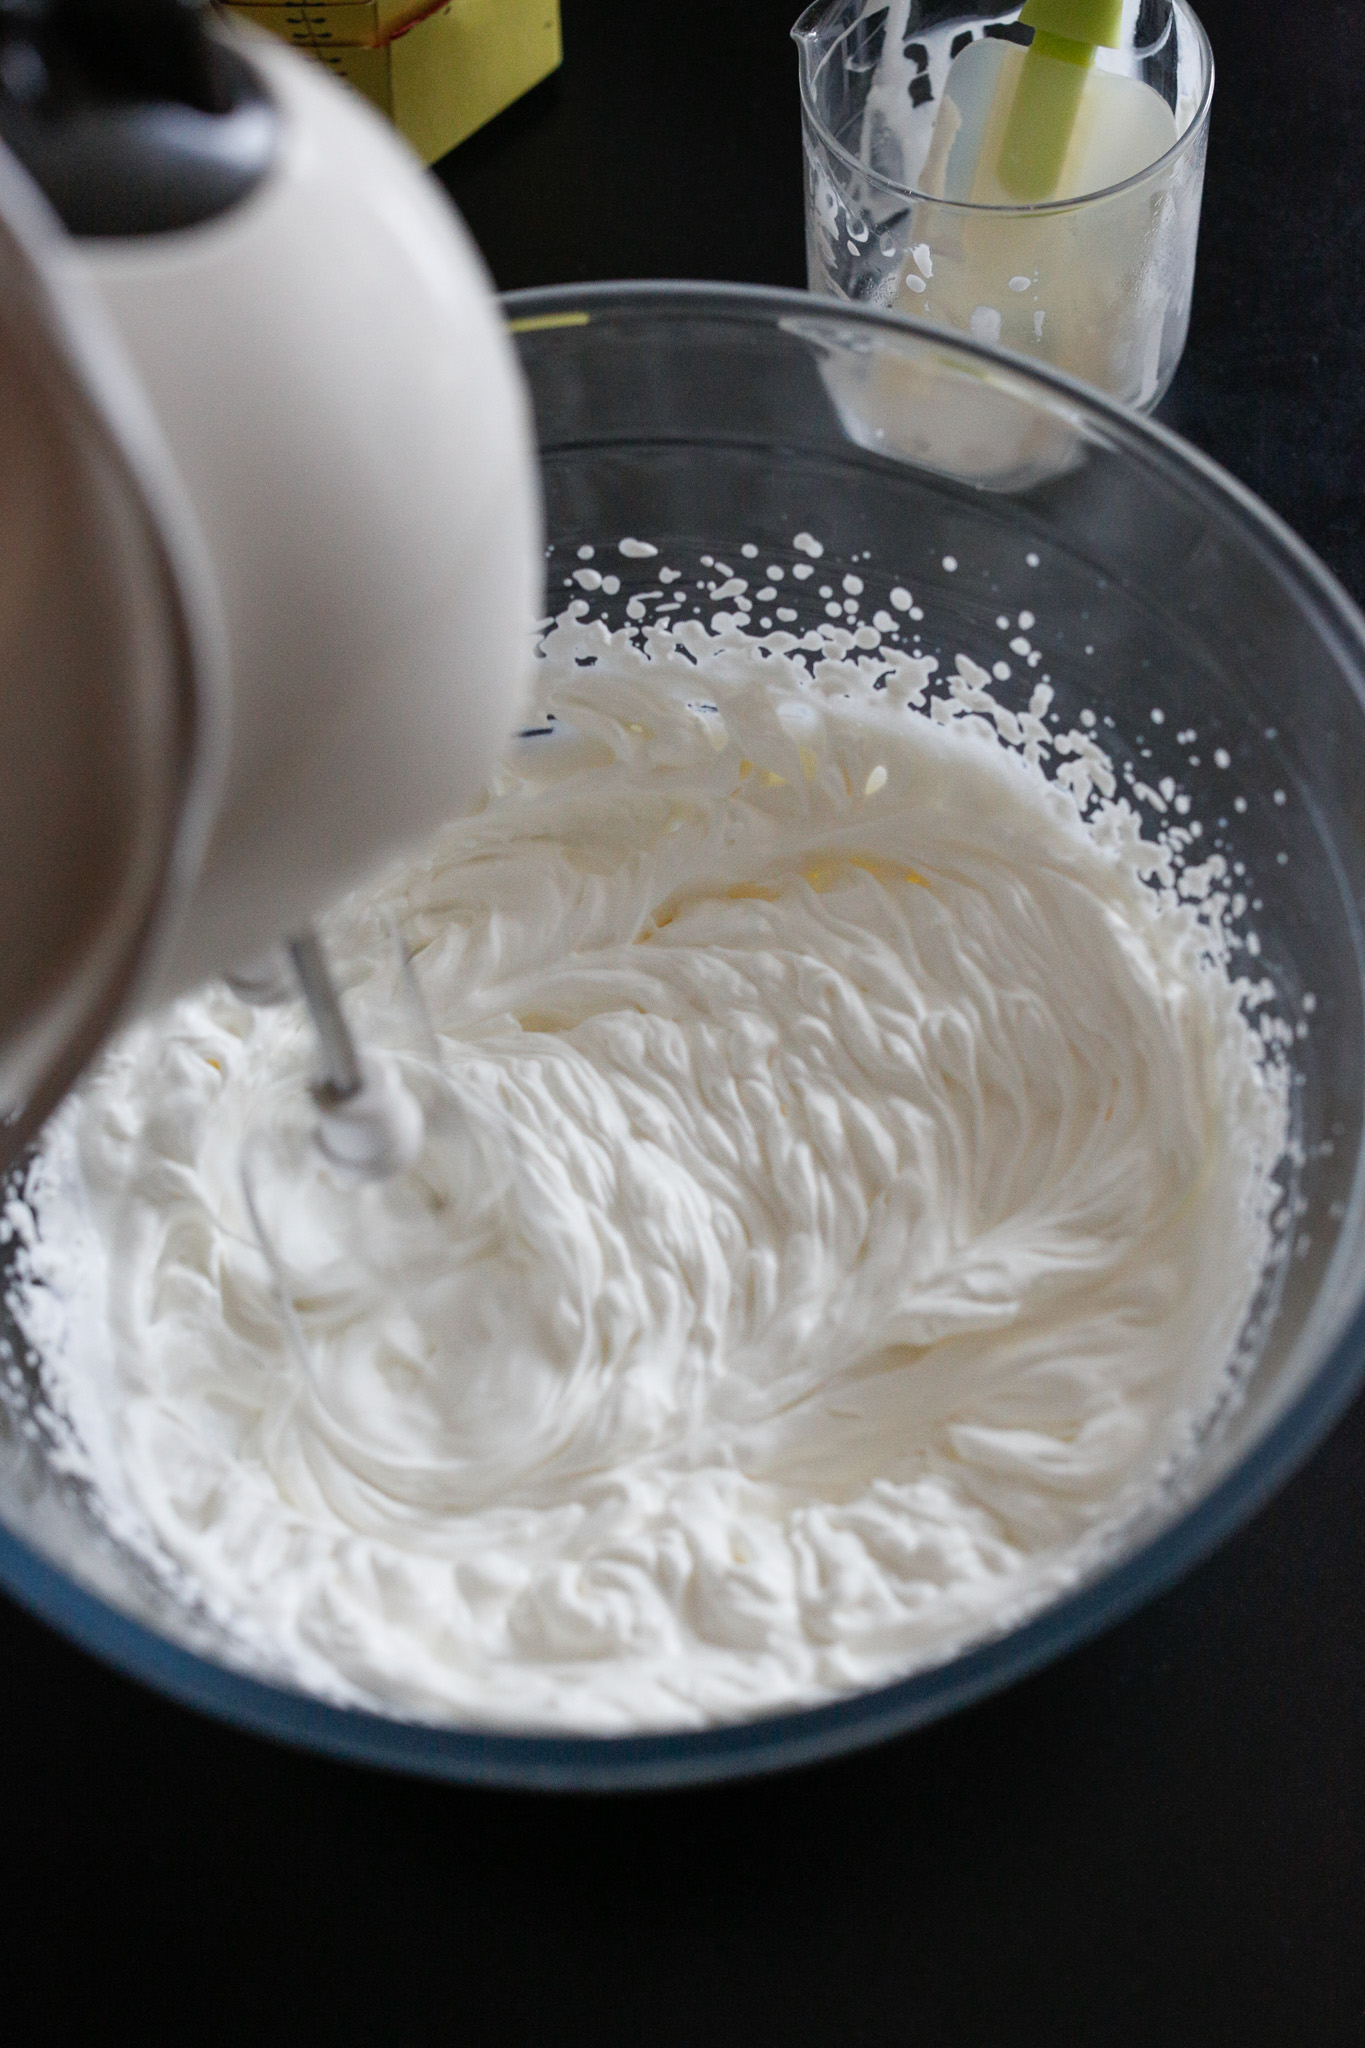
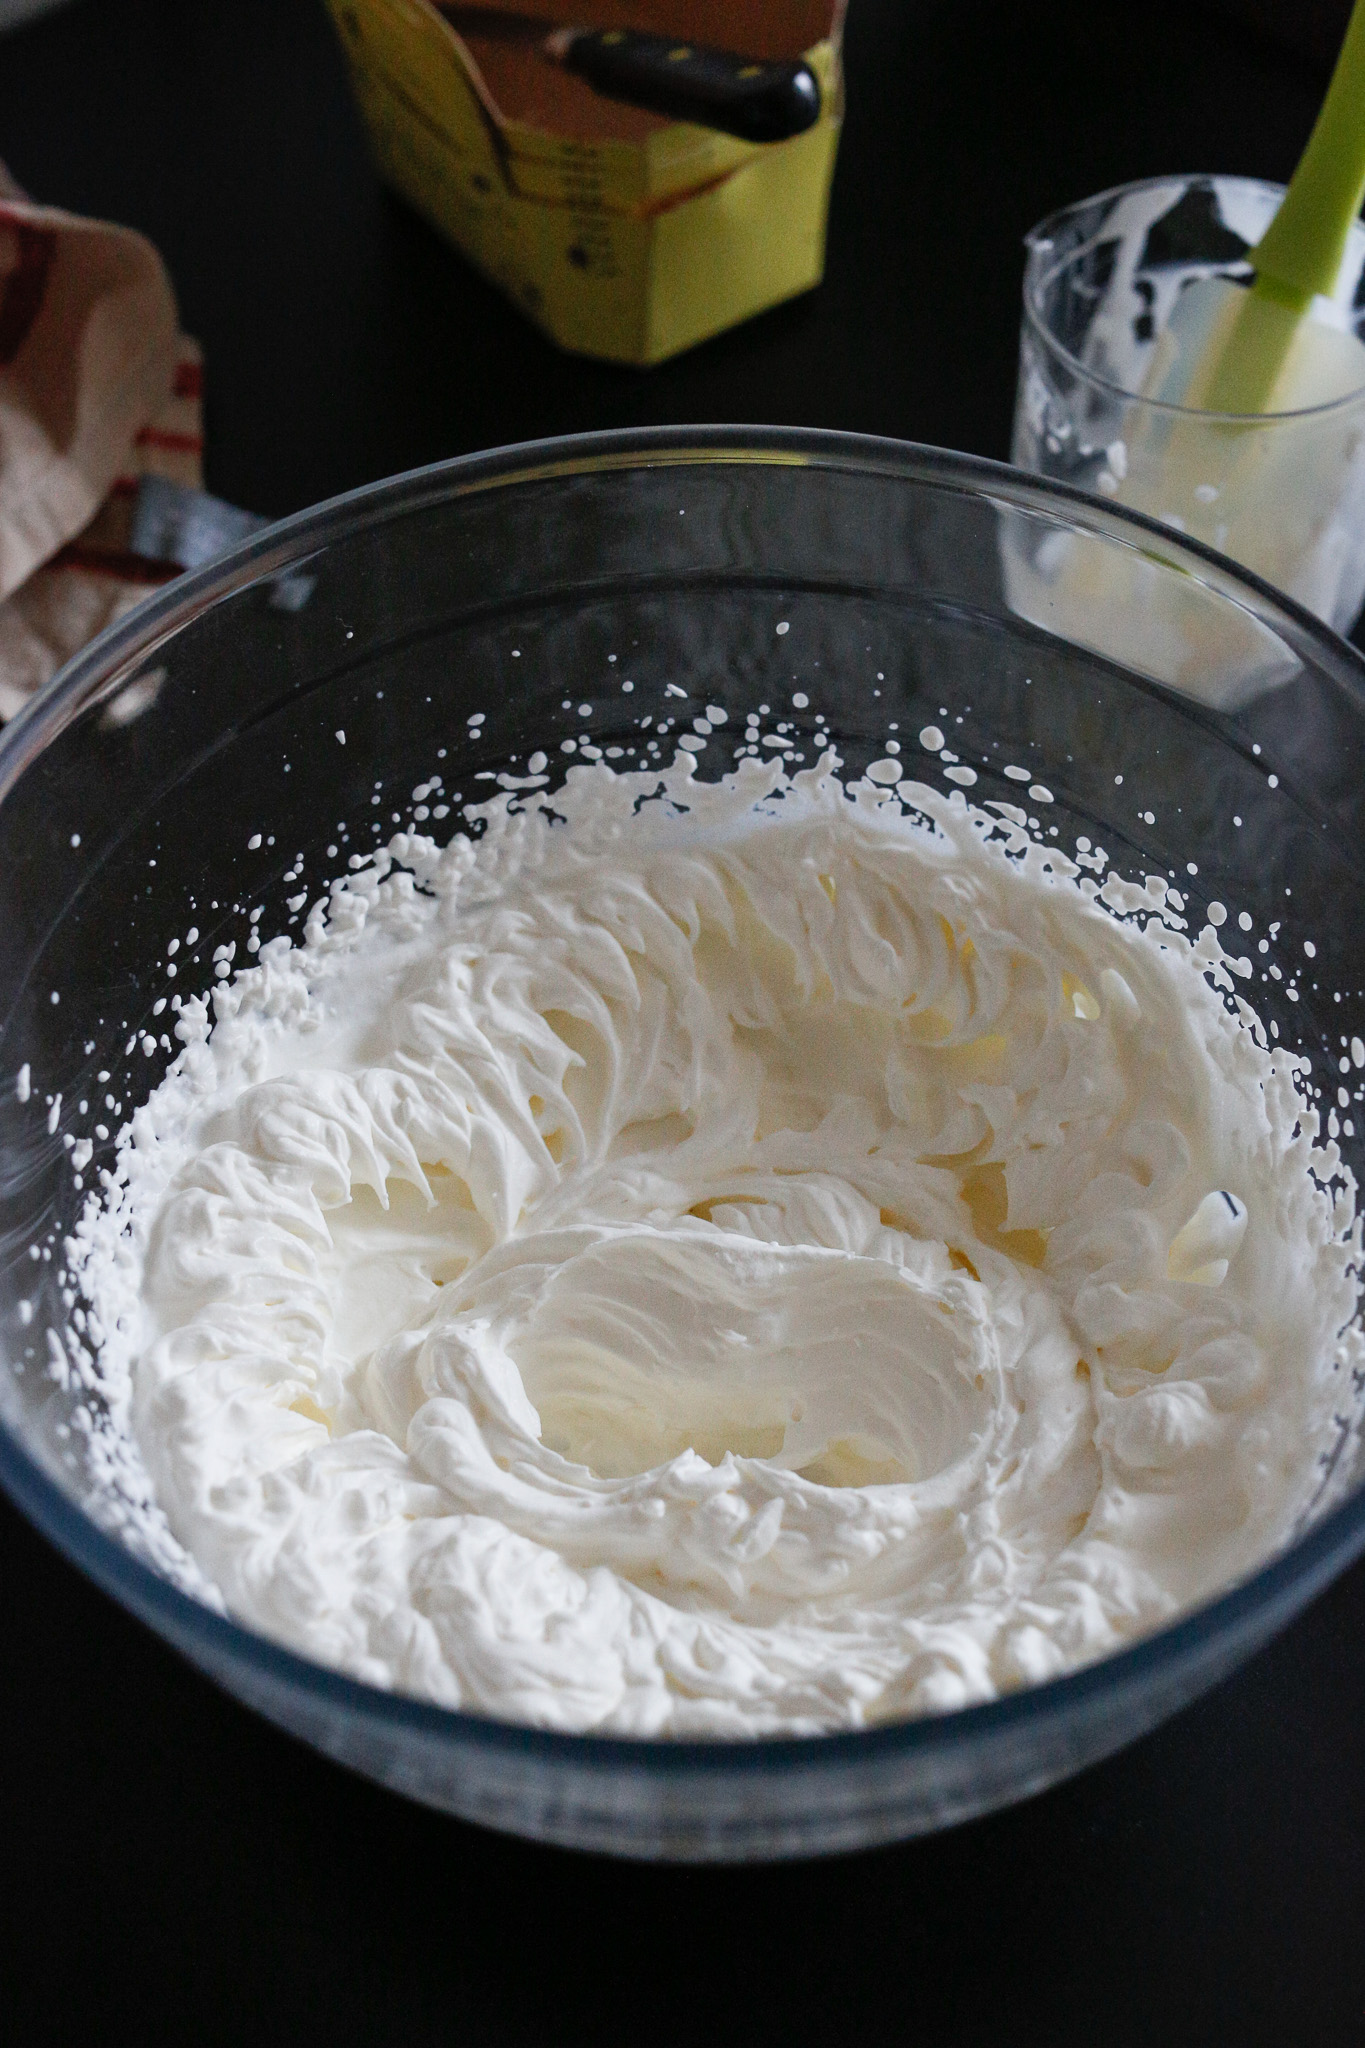
1- In a medium bowl, add in your cold heavy whipping cream and your cold creme fraiche. With a beater start on low and slowly increase the speed every few minutes until it’s on high. Add in your sugar when the cream is thickening. Once your cream is nice and thick, it’s done. Be mindful not to over beat it into butter!
The strawberries
1- Cut up your strawberries into a medium bowl. I cut mine in quarters. Before you assemble your Pavlova, add your sugar and fold them over eachother gently.
The assembly
1- Mindfully lift up your meringue from the parchment paper. Use a knife to unstick it if necessary. Work slowly on this step. Transfer your meringe to a flat serving plate.
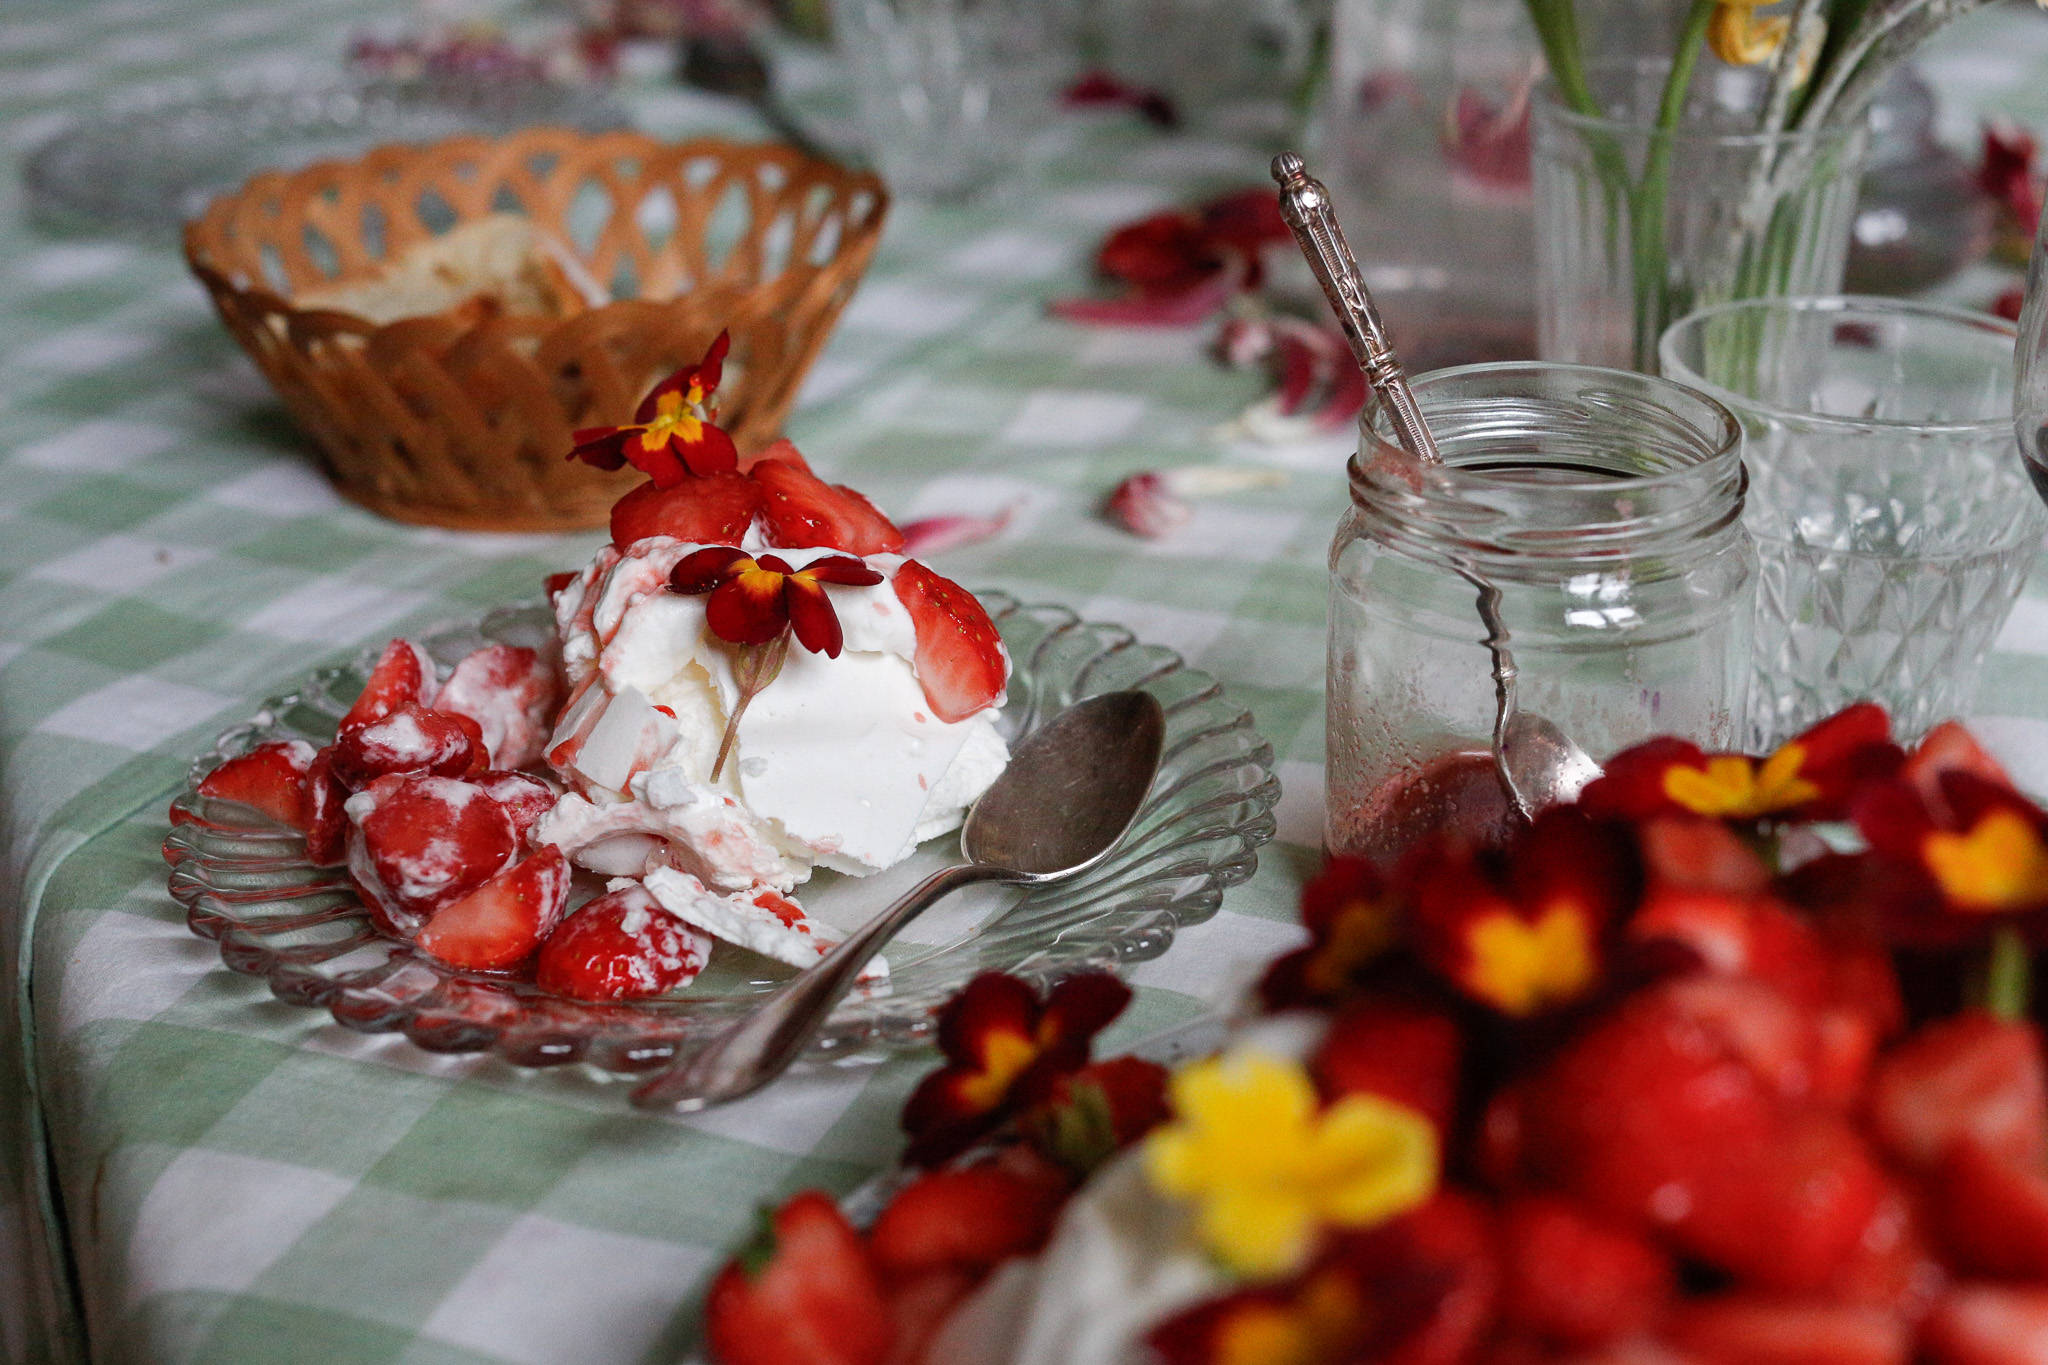
2- Add your cream and spread it out on the top of your meringue.
3- Add your strawberries. Keep your sauce in the jar and bring it to the table to drizzle onto each individual slice. She is ready to serve!
*please see photos below for more detailed instructions and tips.
Step 1
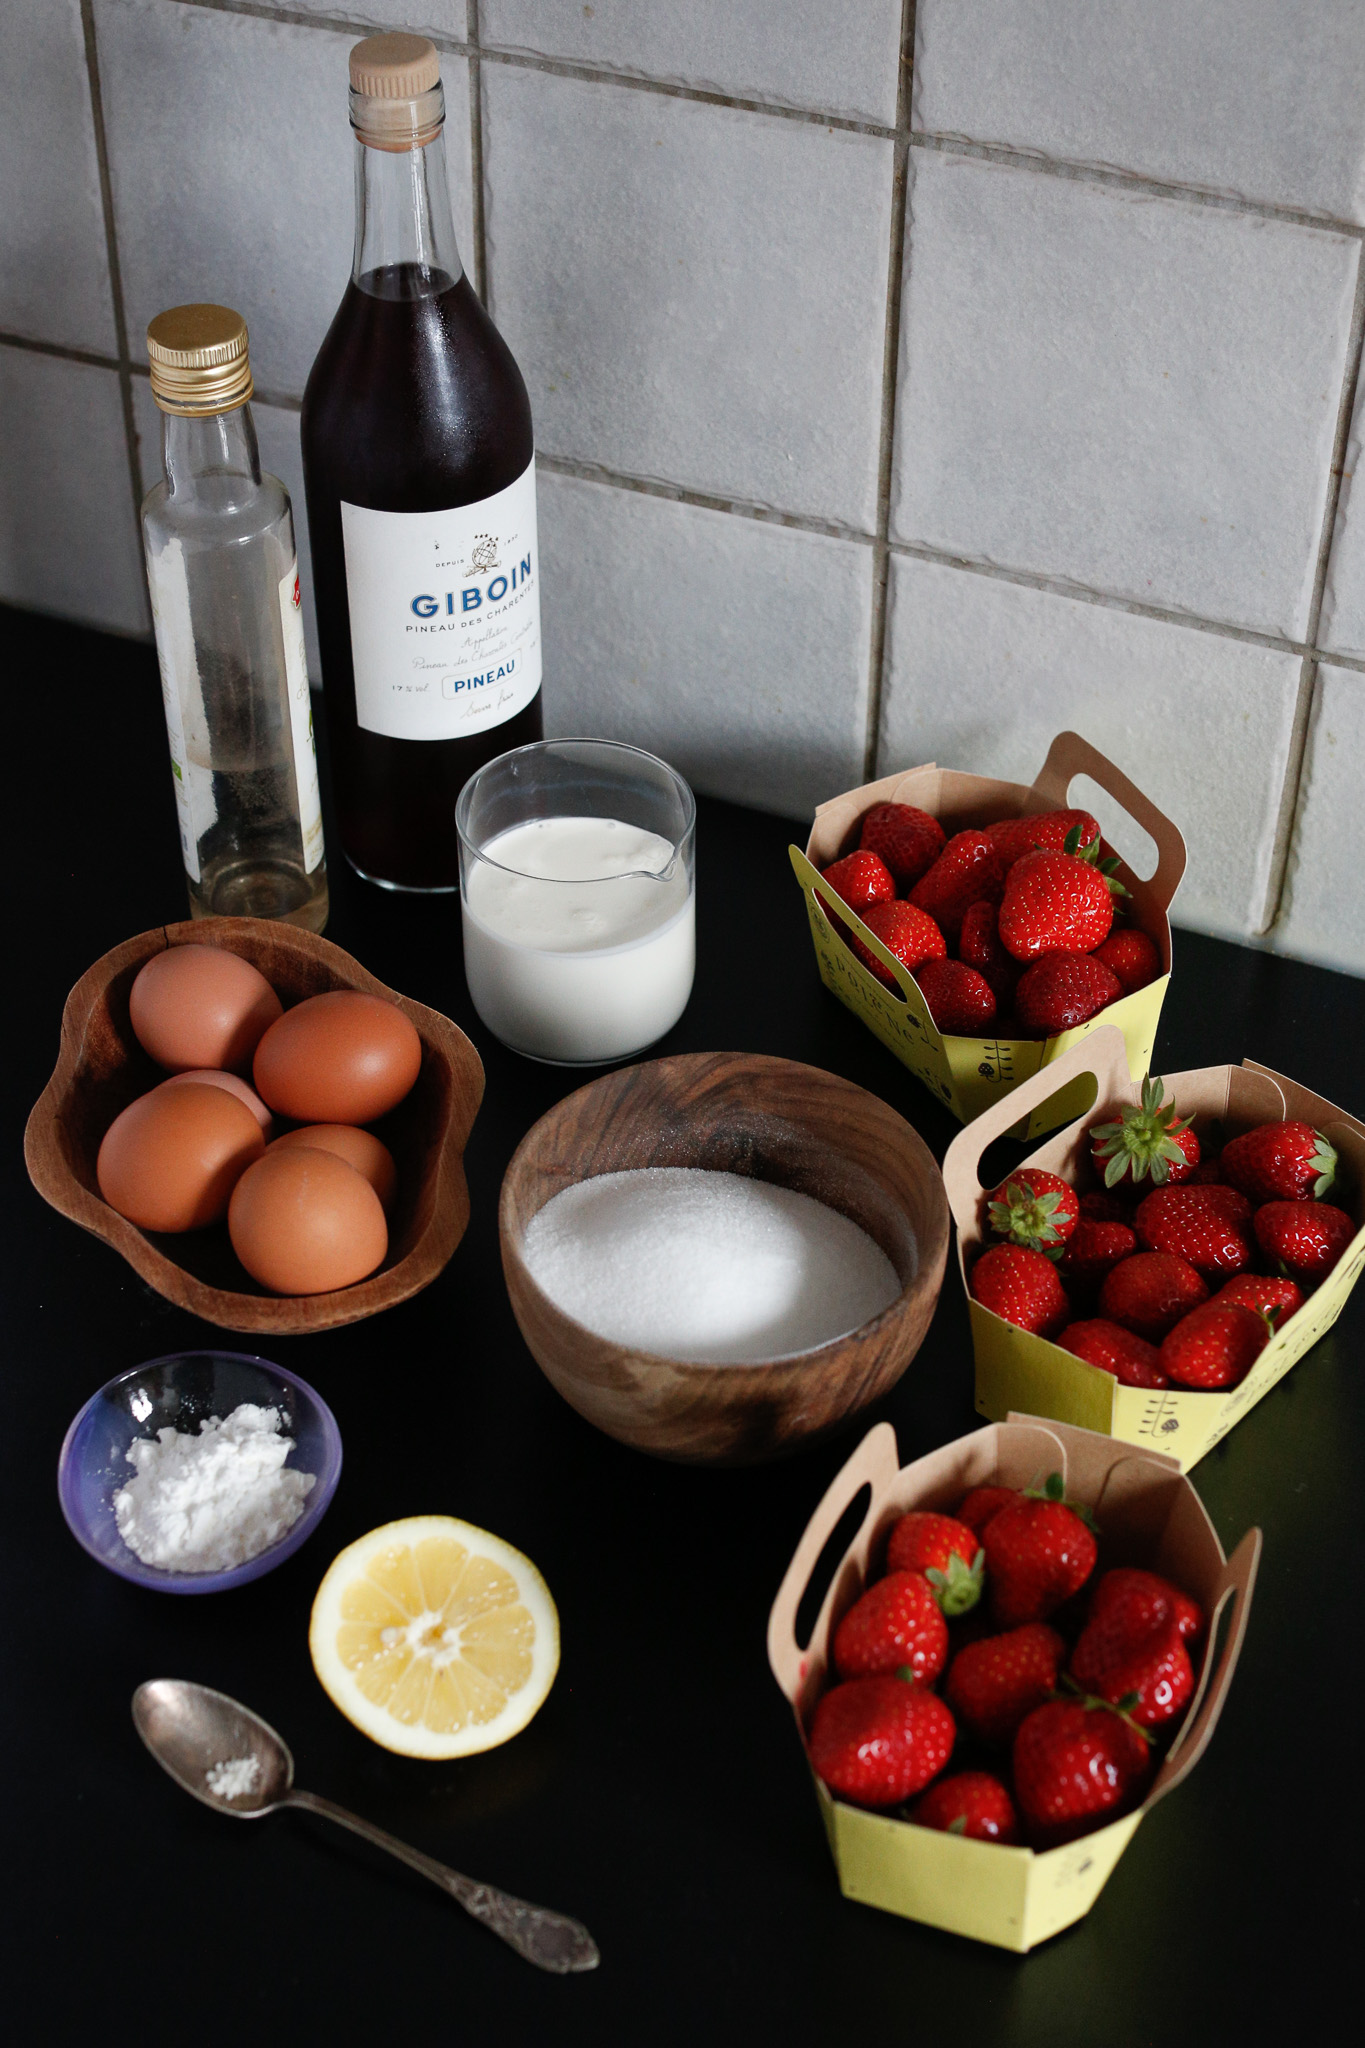
Gather all of your ingredients.
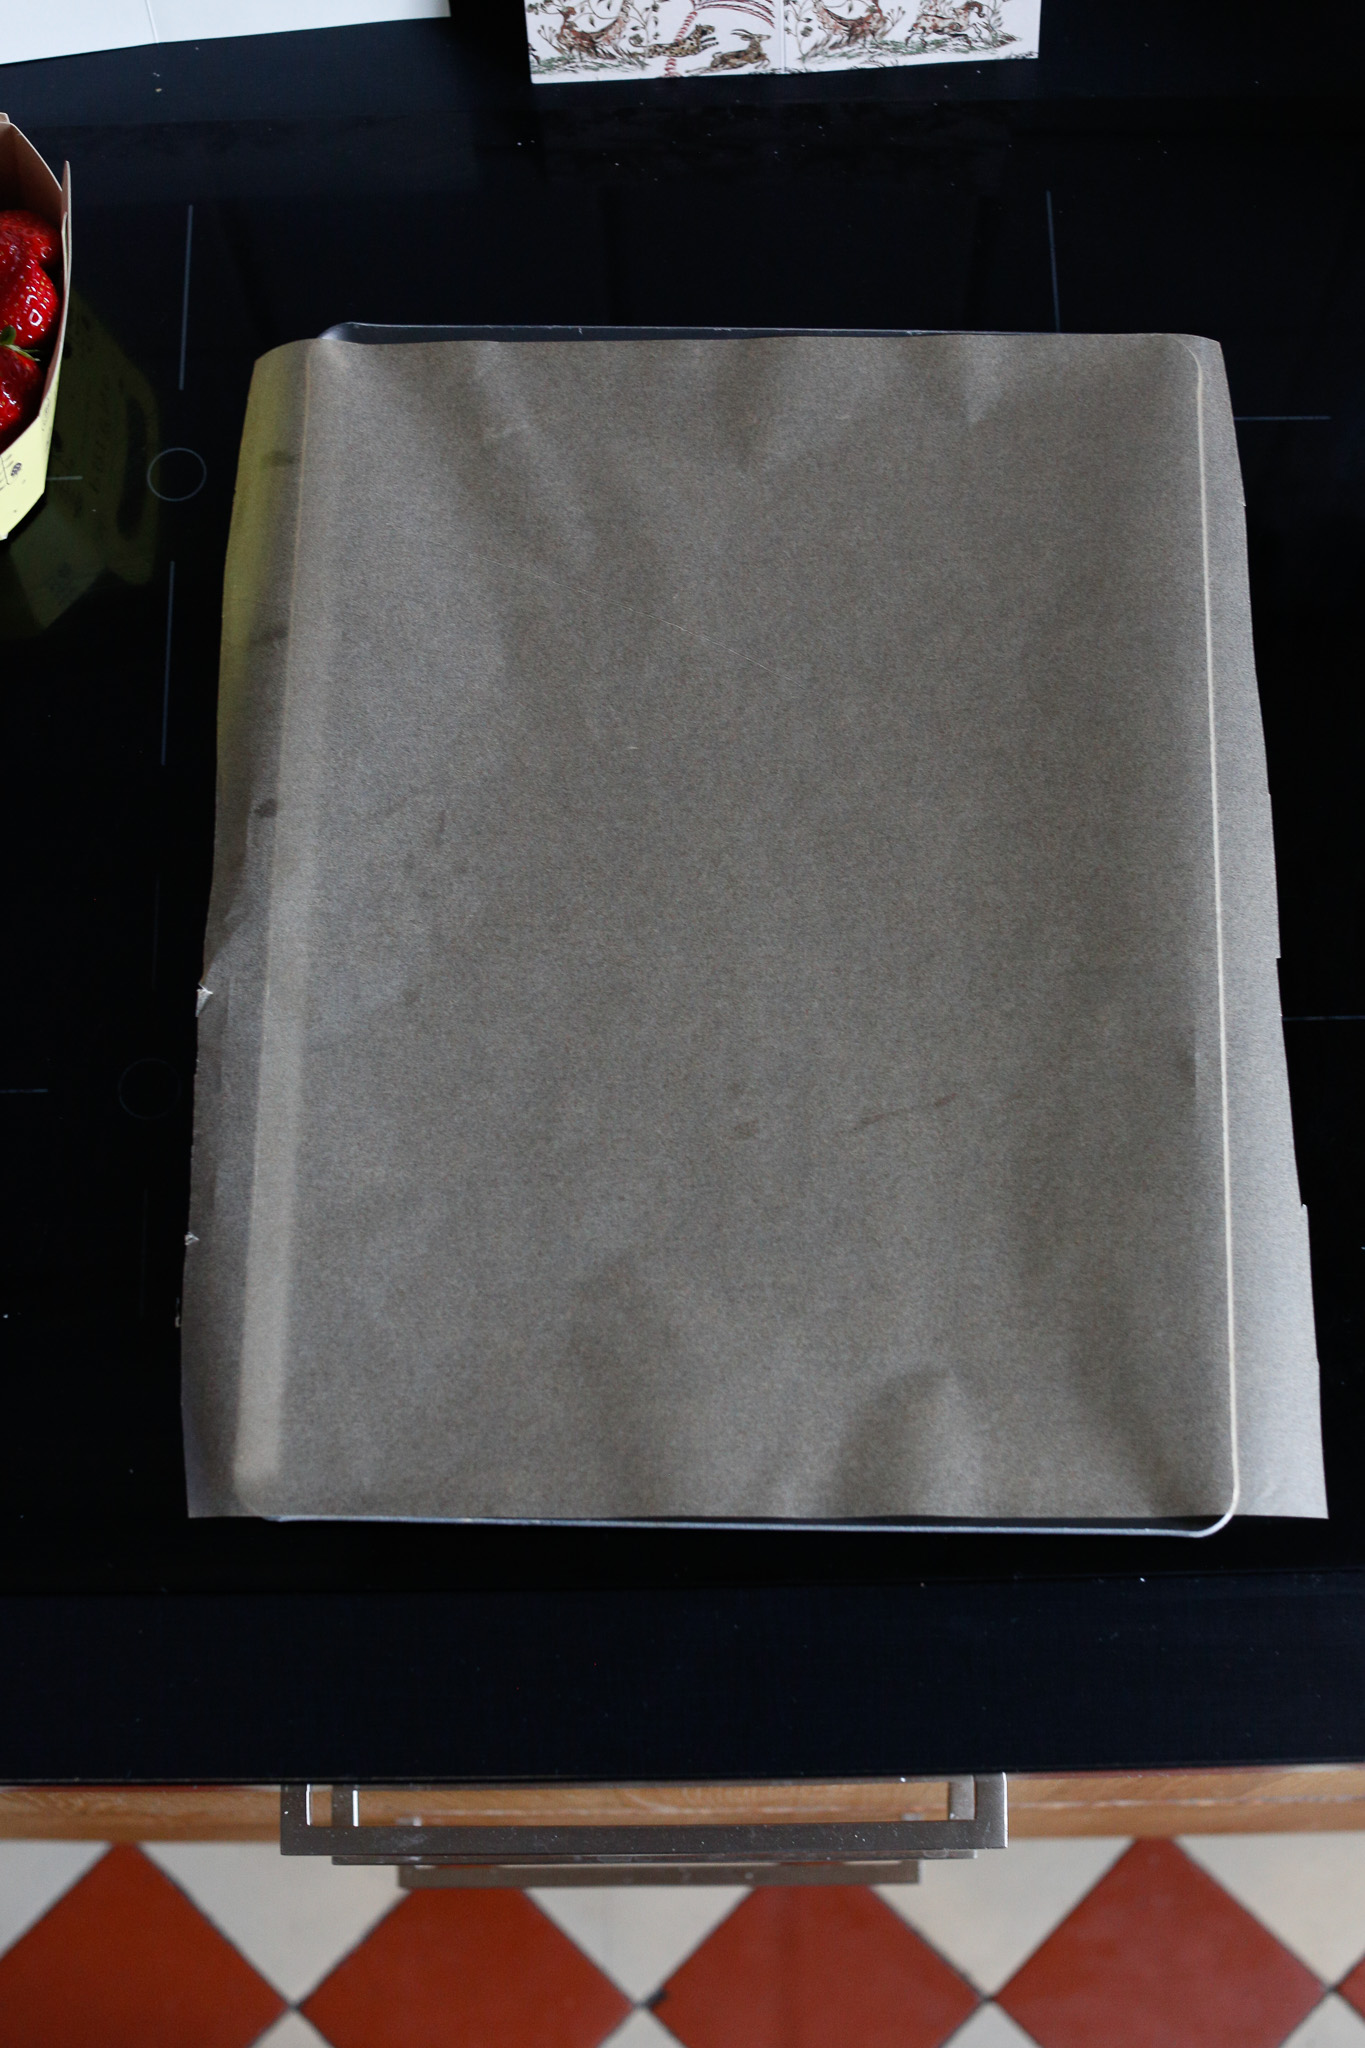
Prepare your baking tray with a piece of parchment paper.
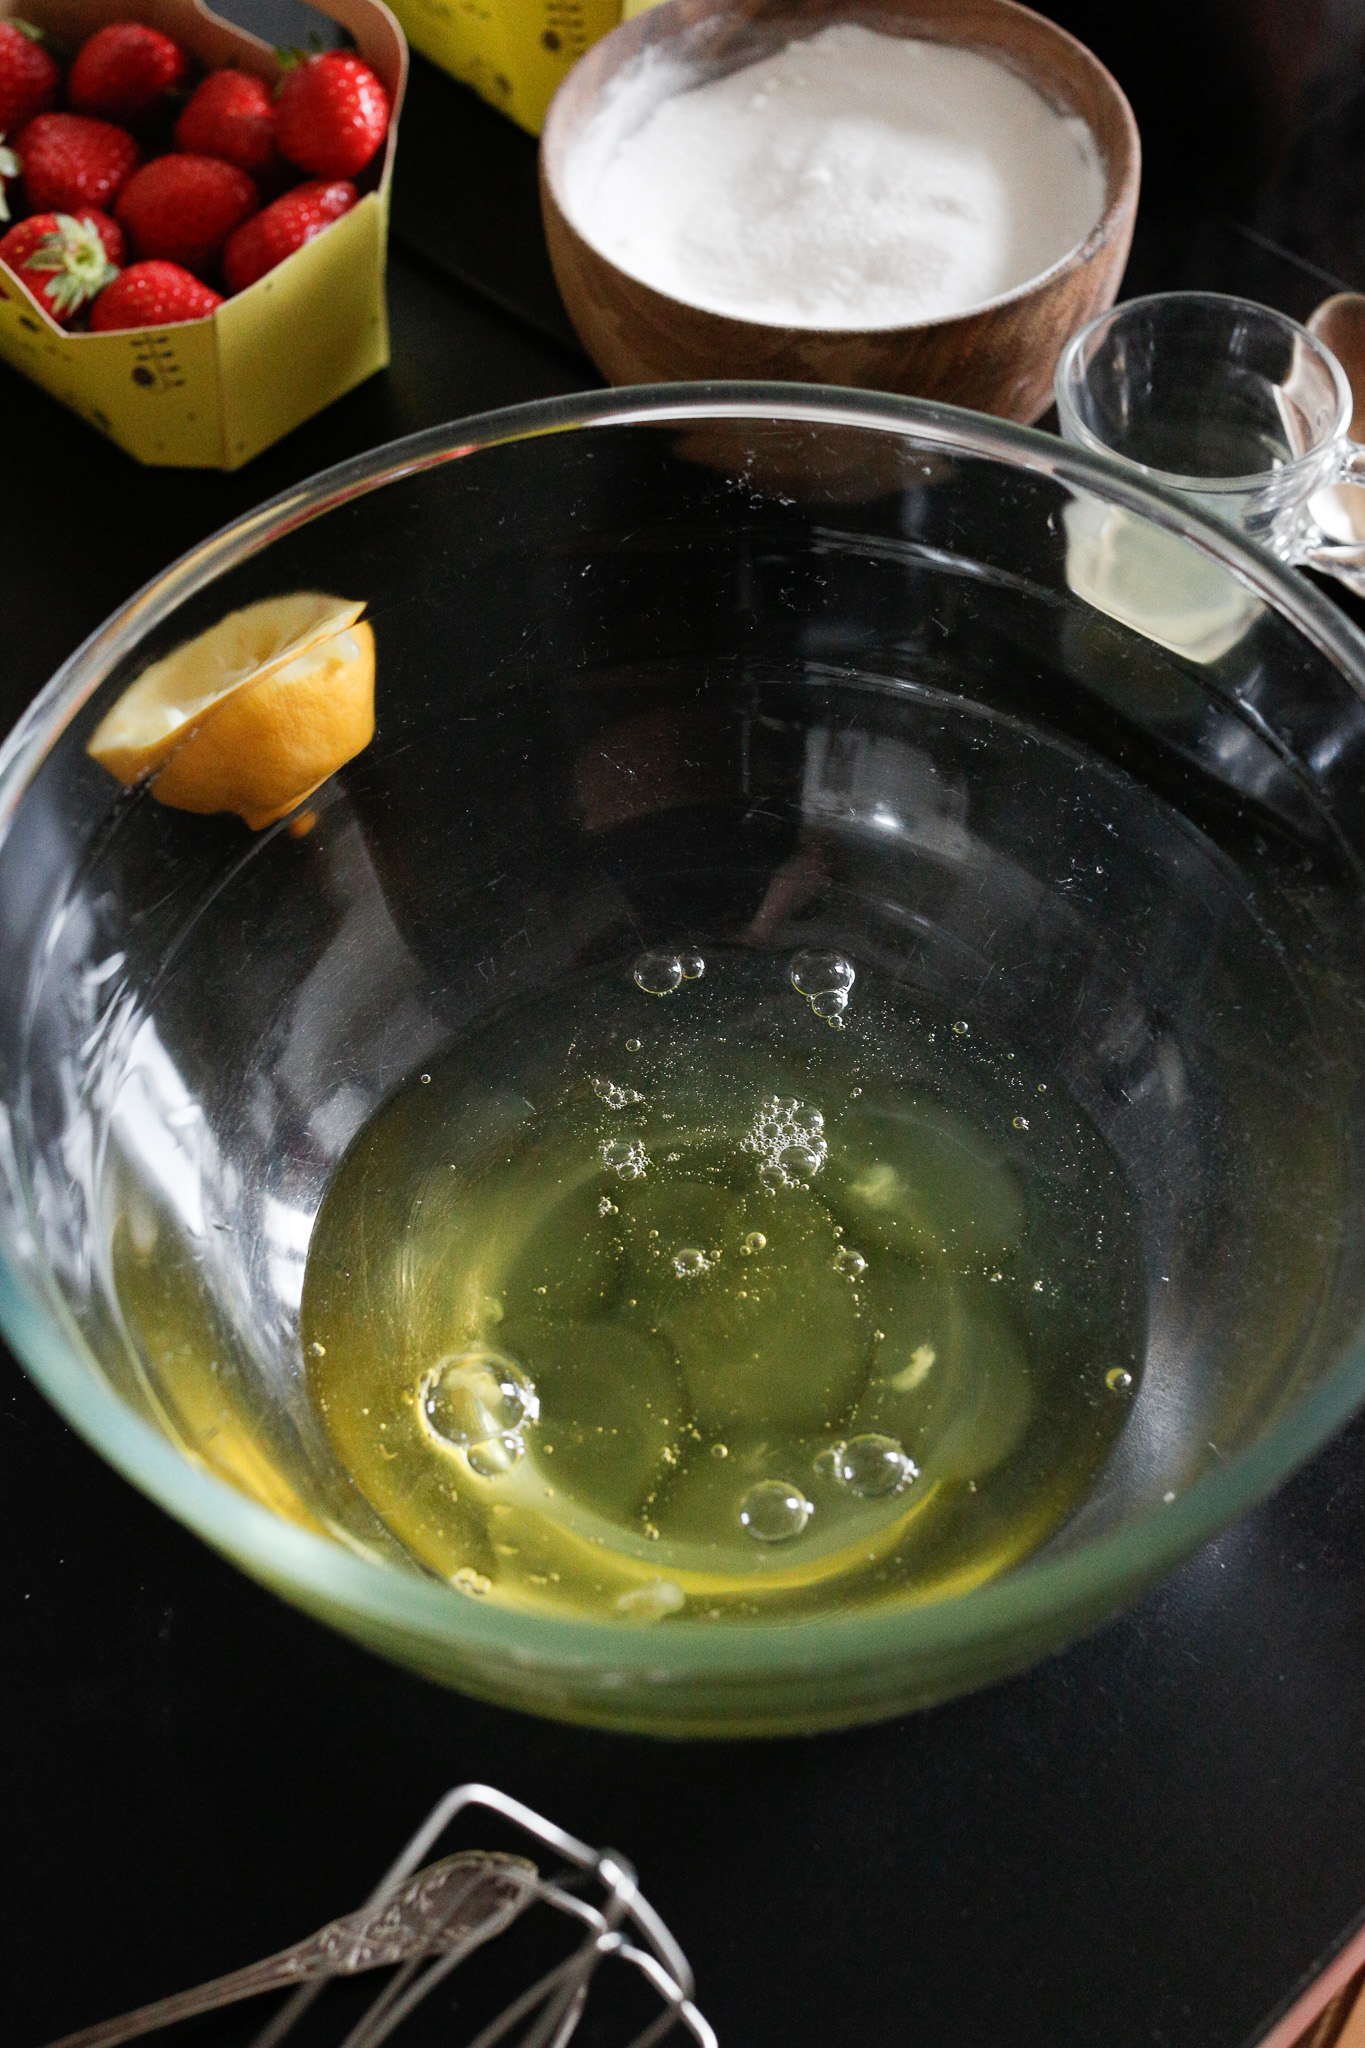
Mindfully separate your egg whites from the yolks. Be sure not to let a drop eggyolk into your whites!
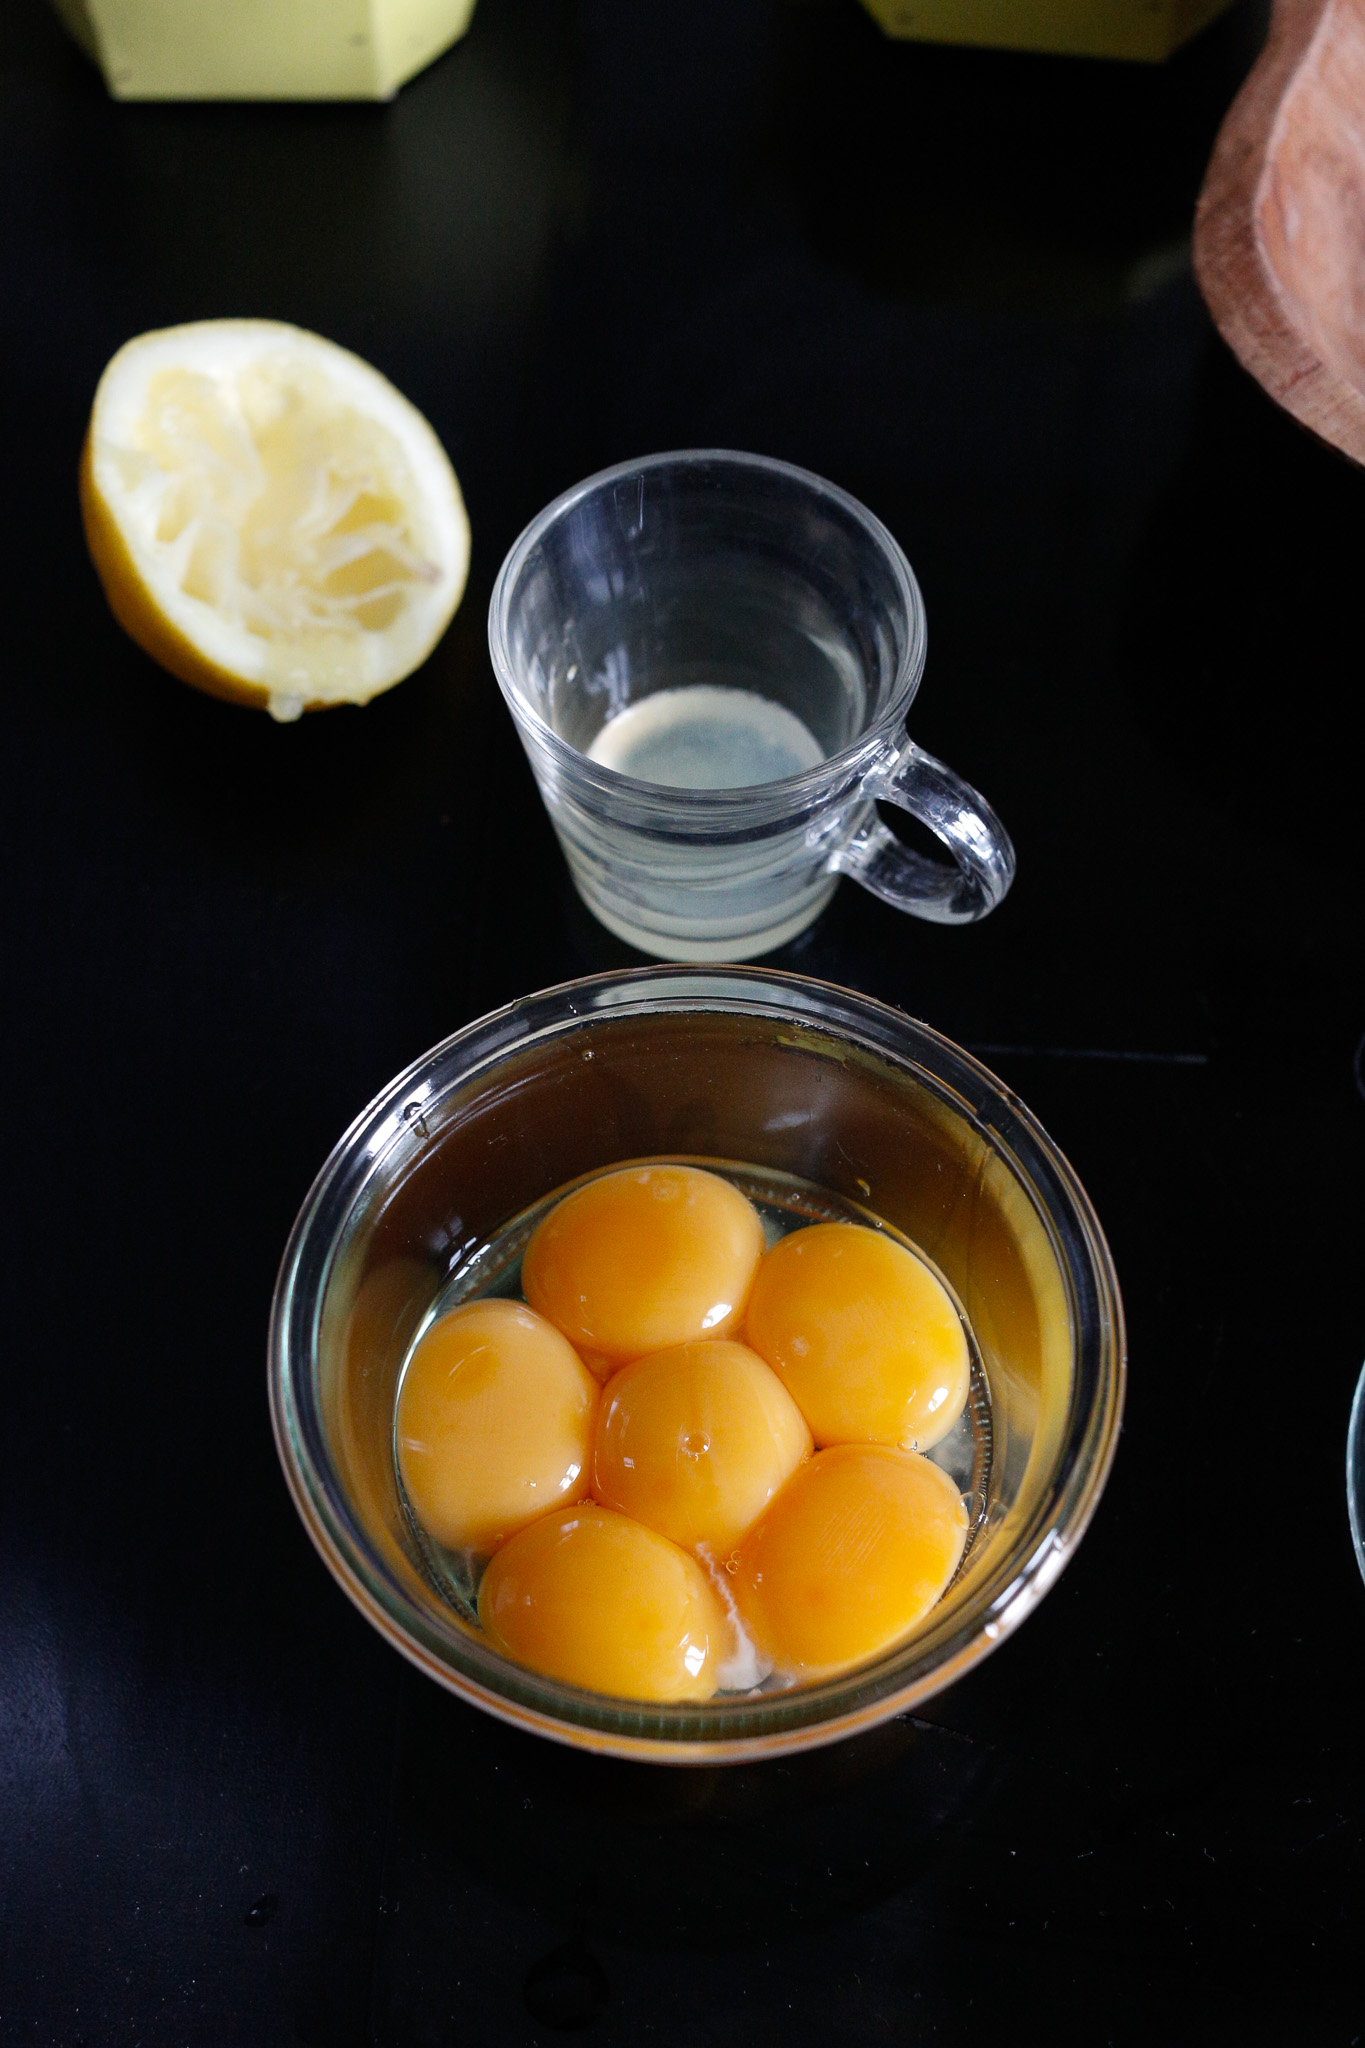
Save these beauties for something else such as a creme anglaise or ___.
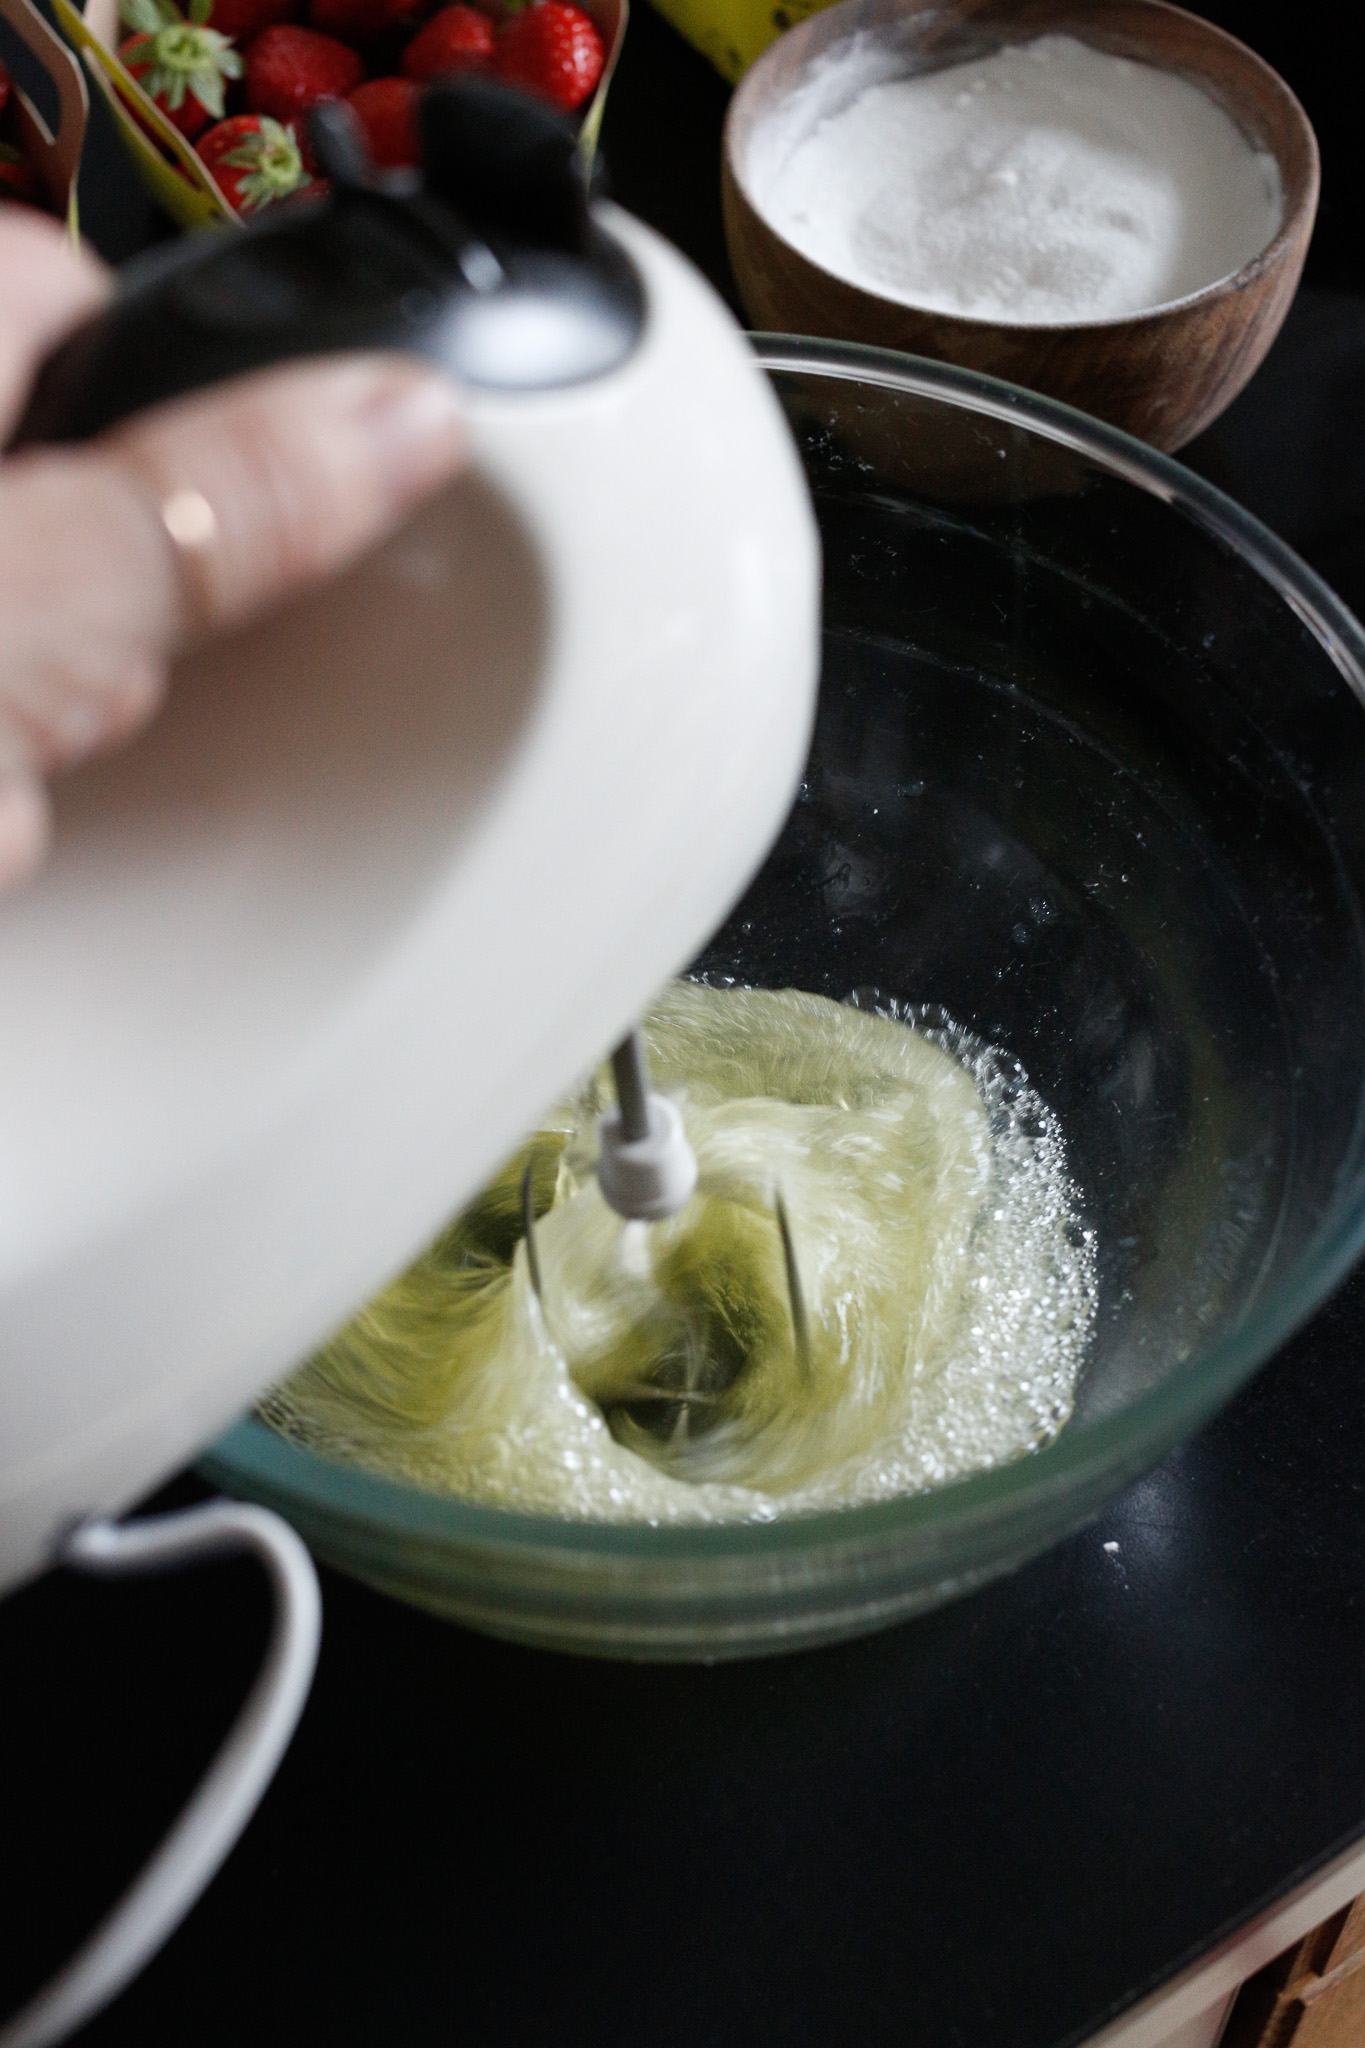
Start out on low to introduce air bubbles into your egg whites. Add in your salt & lemon juice.
Once they are looking like this you may start adding in your sugar one spoonful at a time, beating in between.
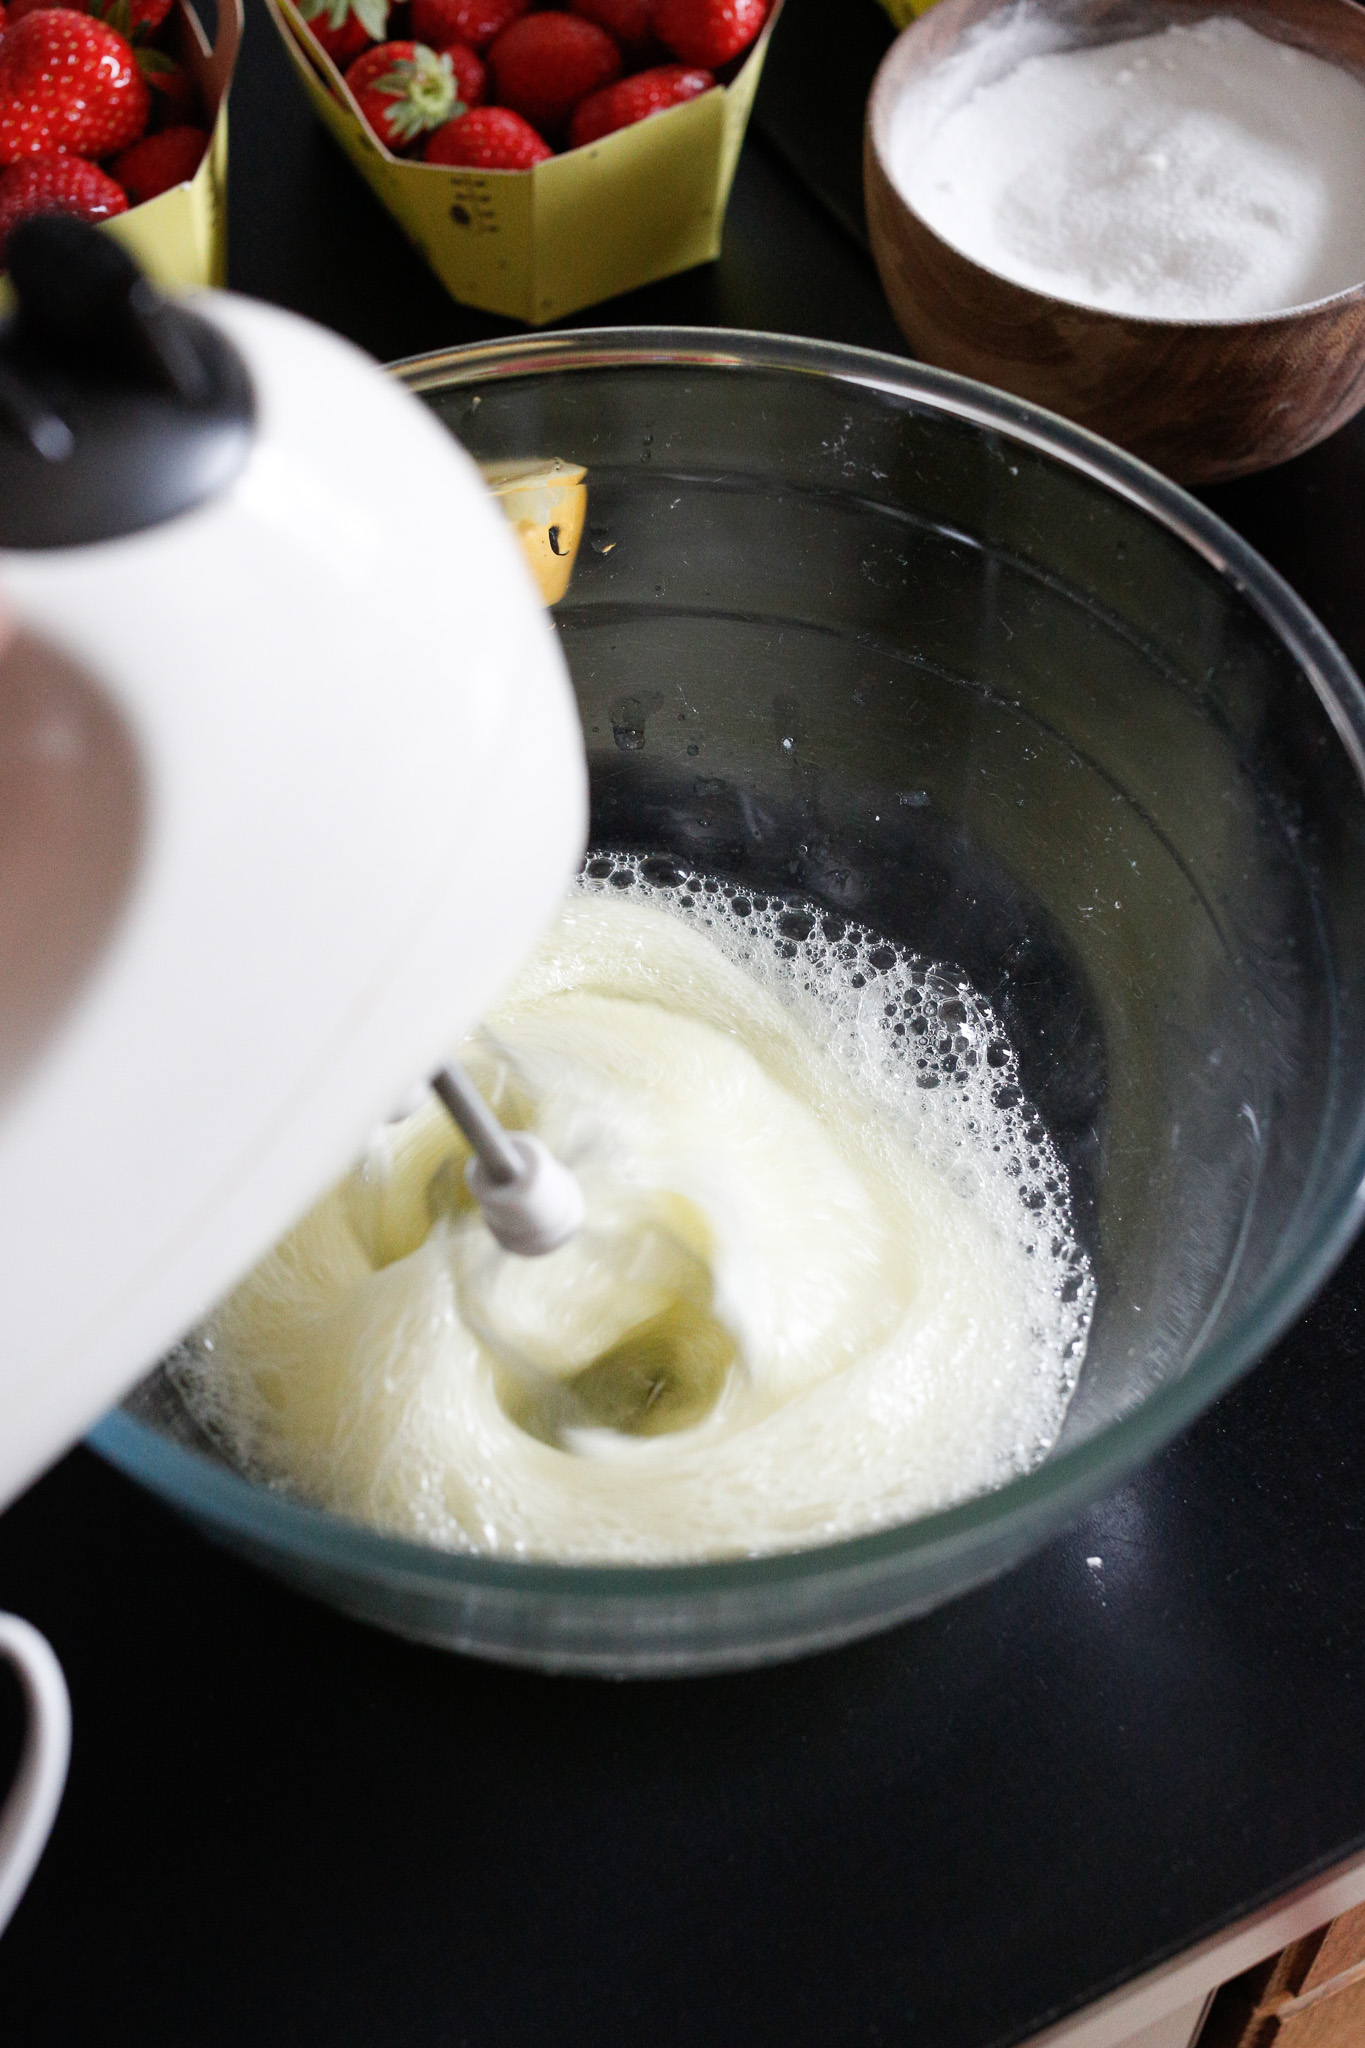
After 3-4 minutes your egg whites will start to look like this.
Here you can see the waves have a different consistency. You're on the right track!
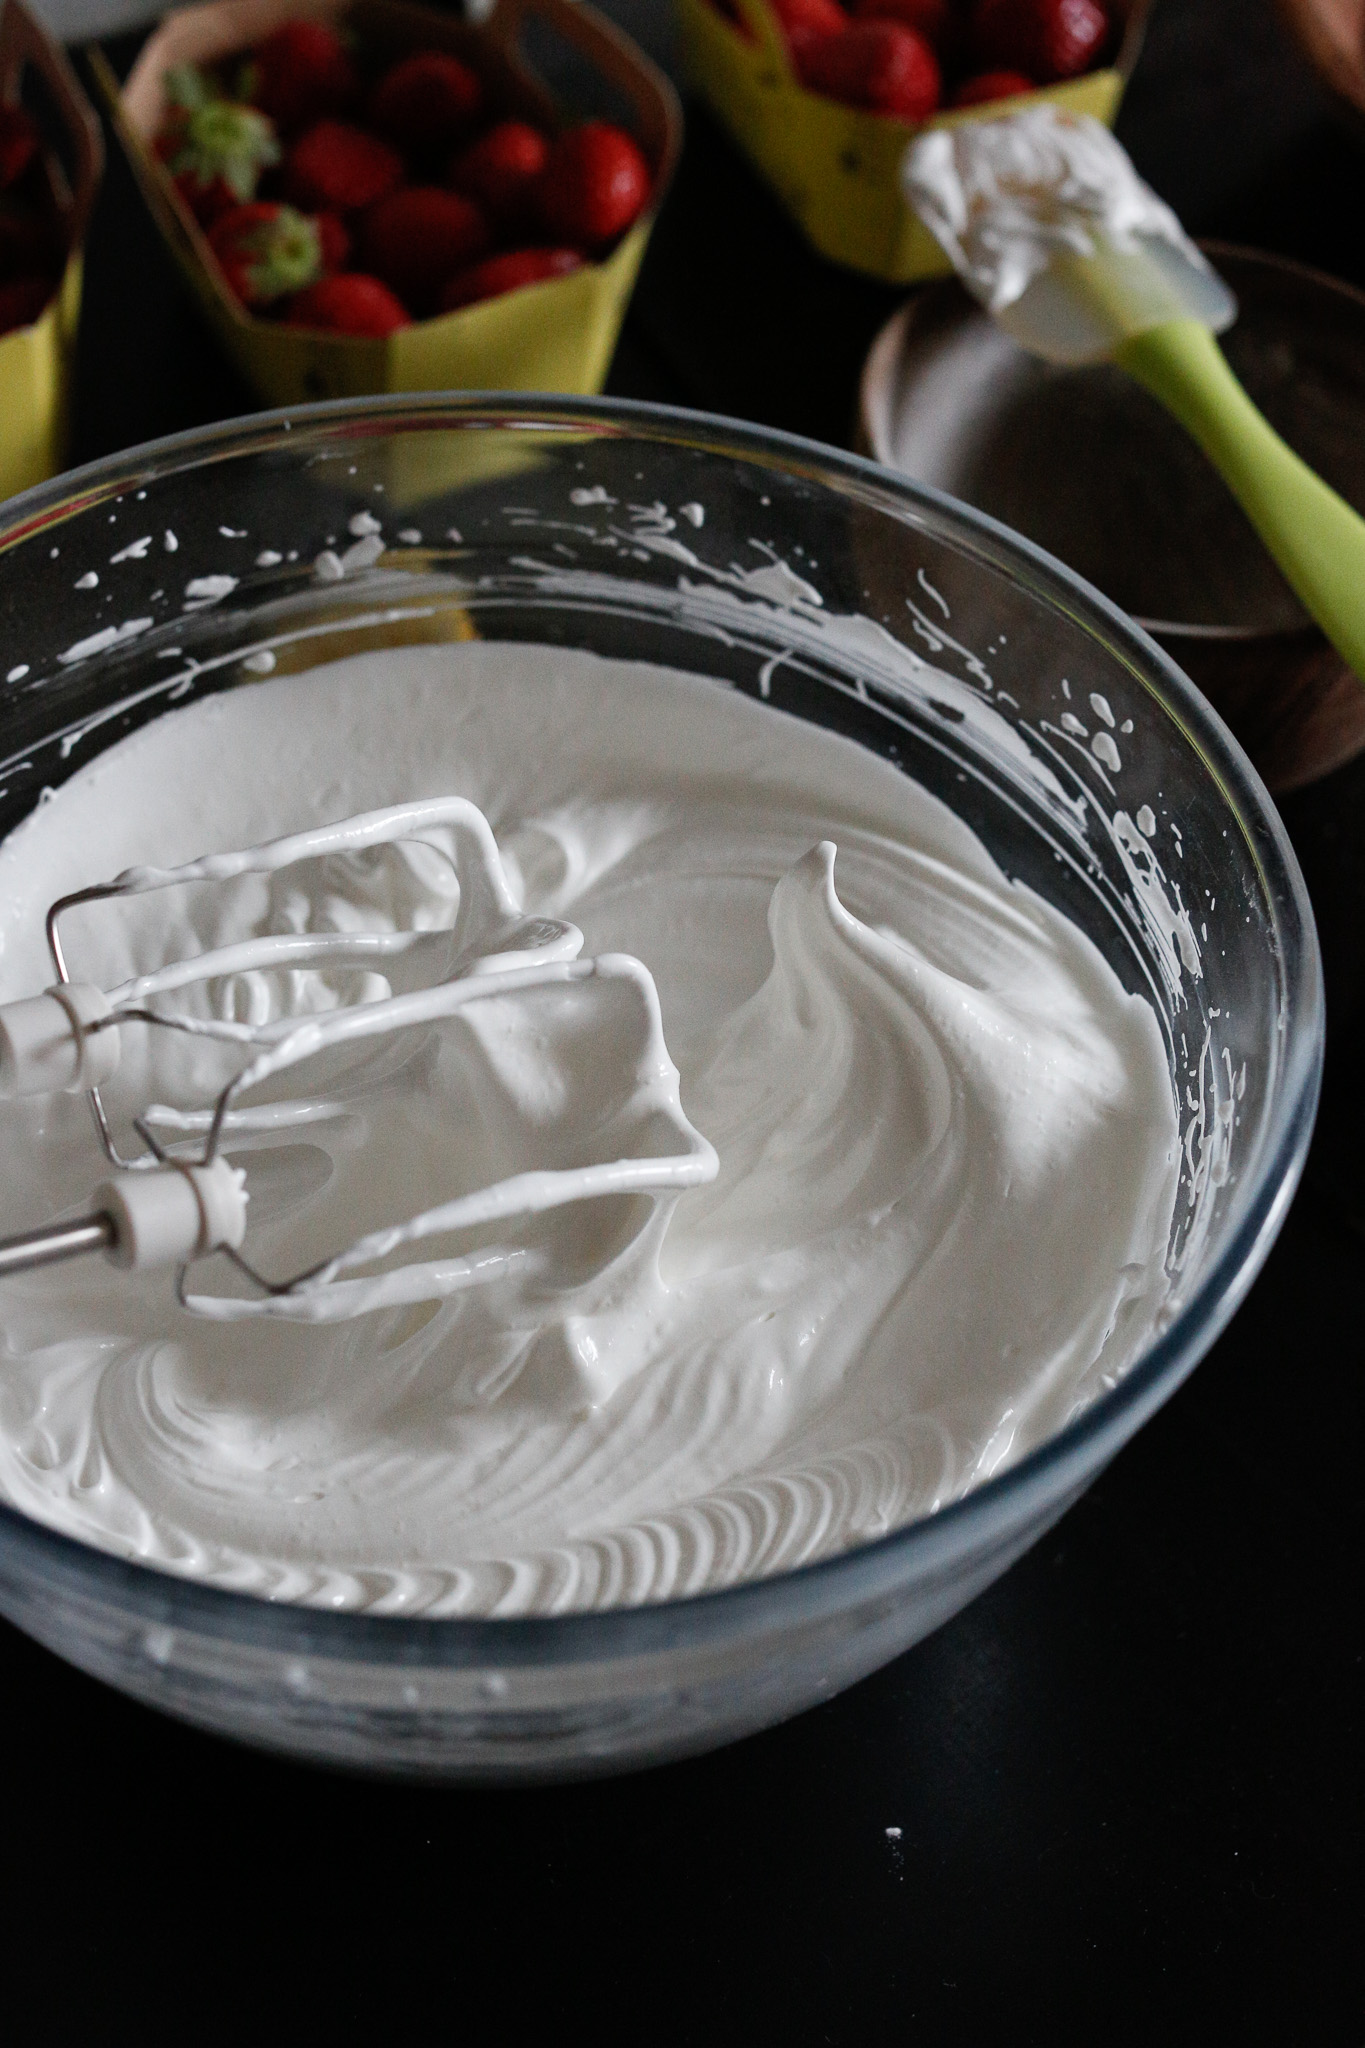
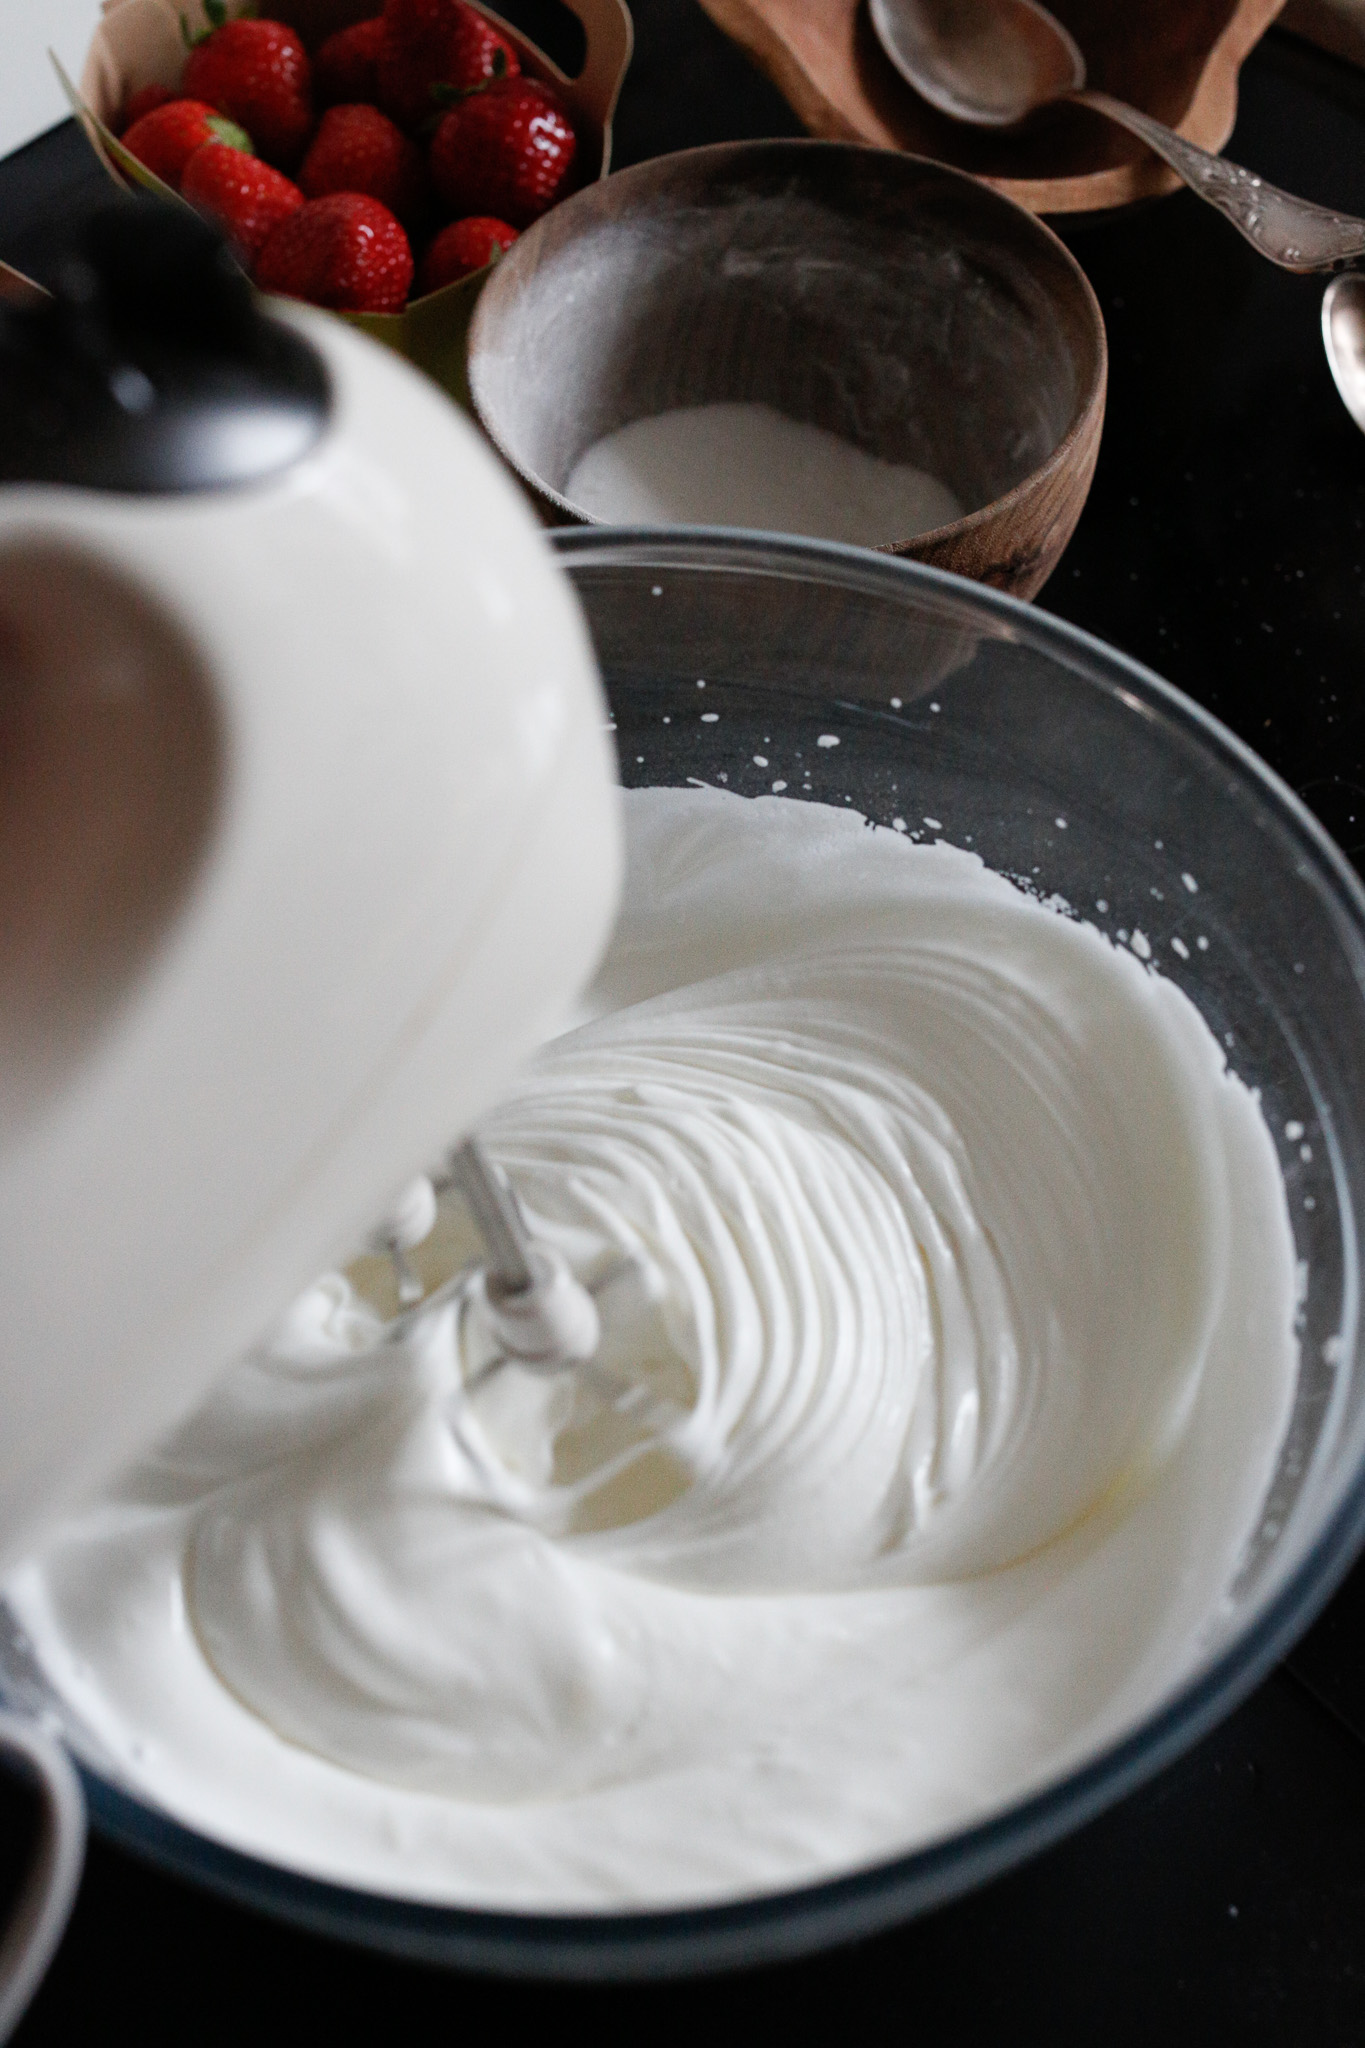
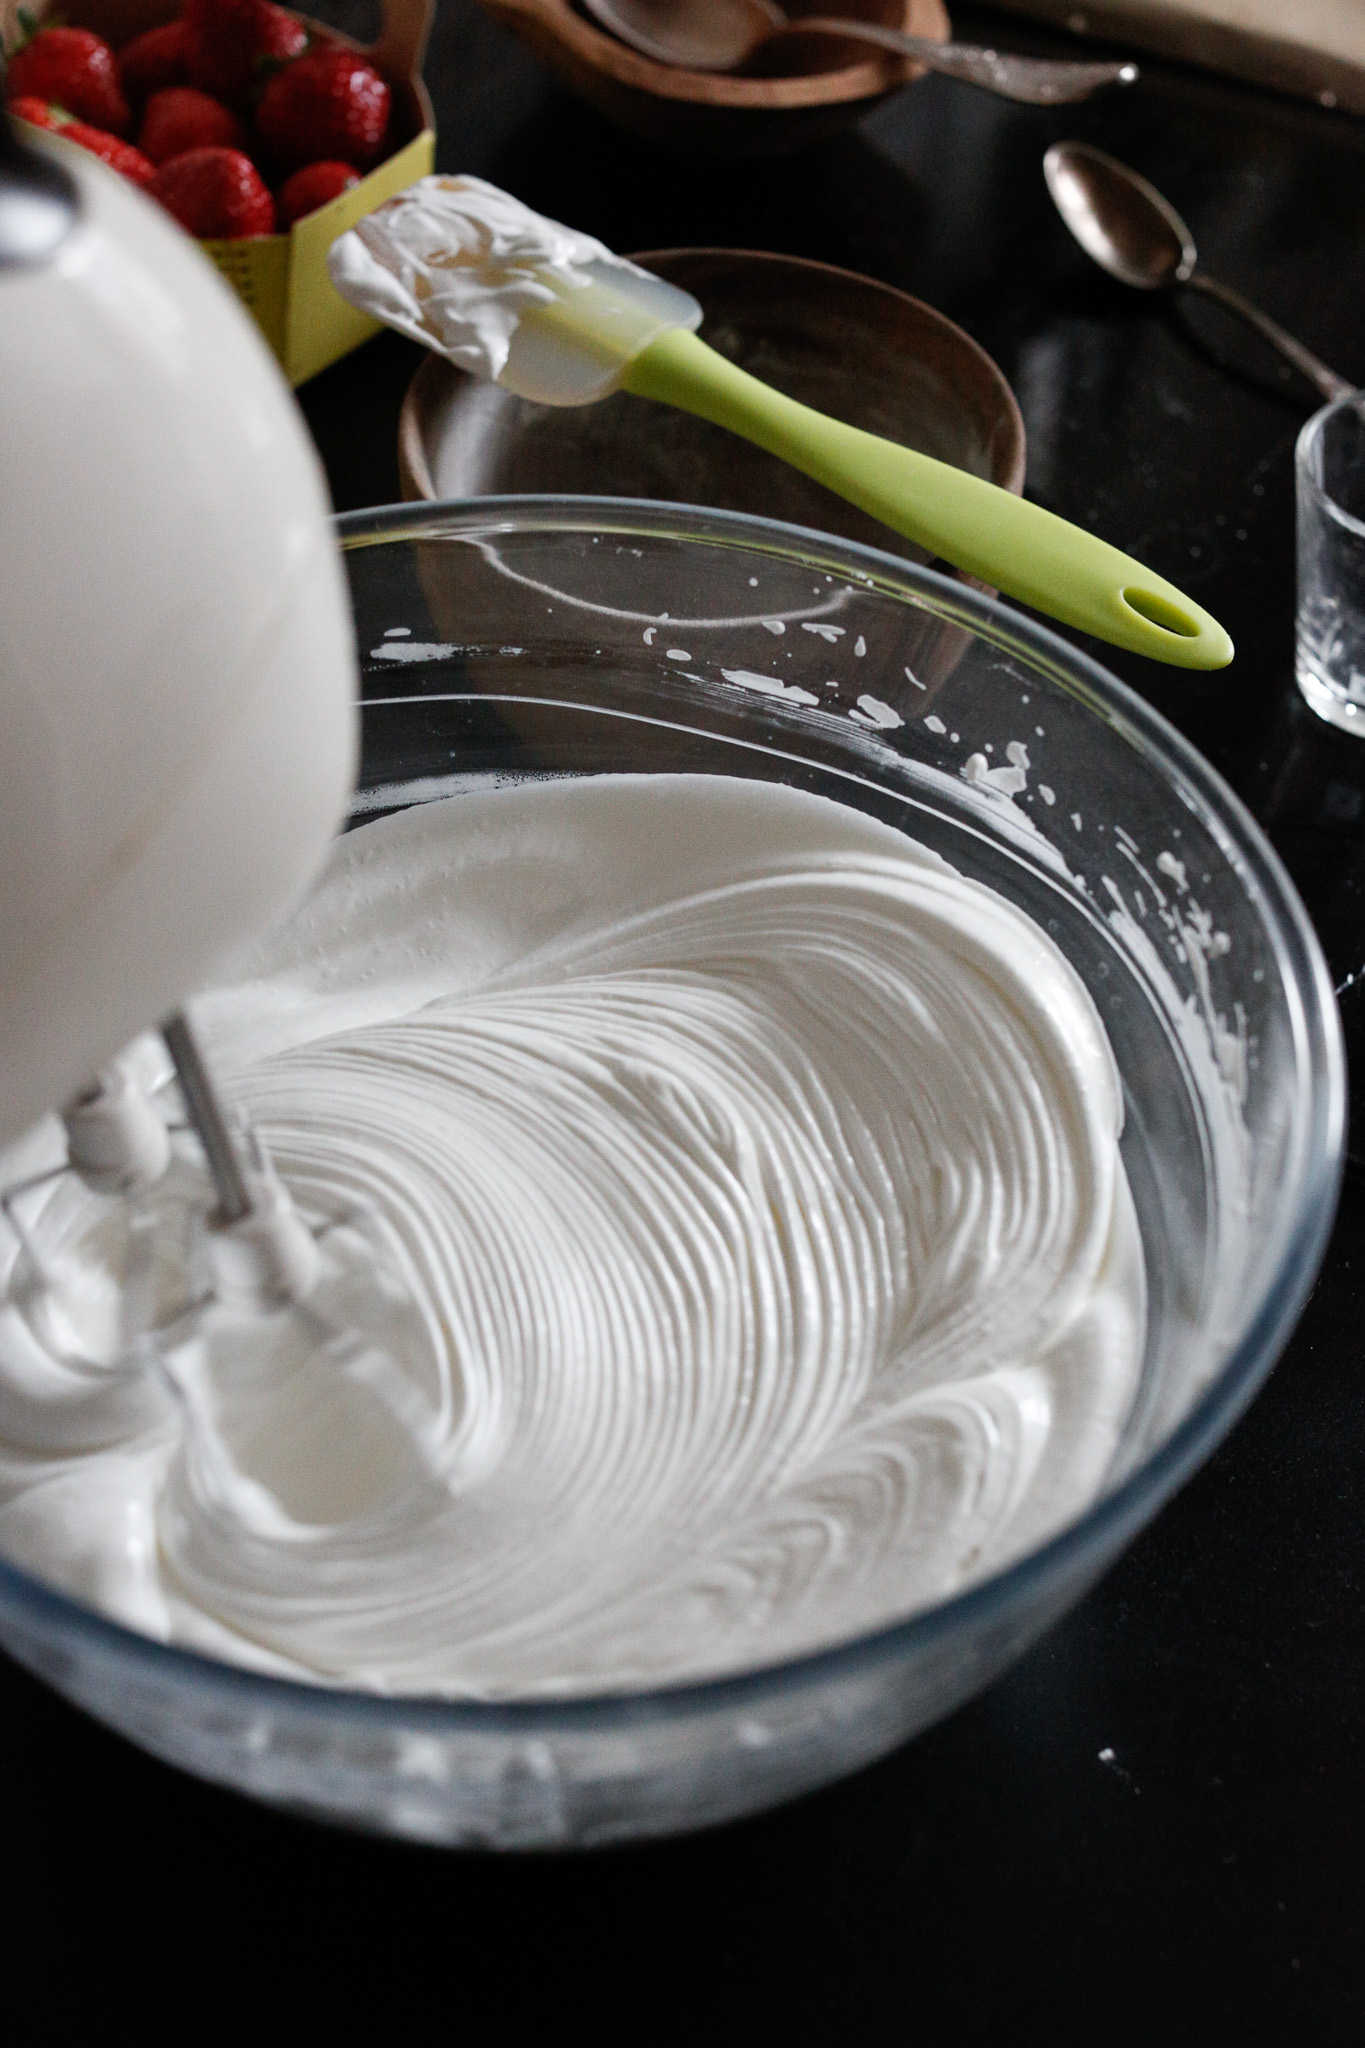
You'll know they are done when your peak stays like this and they will be very glossy!
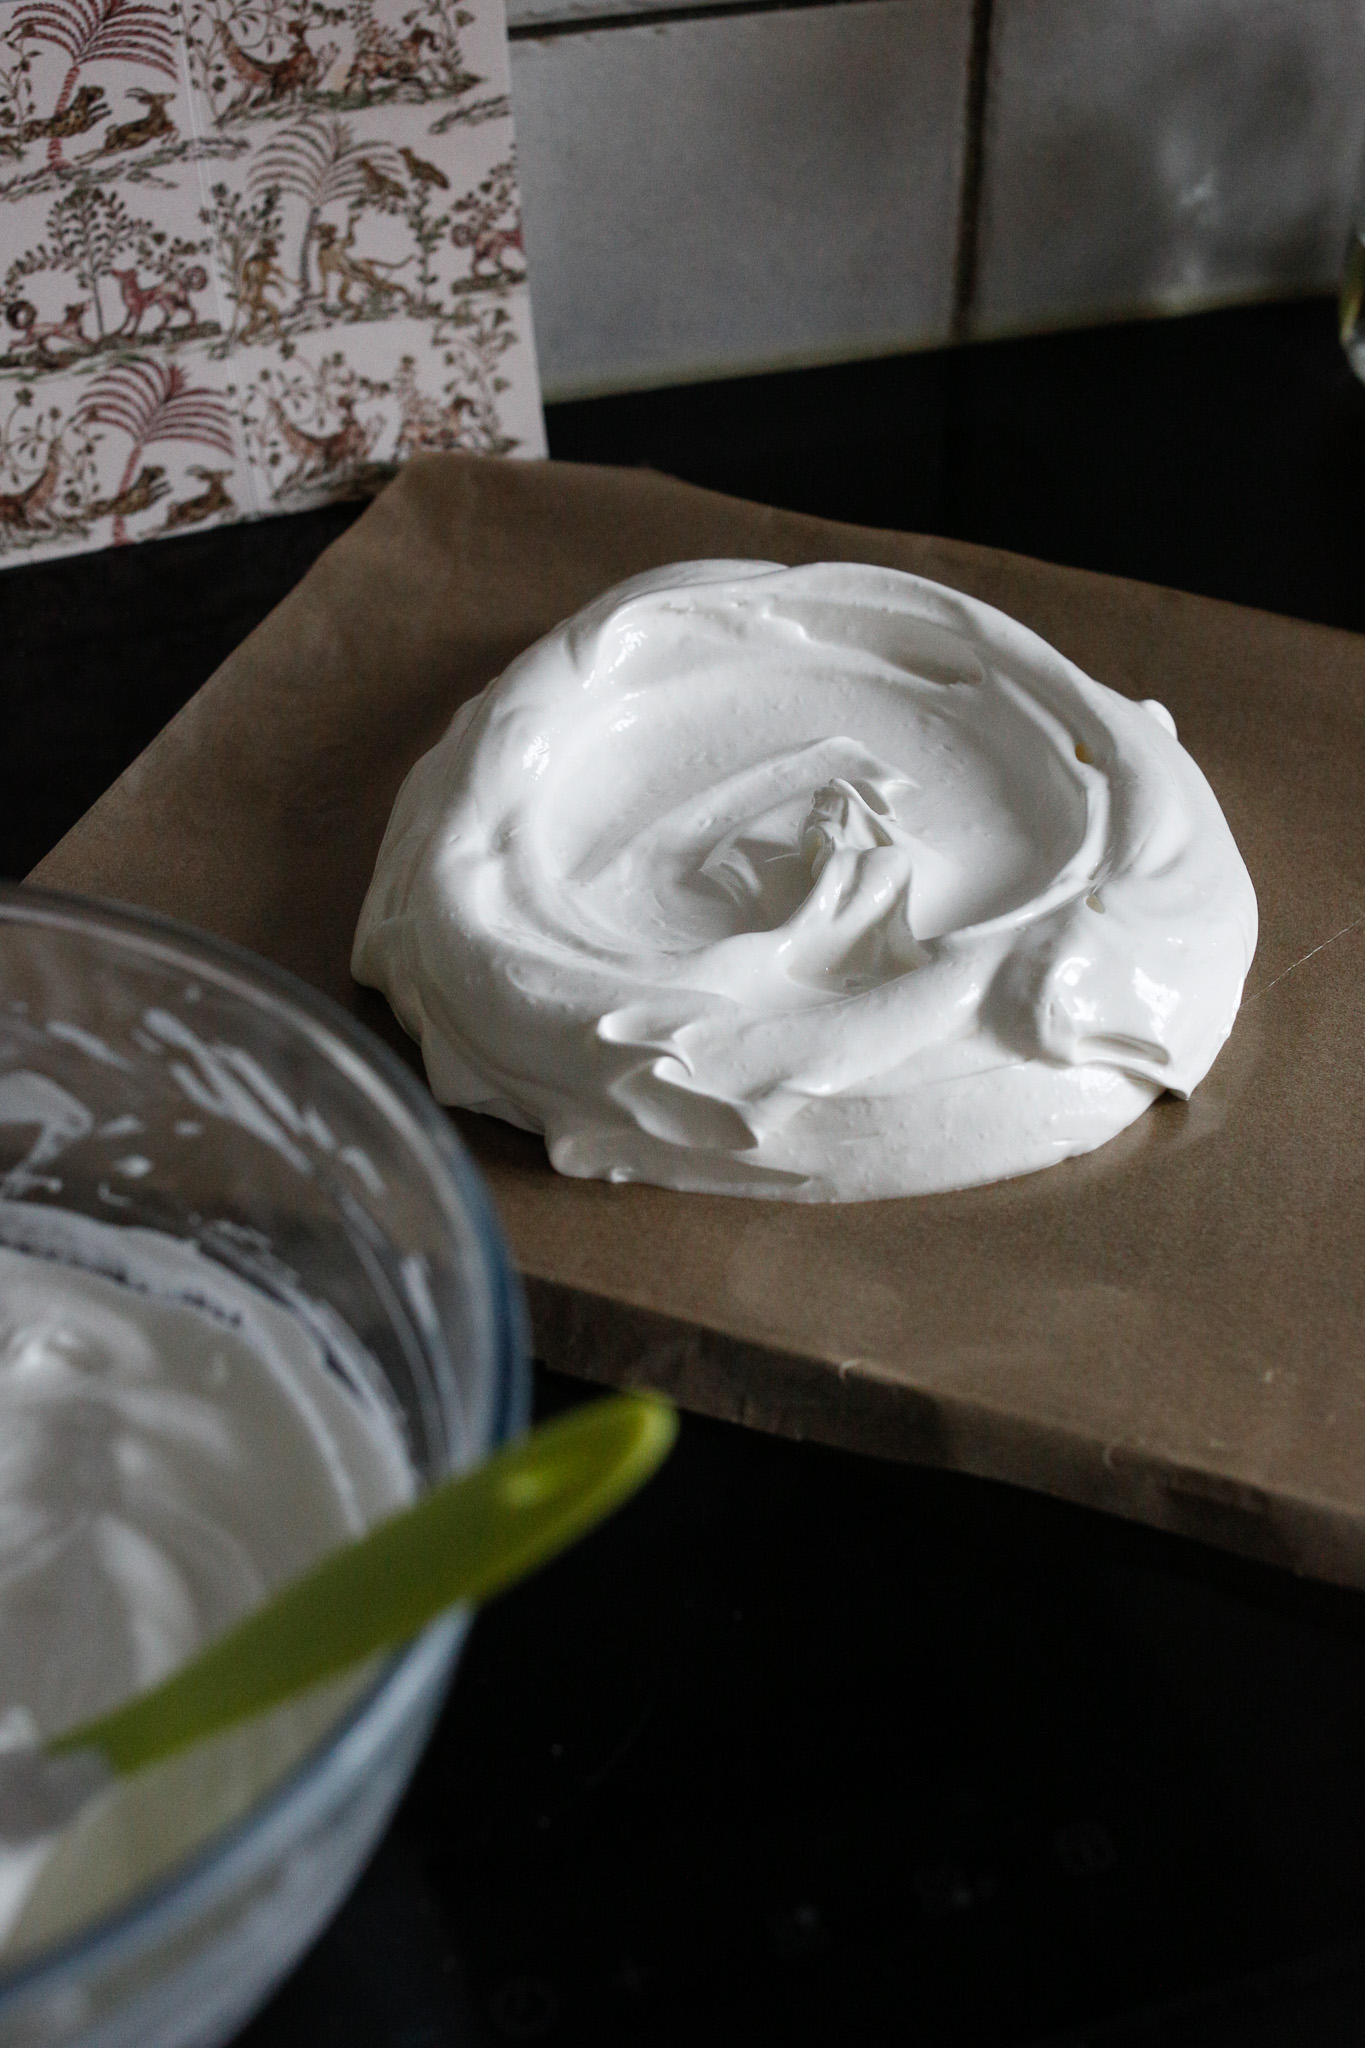
Add your whites onto your baking sheet and spread them out into a circle.
Do your best to make a nest. The center of your meringue will poof up regardless while it bakes so make the "walls" high. Pop her in the oven! Start your Pineau Rouge sauce.
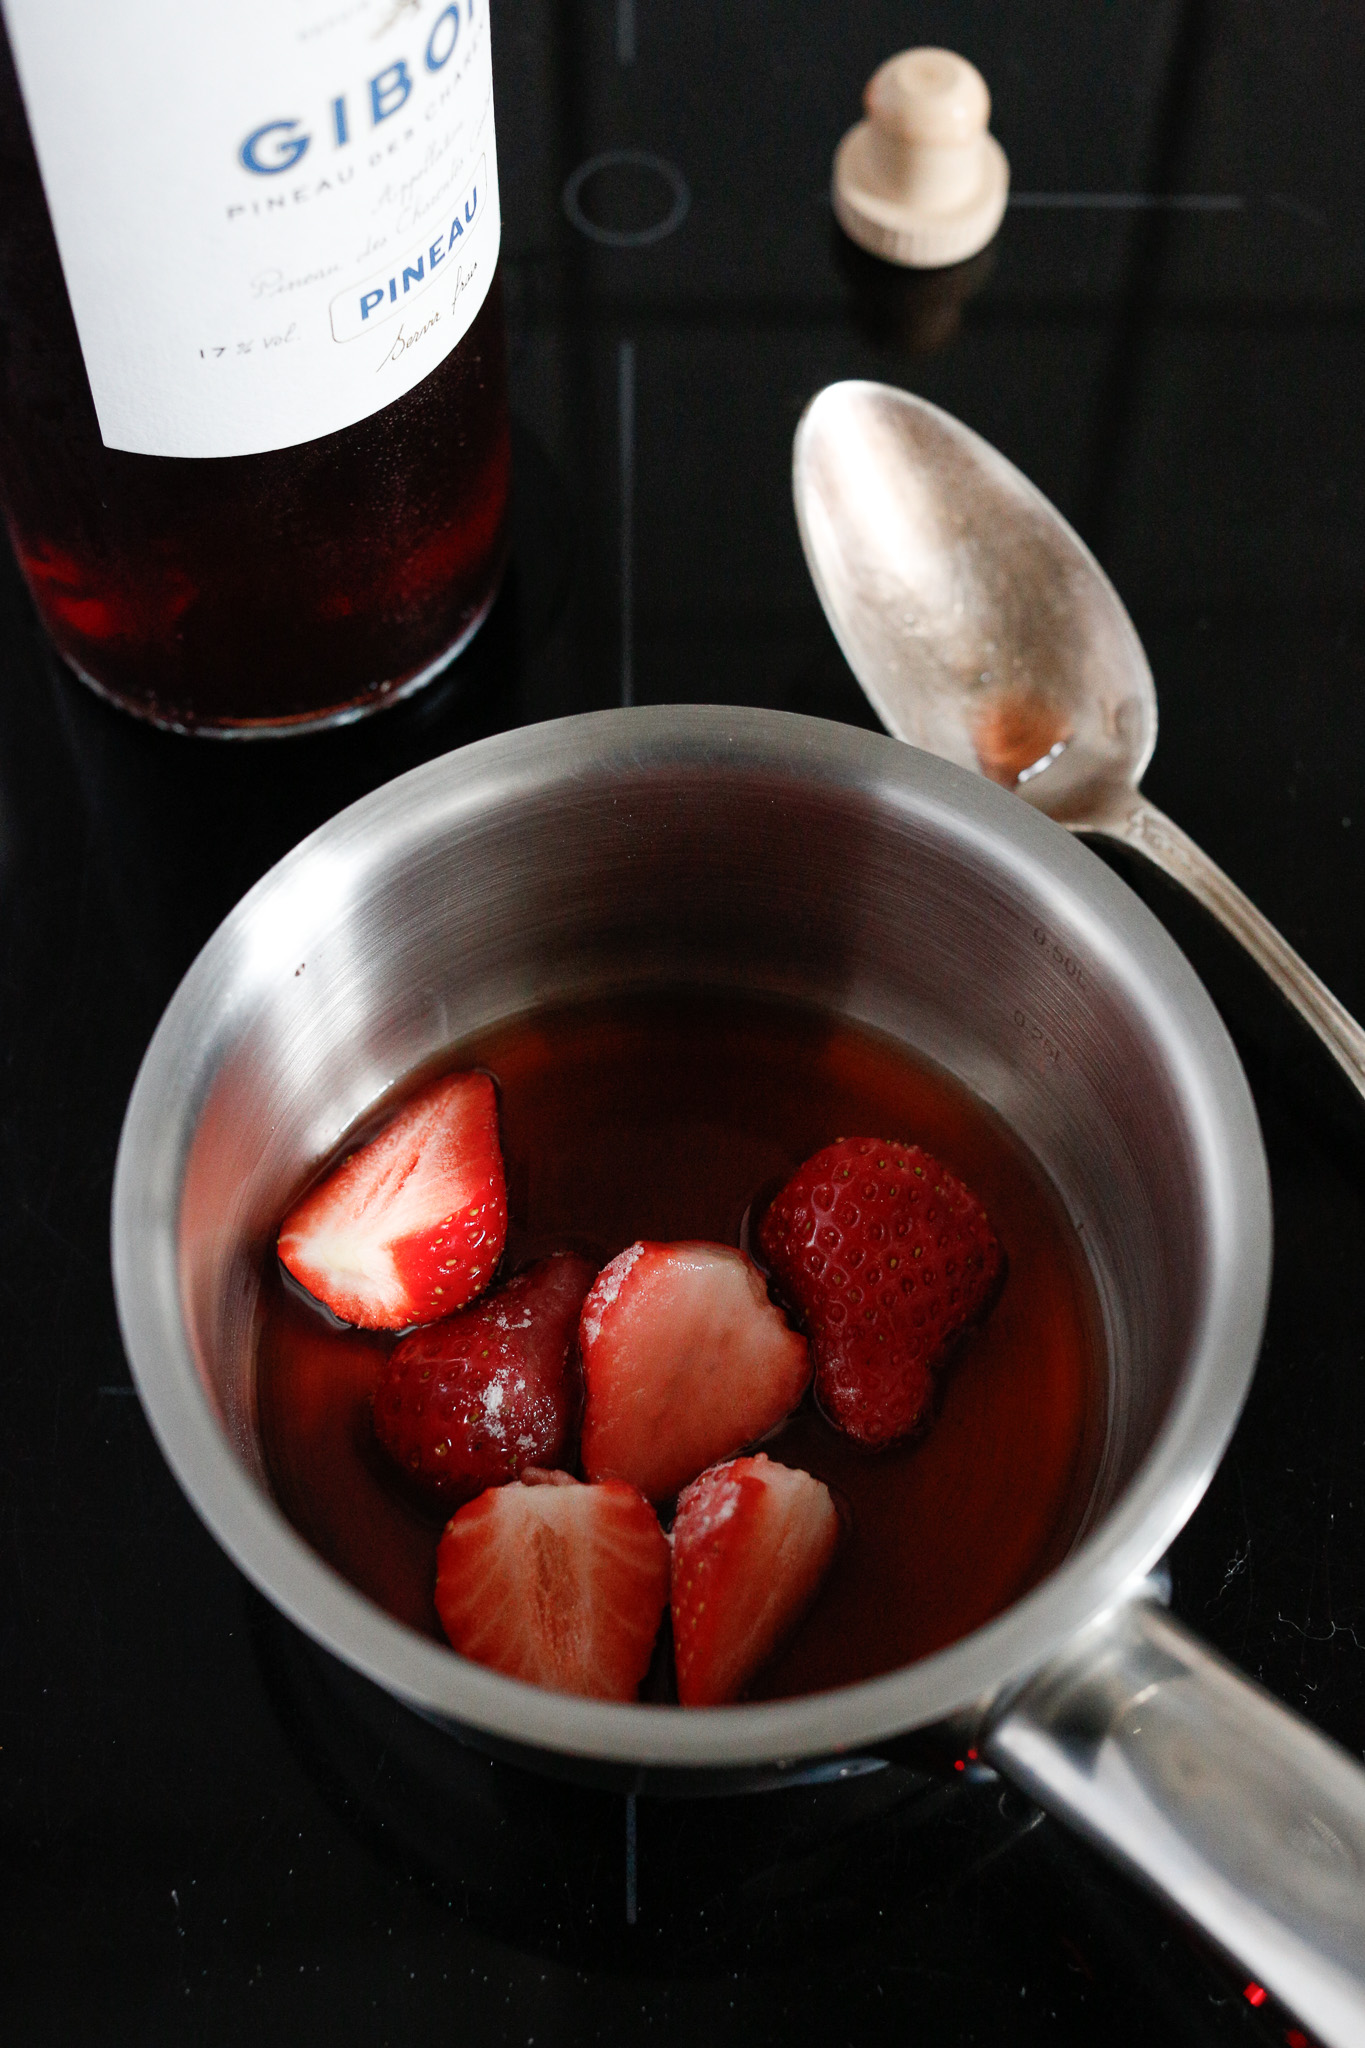
In a small saucepan add your 3 strawberries, Pineau des Charentes (or Porto,) sugar and water and bring to a boil.
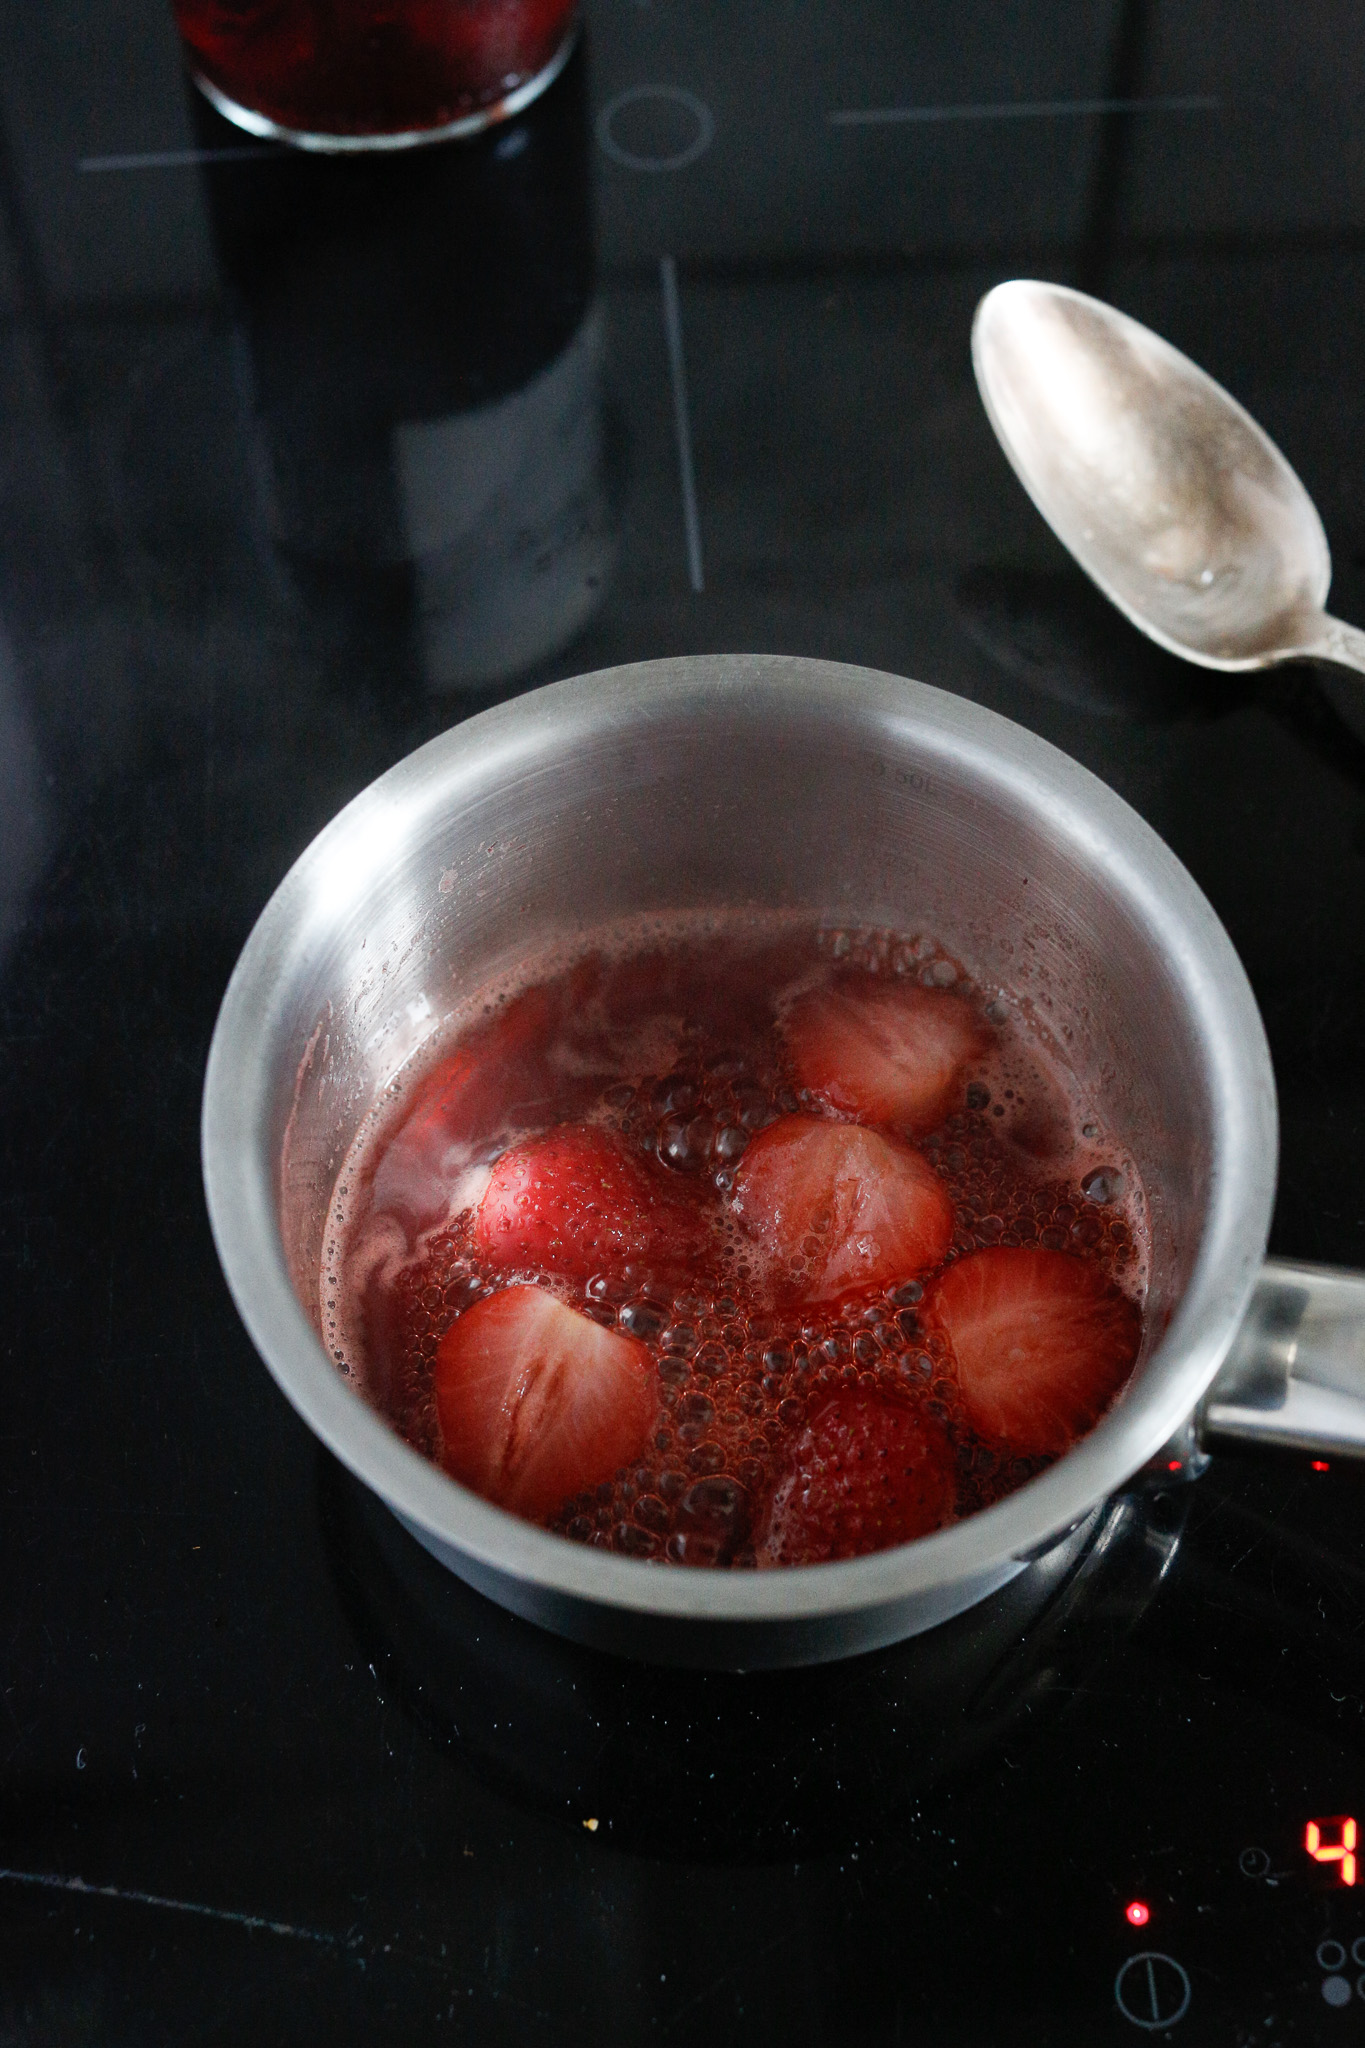
Let the strawberries simmer until the sauce starts to thicken and takes on a syrupy consistency.
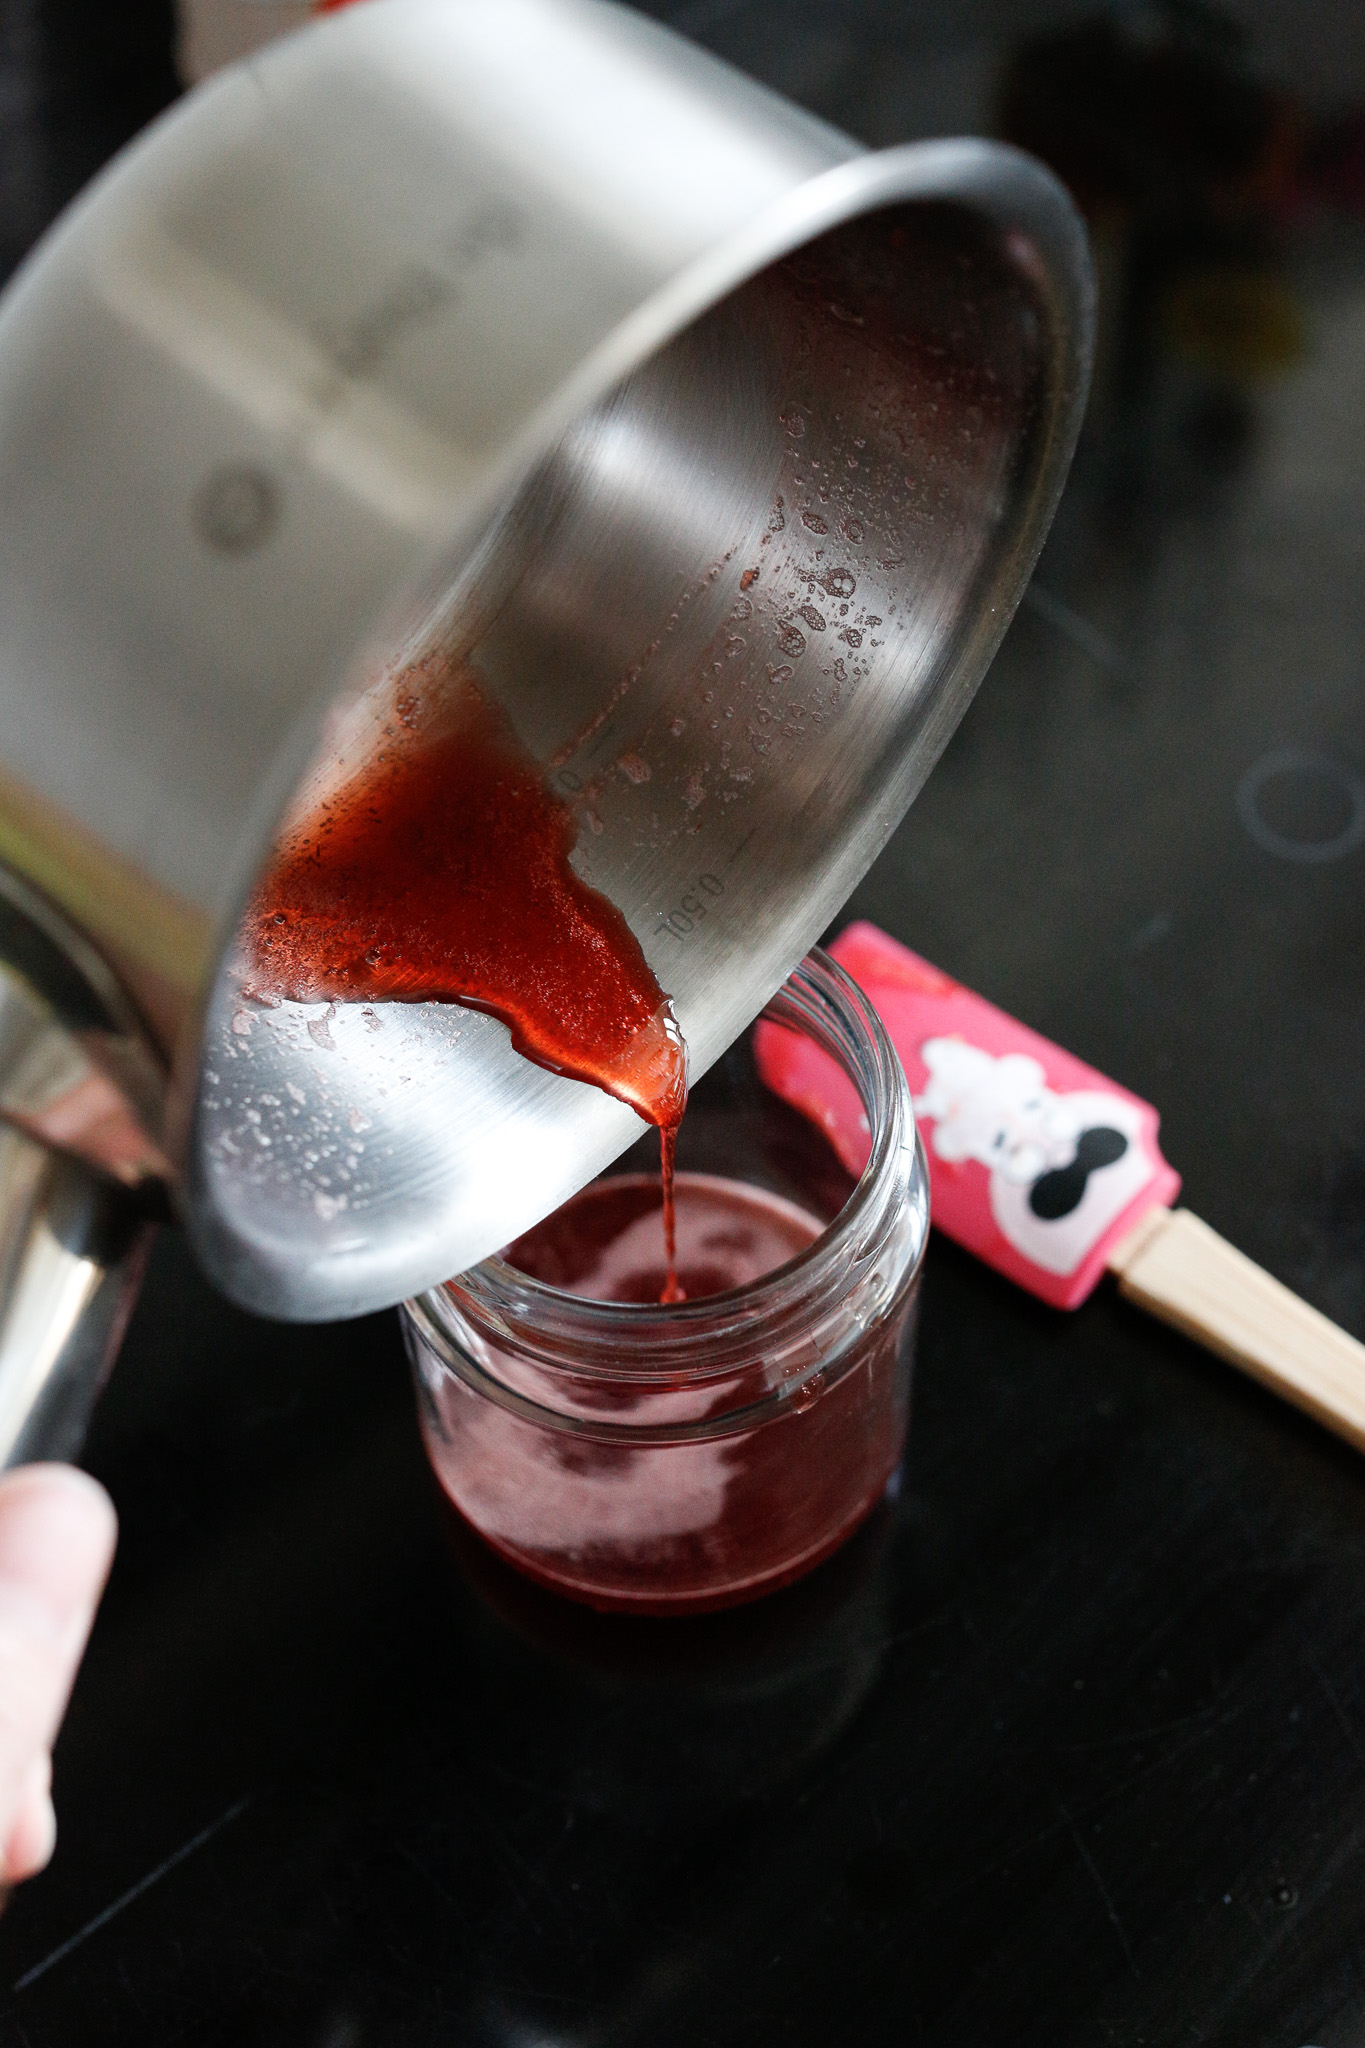
When you are happy with your consistency pour in the syrup into a jar with a lid.
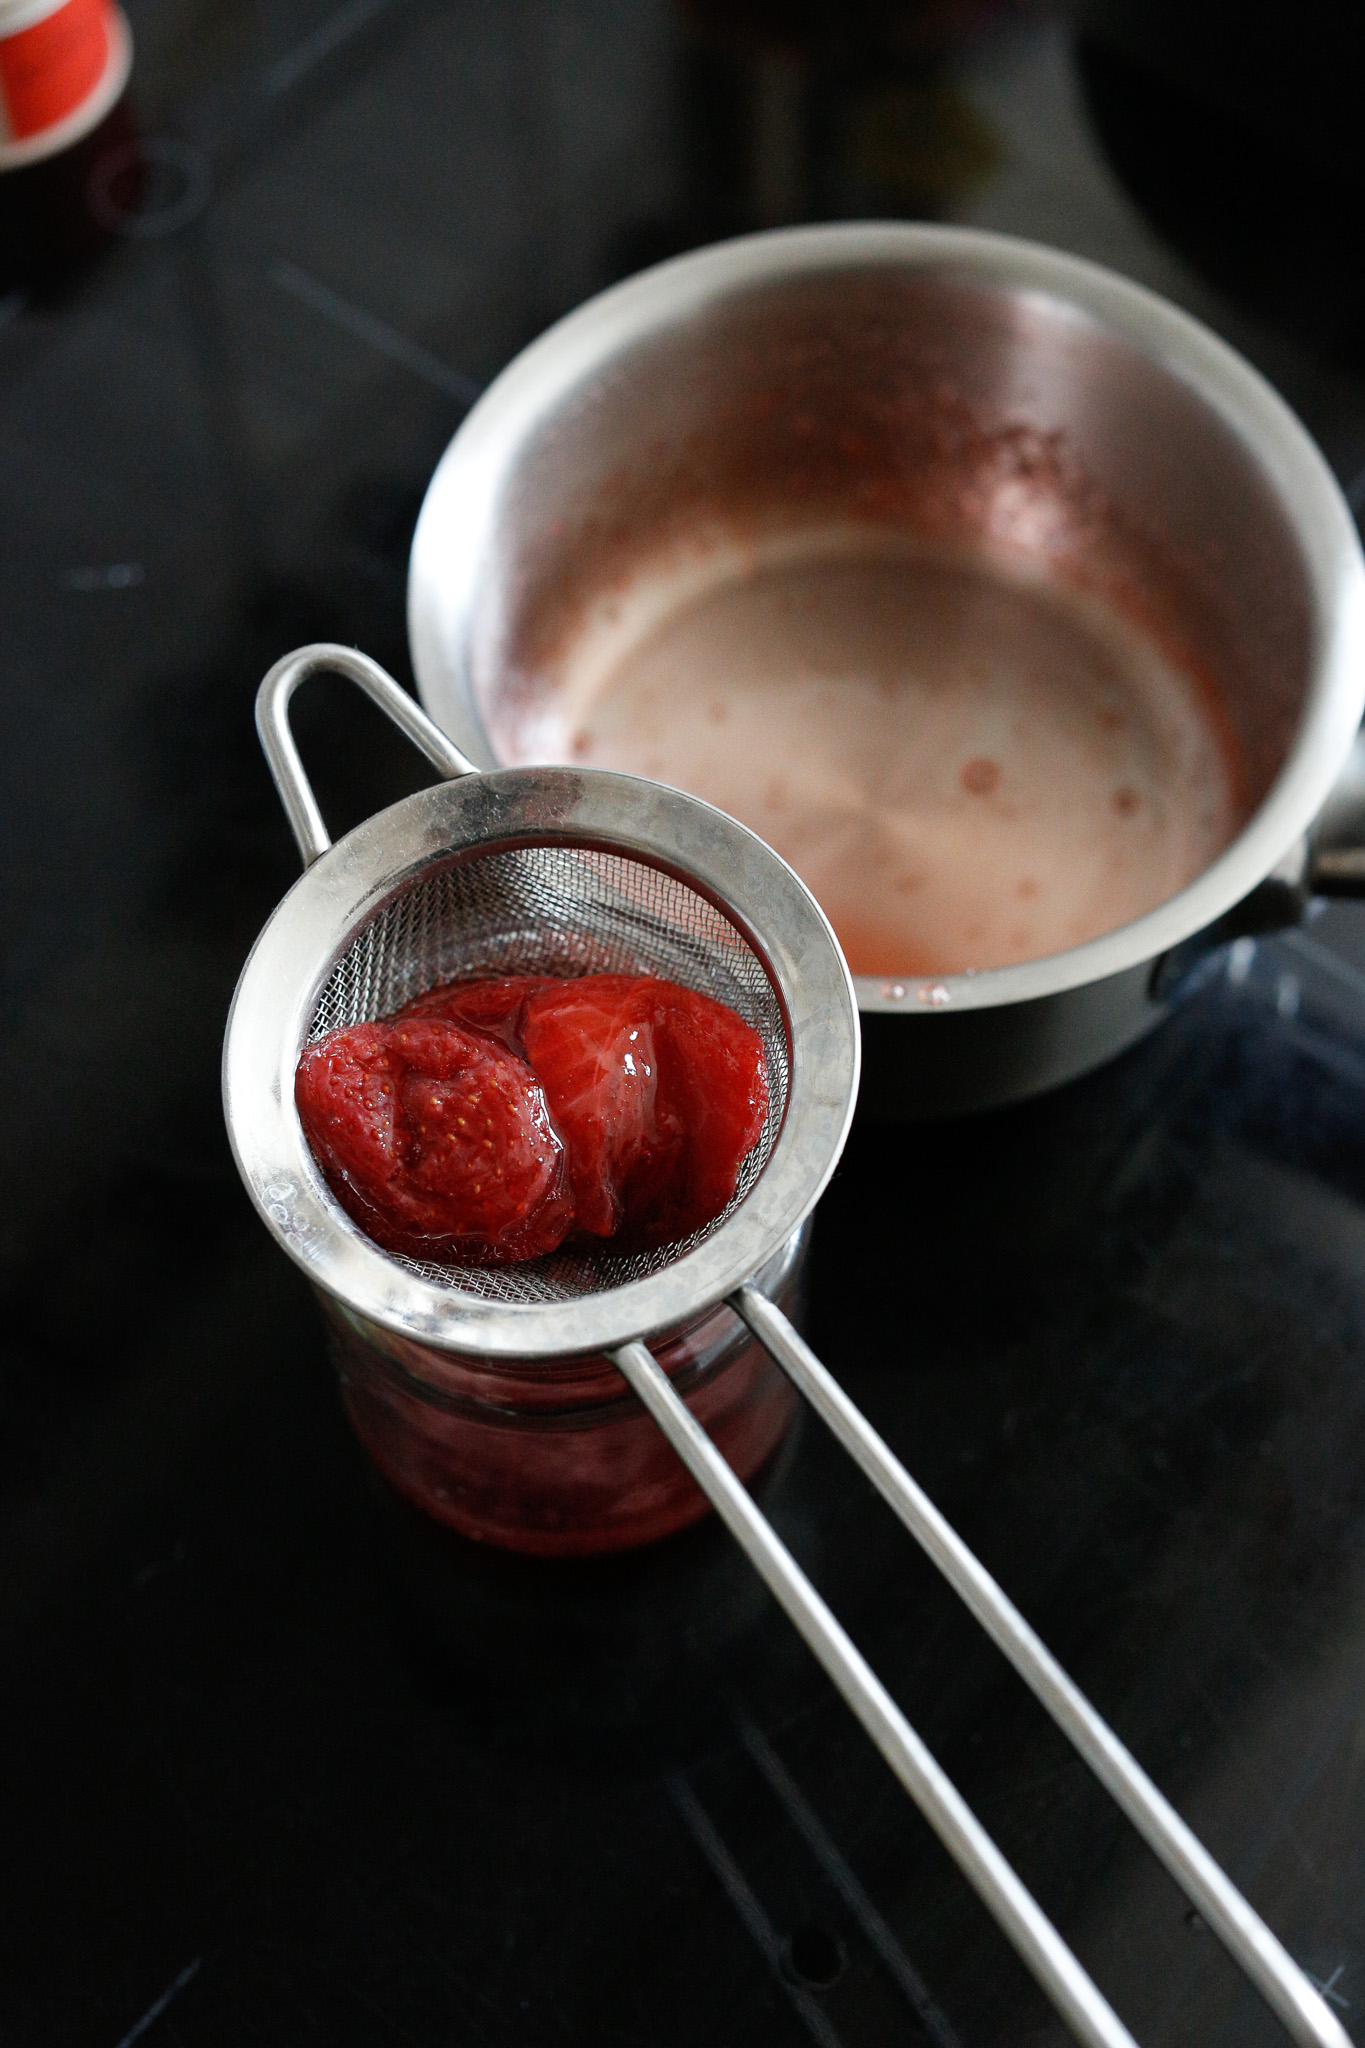
For more sauce & more flavor, let your strawberries fall into a sieve to drip.
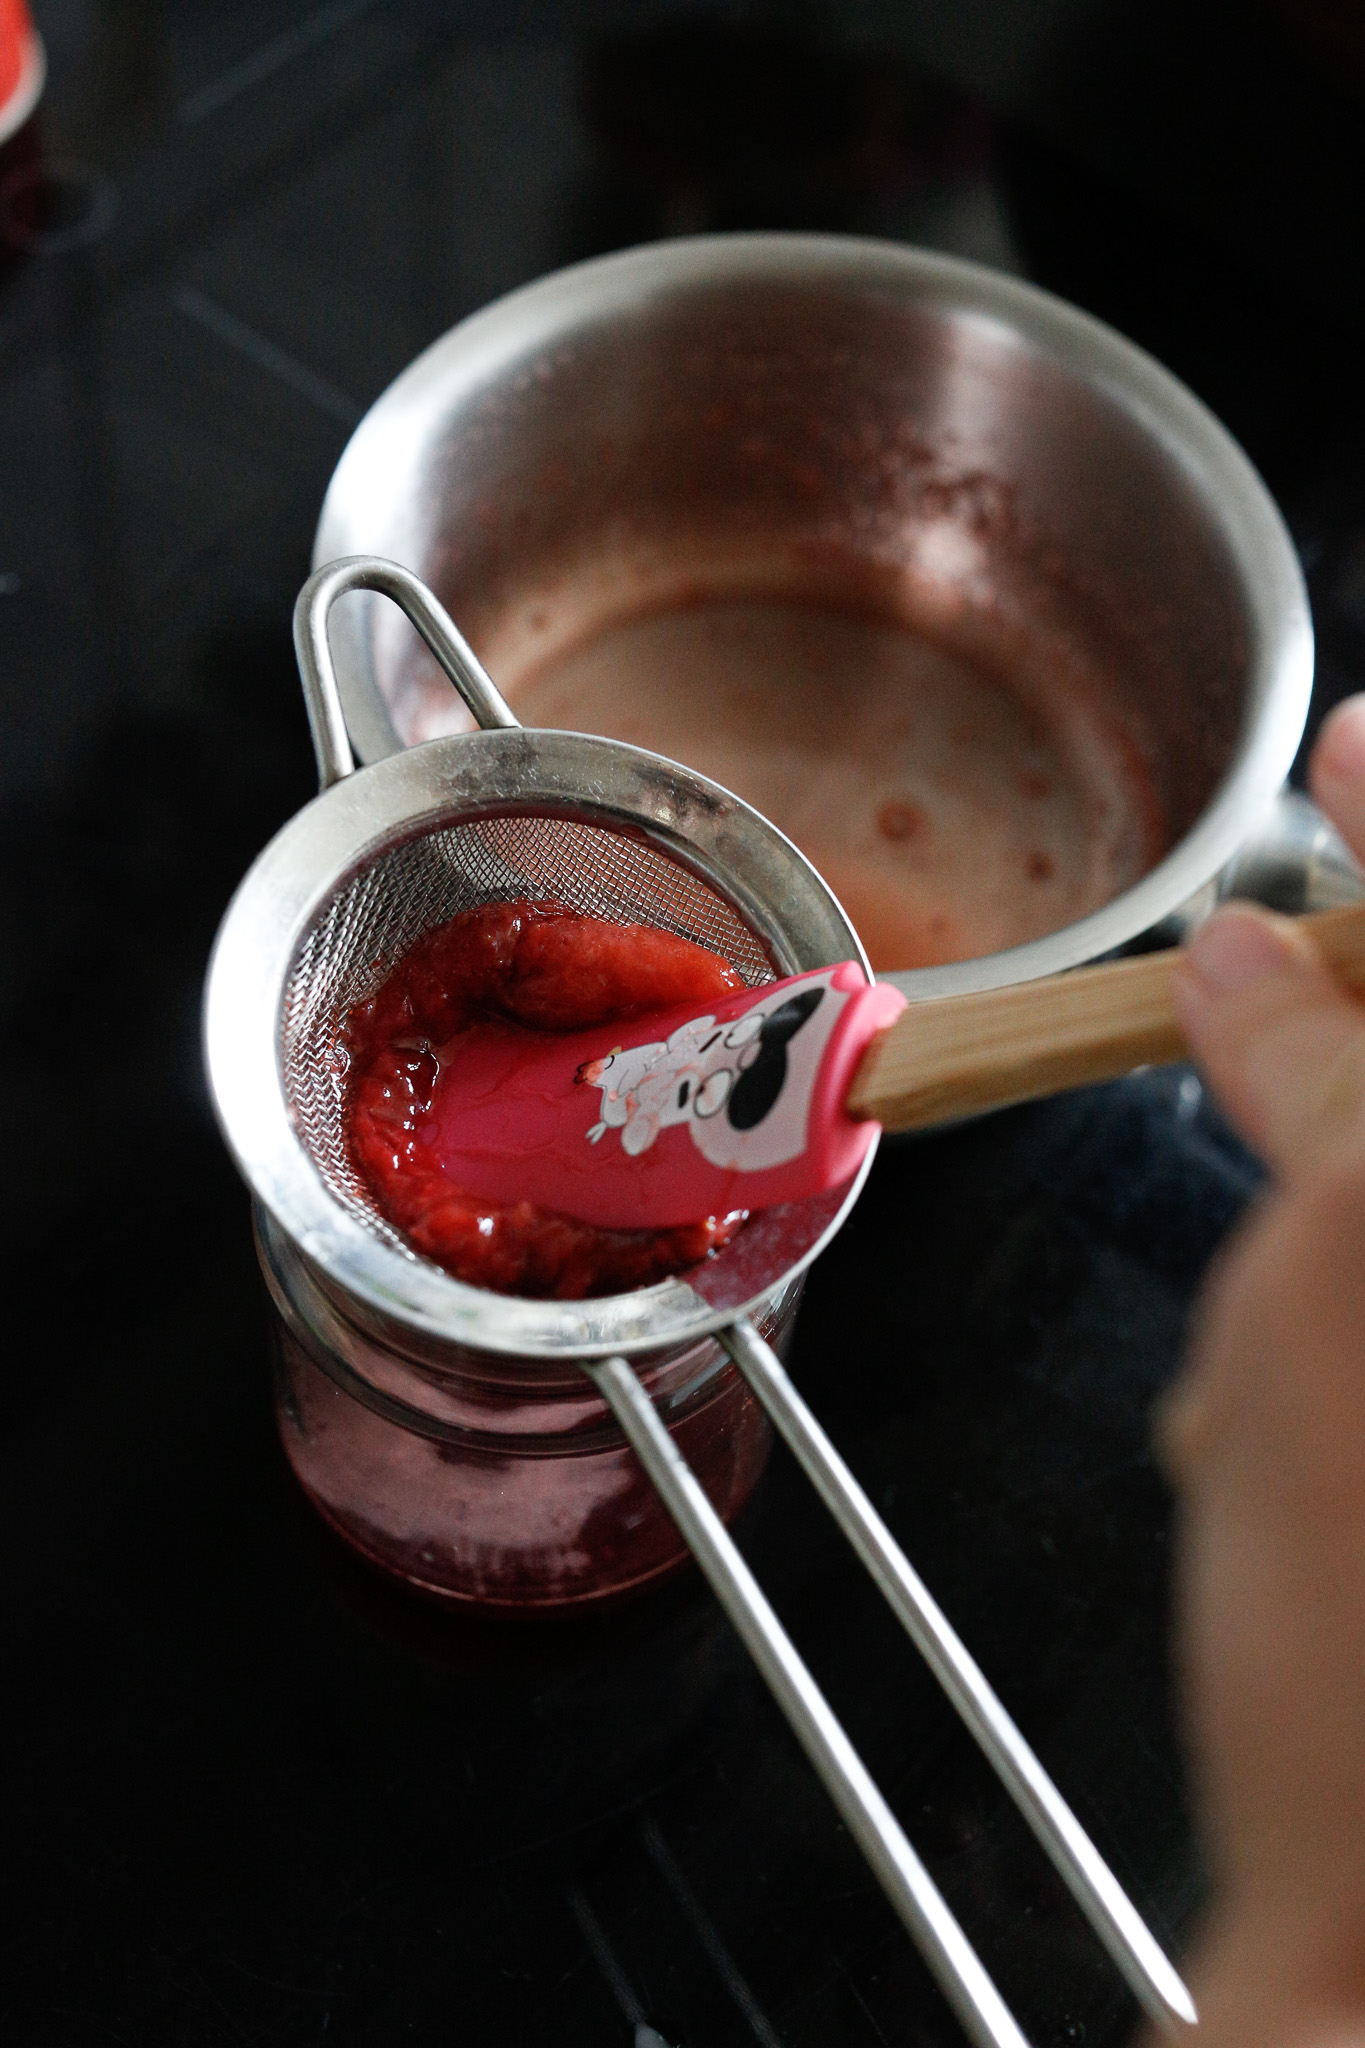
Using a spatula (this is a small kids spatula) squish your strawberries to extract the most juice. You could also blend all this together to make a thicker syrup more like a coulis.
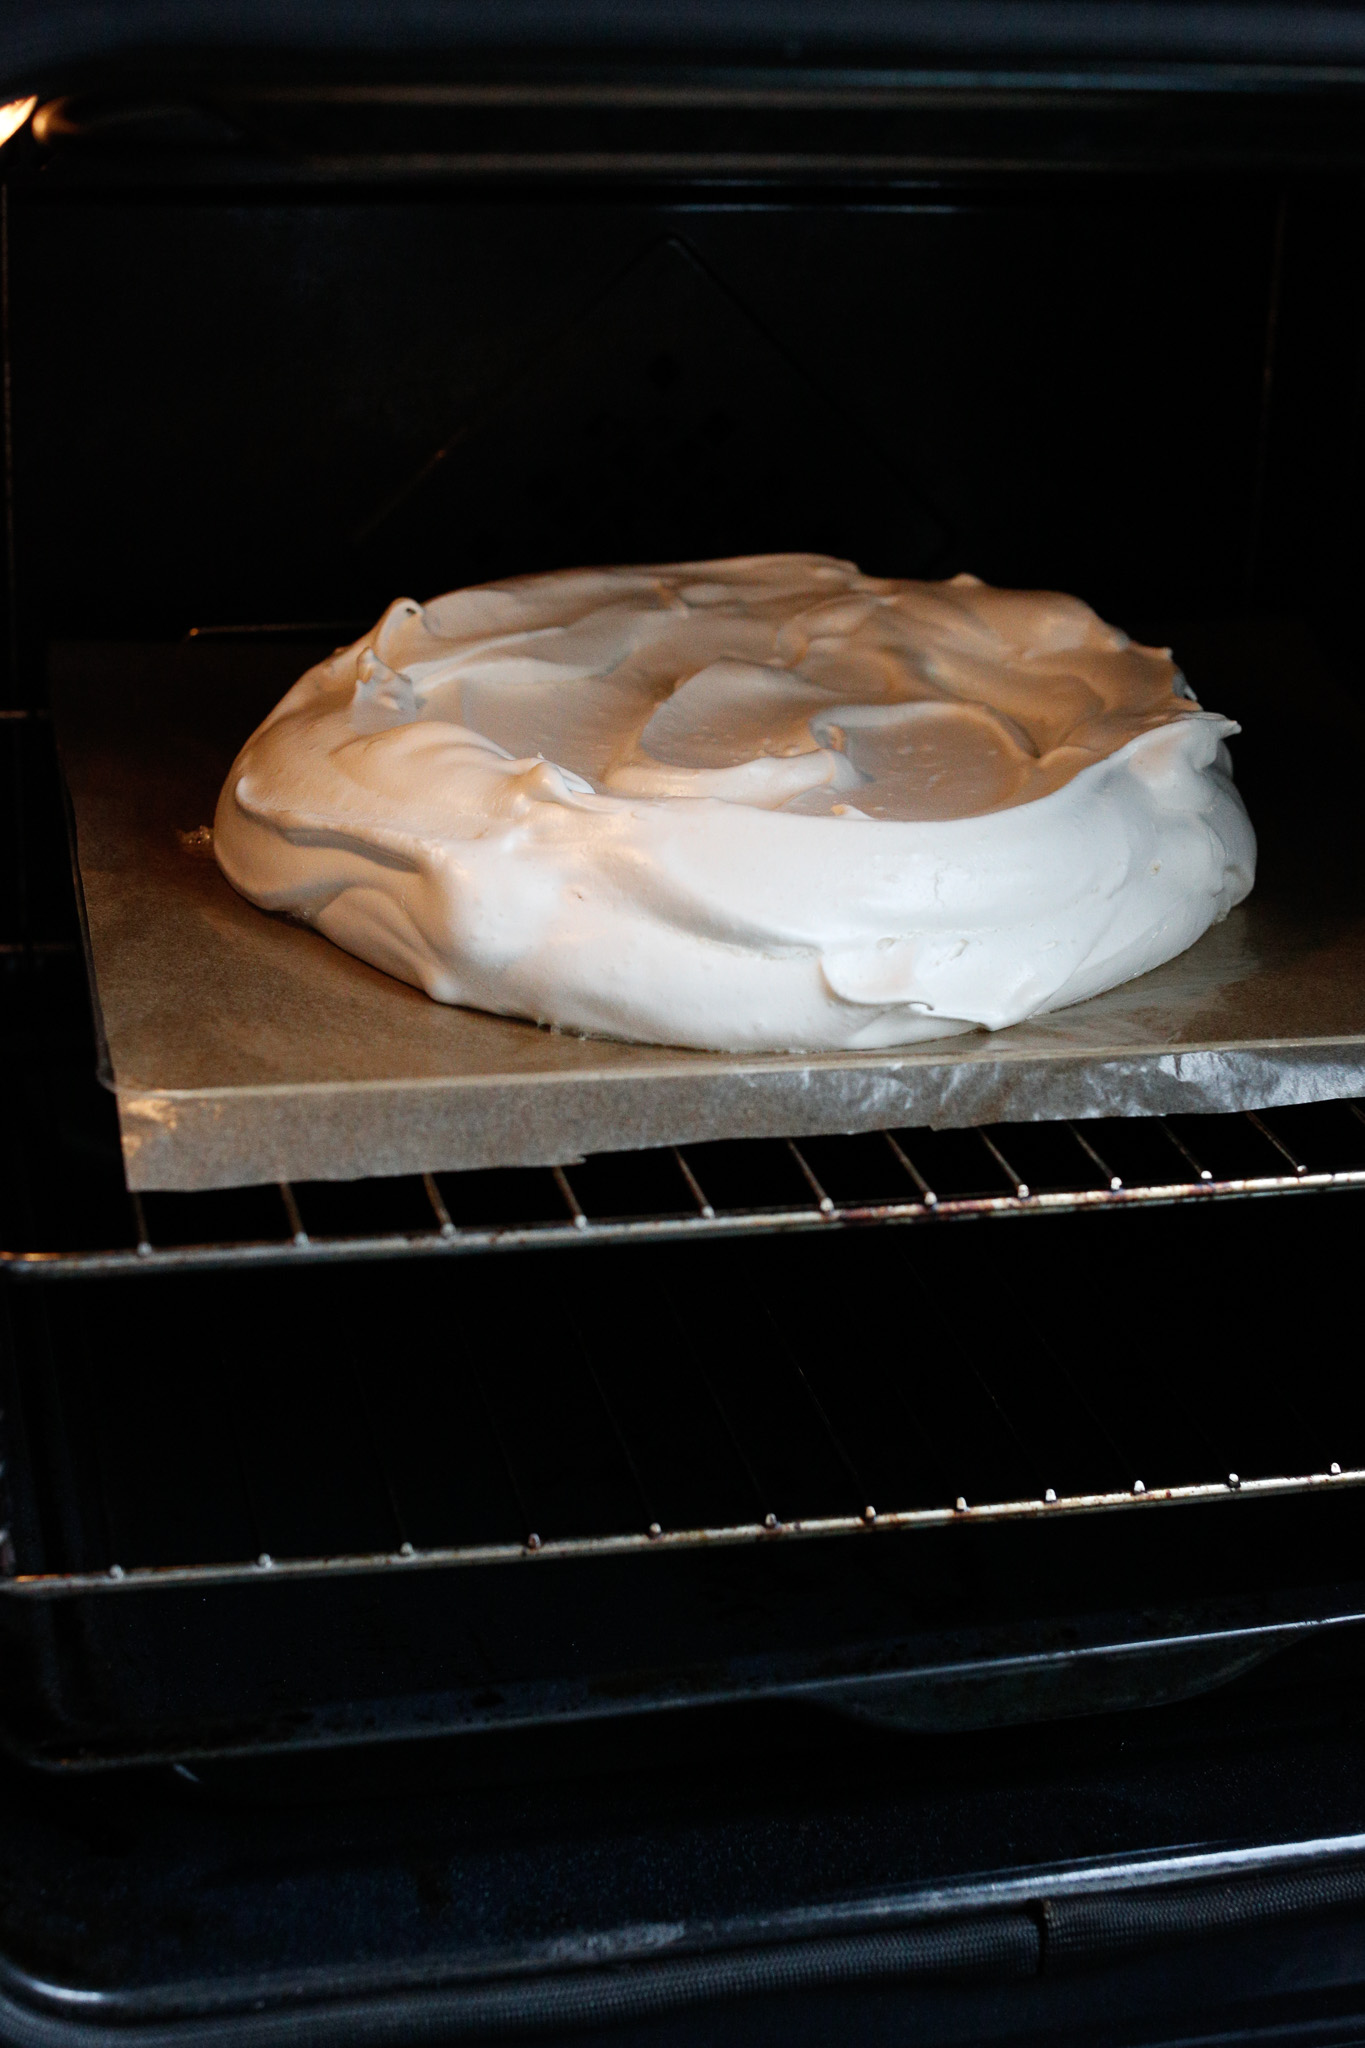
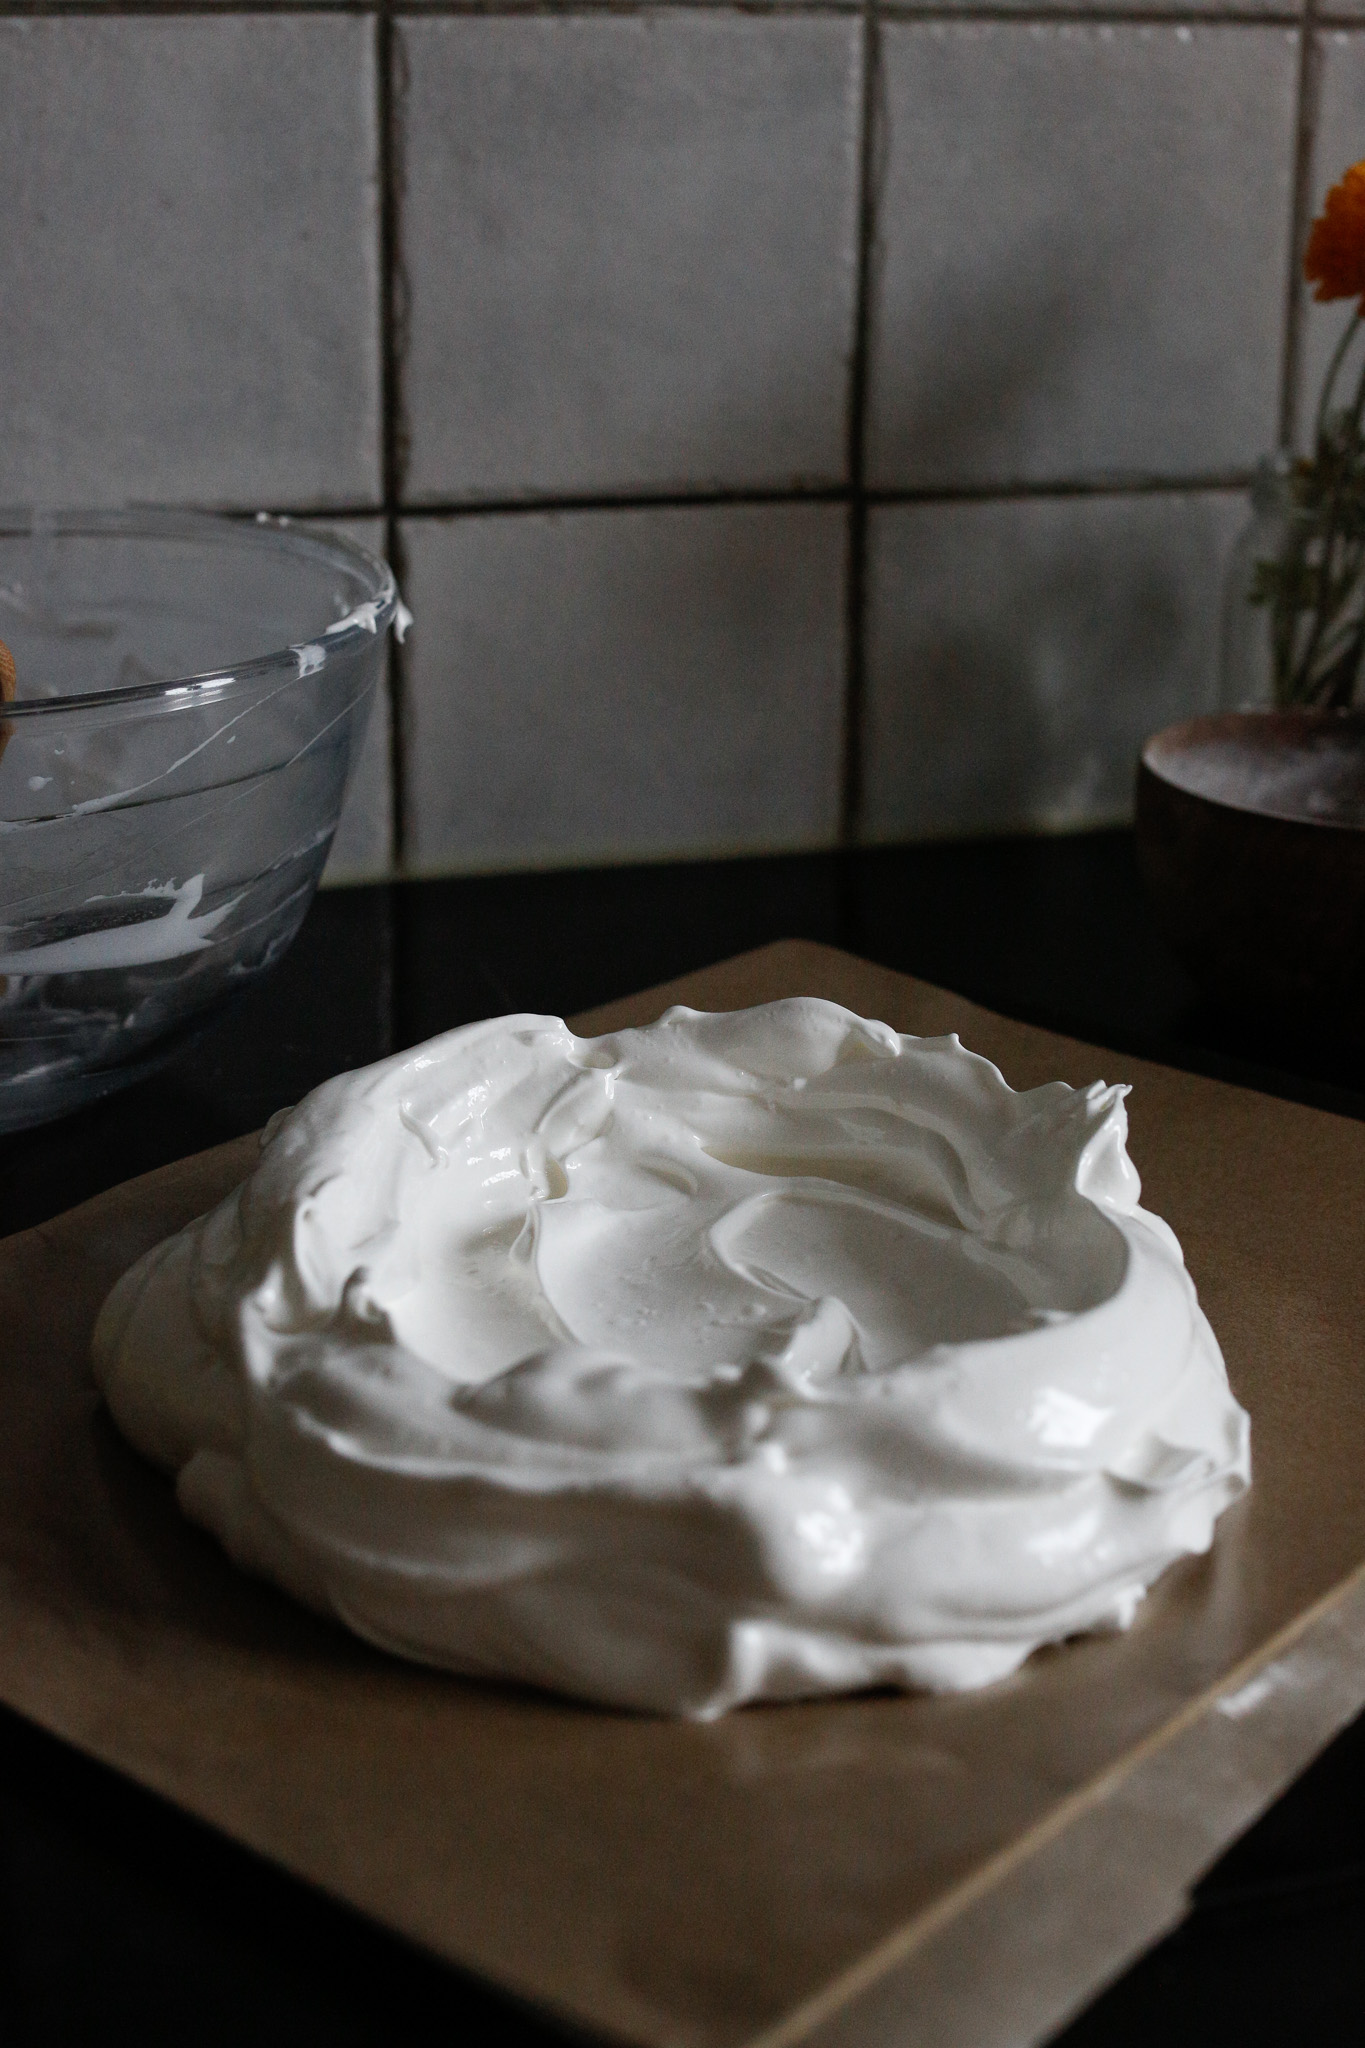
Once it's cooked leave it in the oven to cool with the door open.
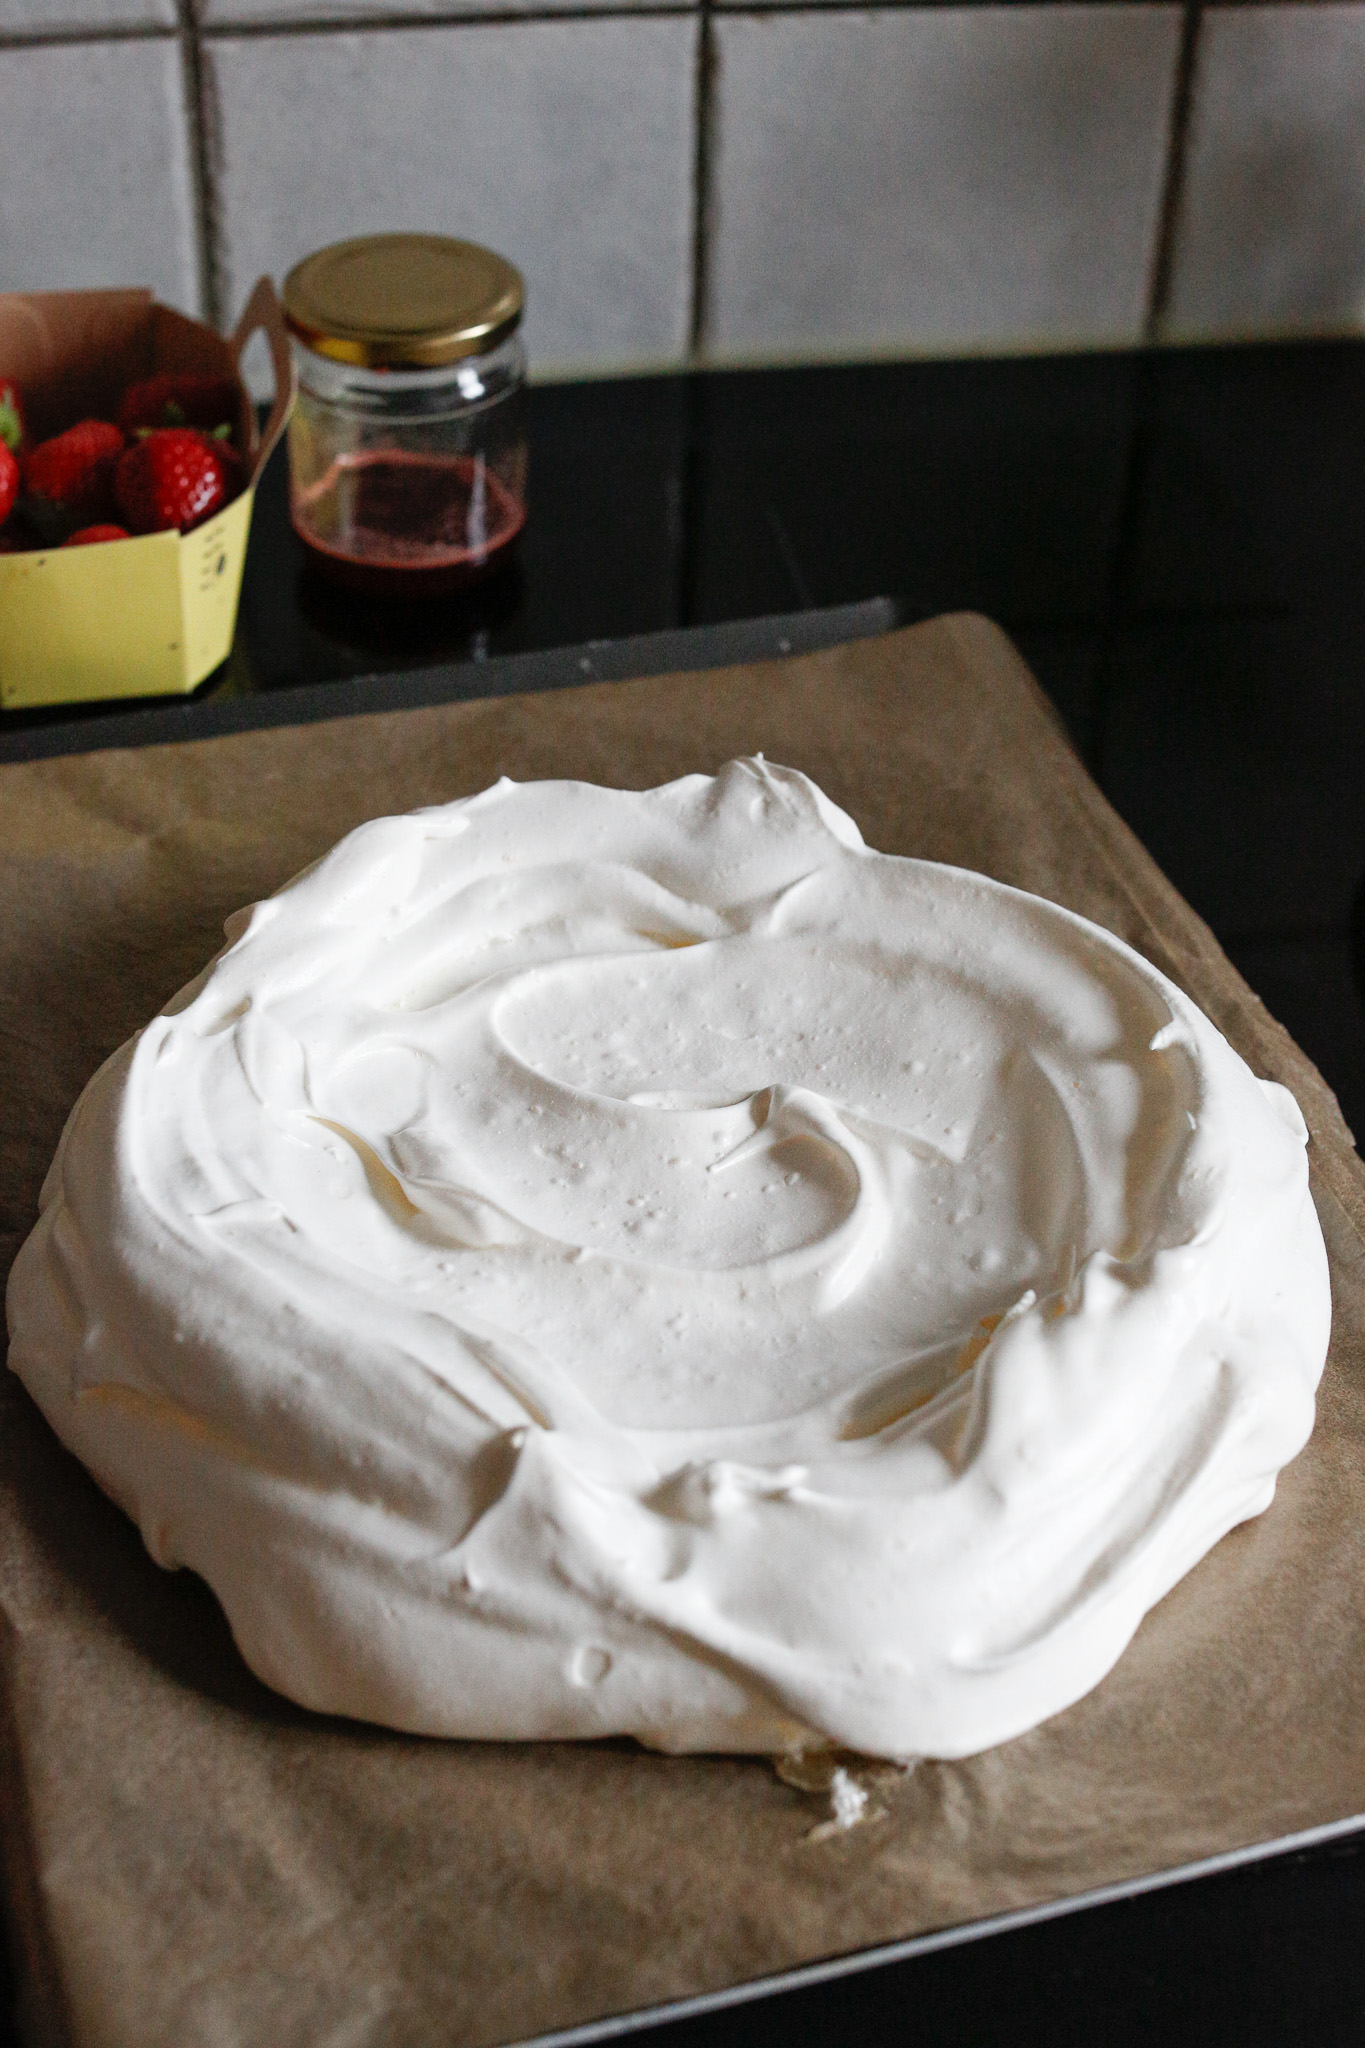
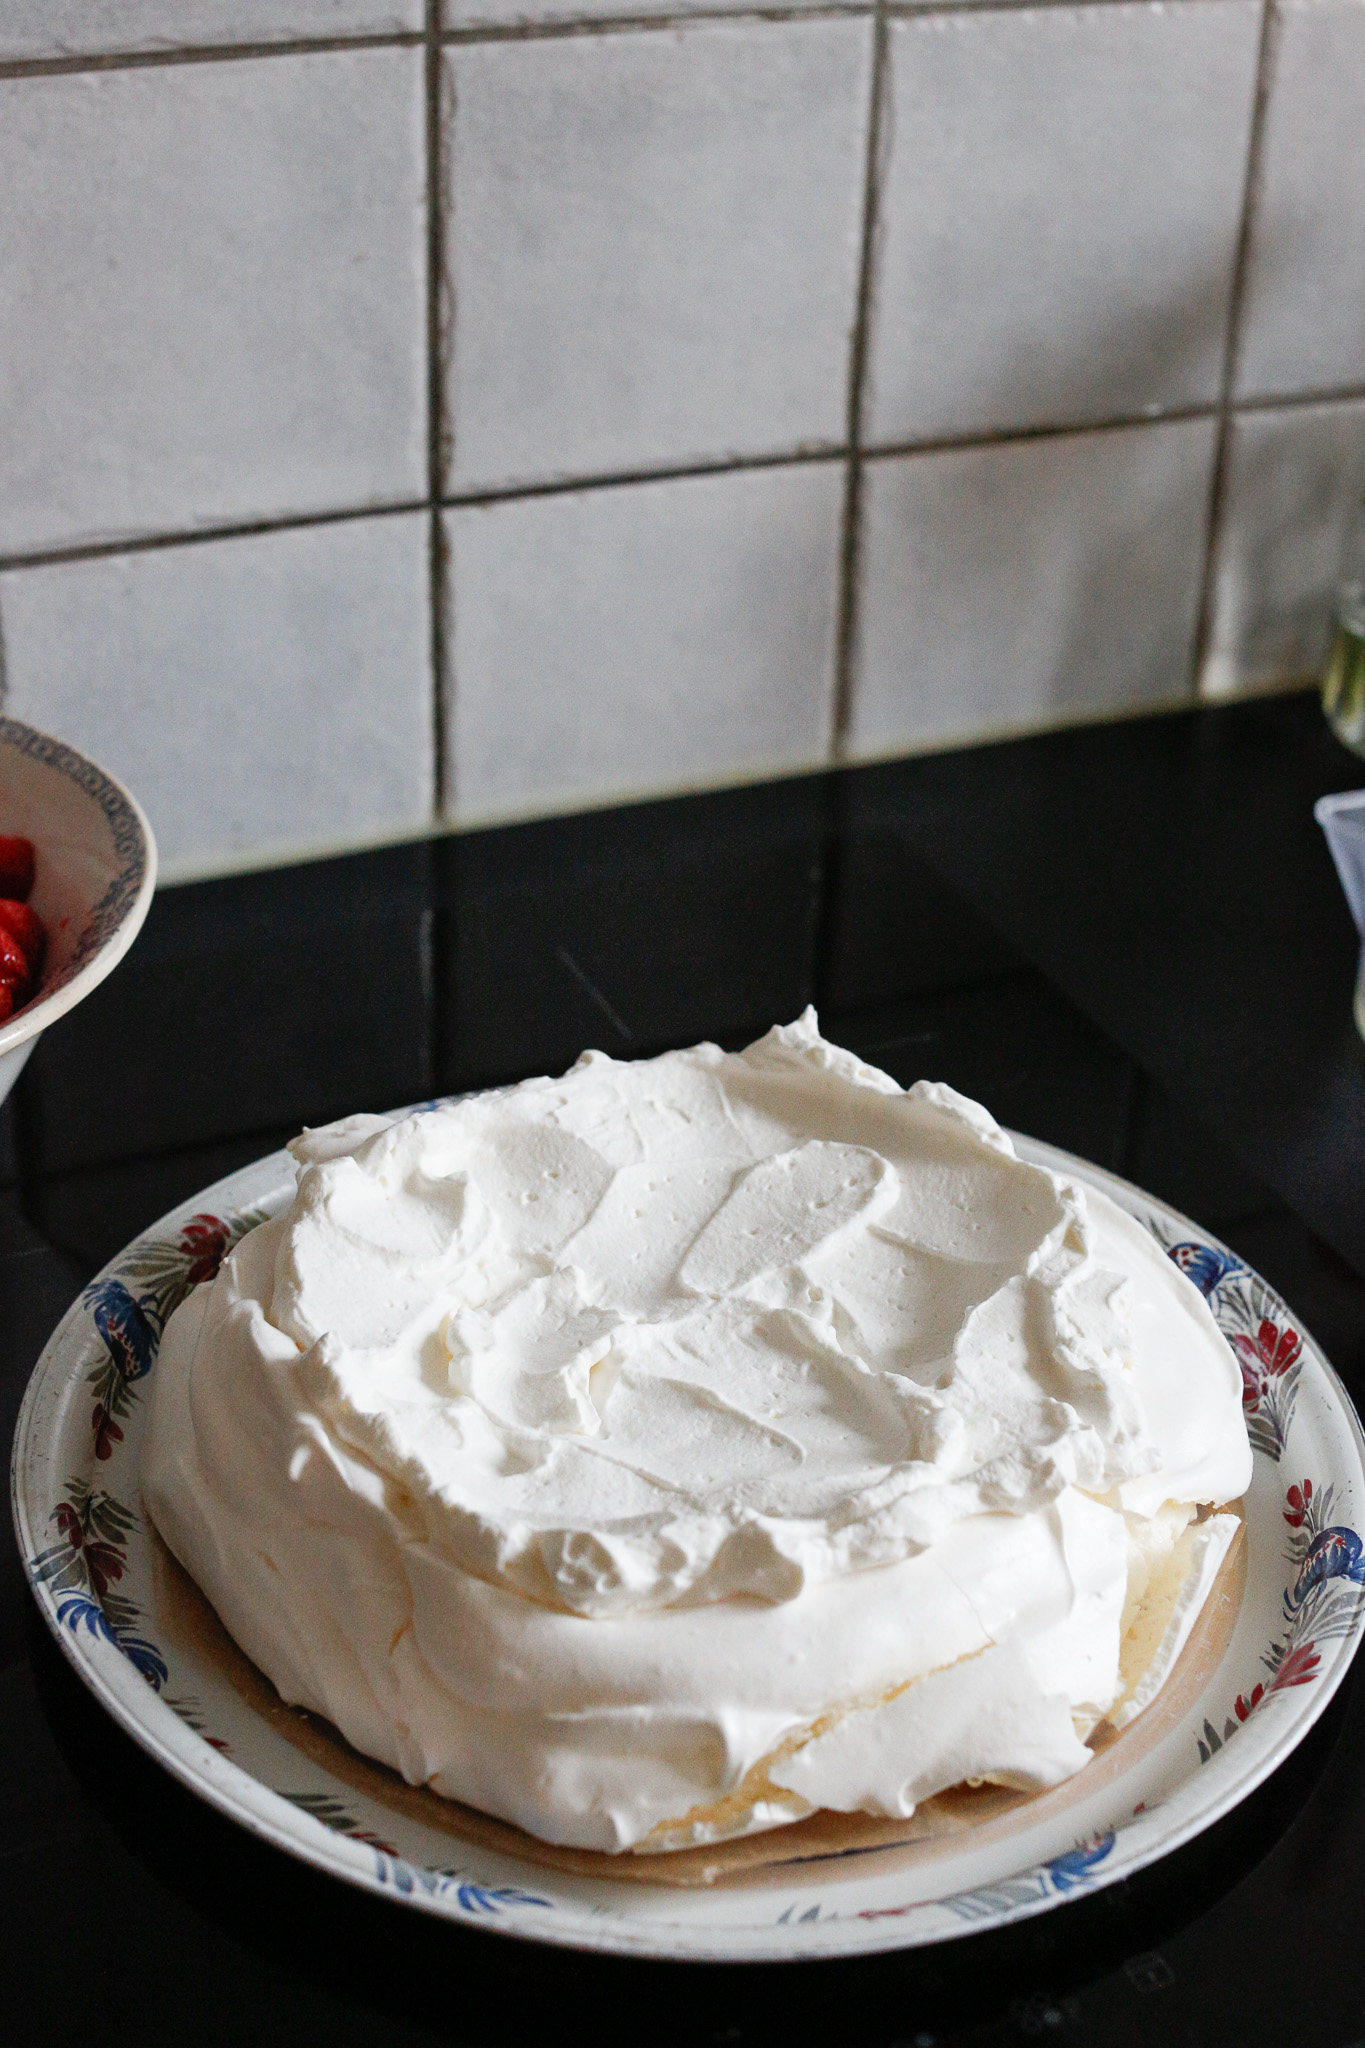
Once it has cooled in the oven go ahead and take it out. Ideally you will be able to mindfully lift it from the parchment paper and transfer it to your flat cake plate but sometimes it starts to crack.
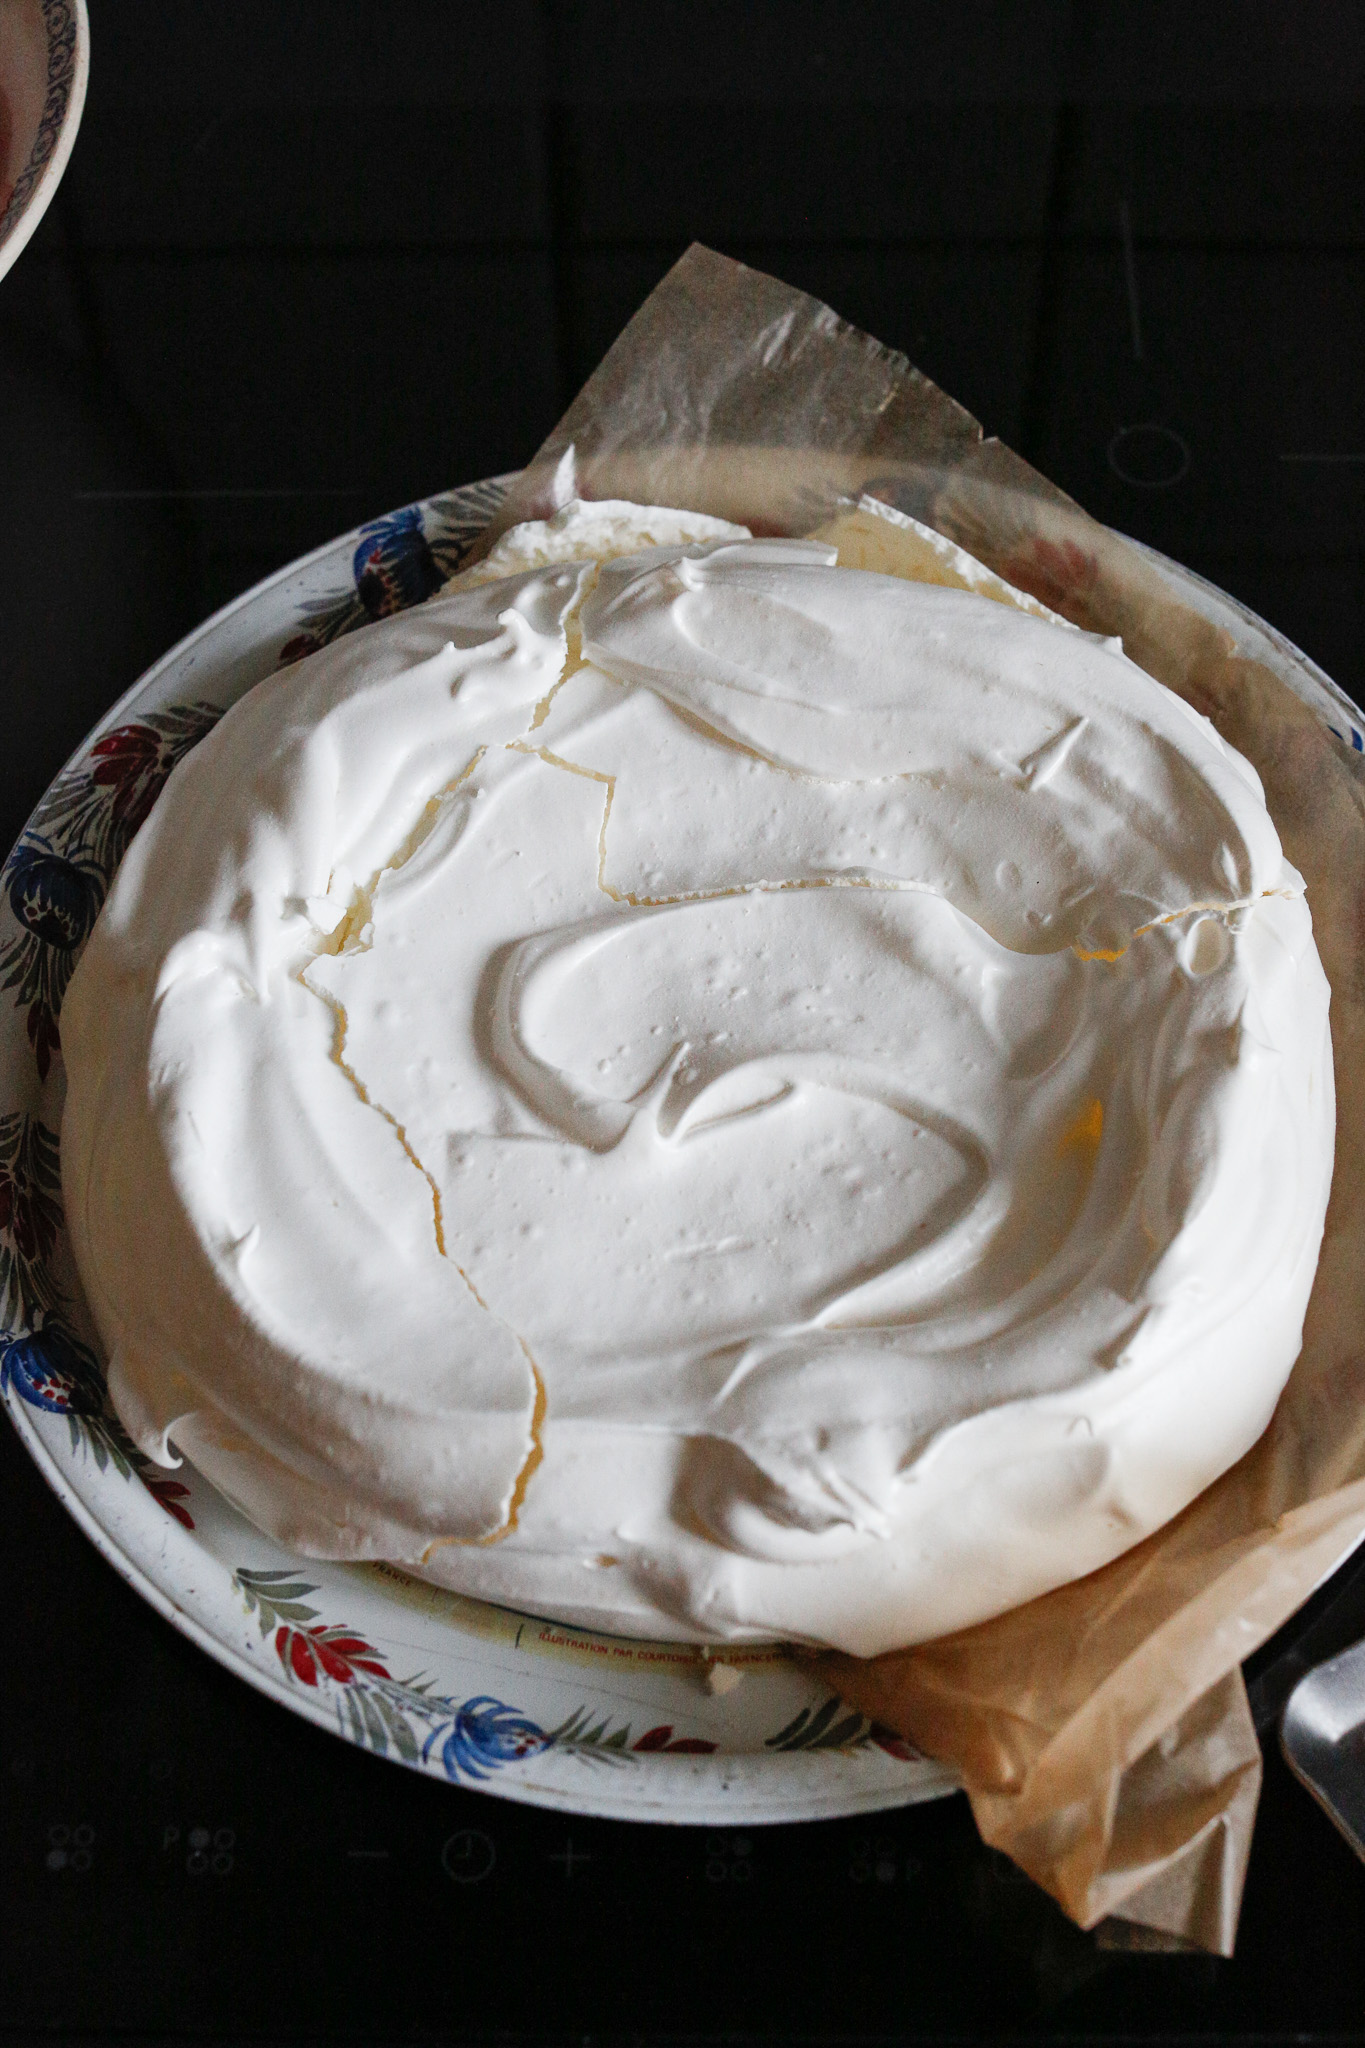
This one started cracking when I tried to move it so I slid it from the tray onto my serving plate (tray) and I cut around the parchment paper and left it as is.
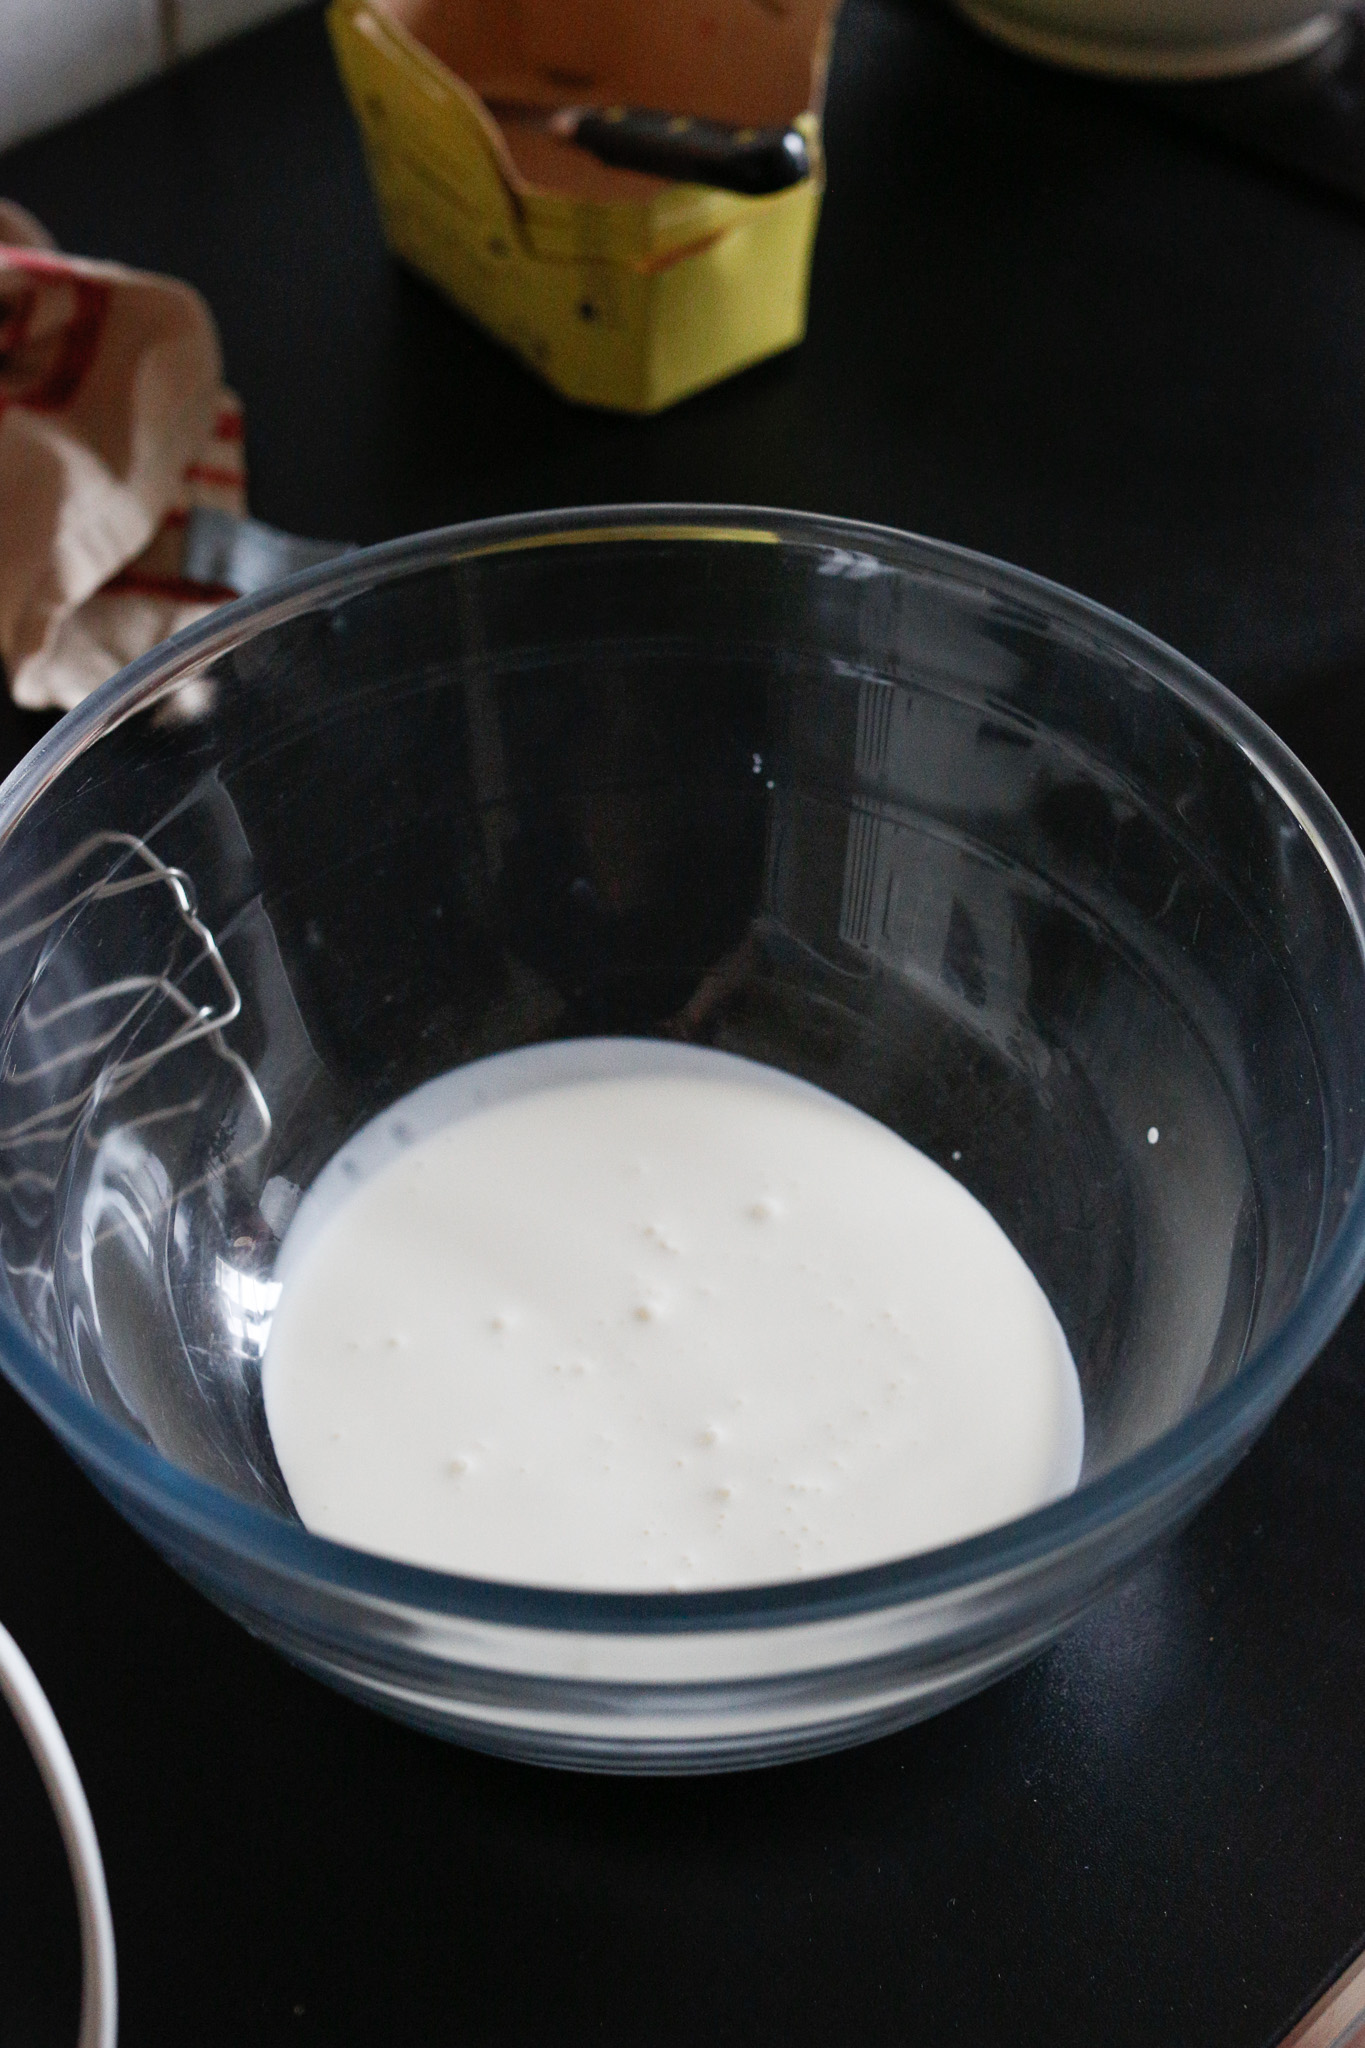
While you allow your meringue to settle into the serving platter to cool completely make your whip cream. Make sure your bowl is clean, dry and deep enough.
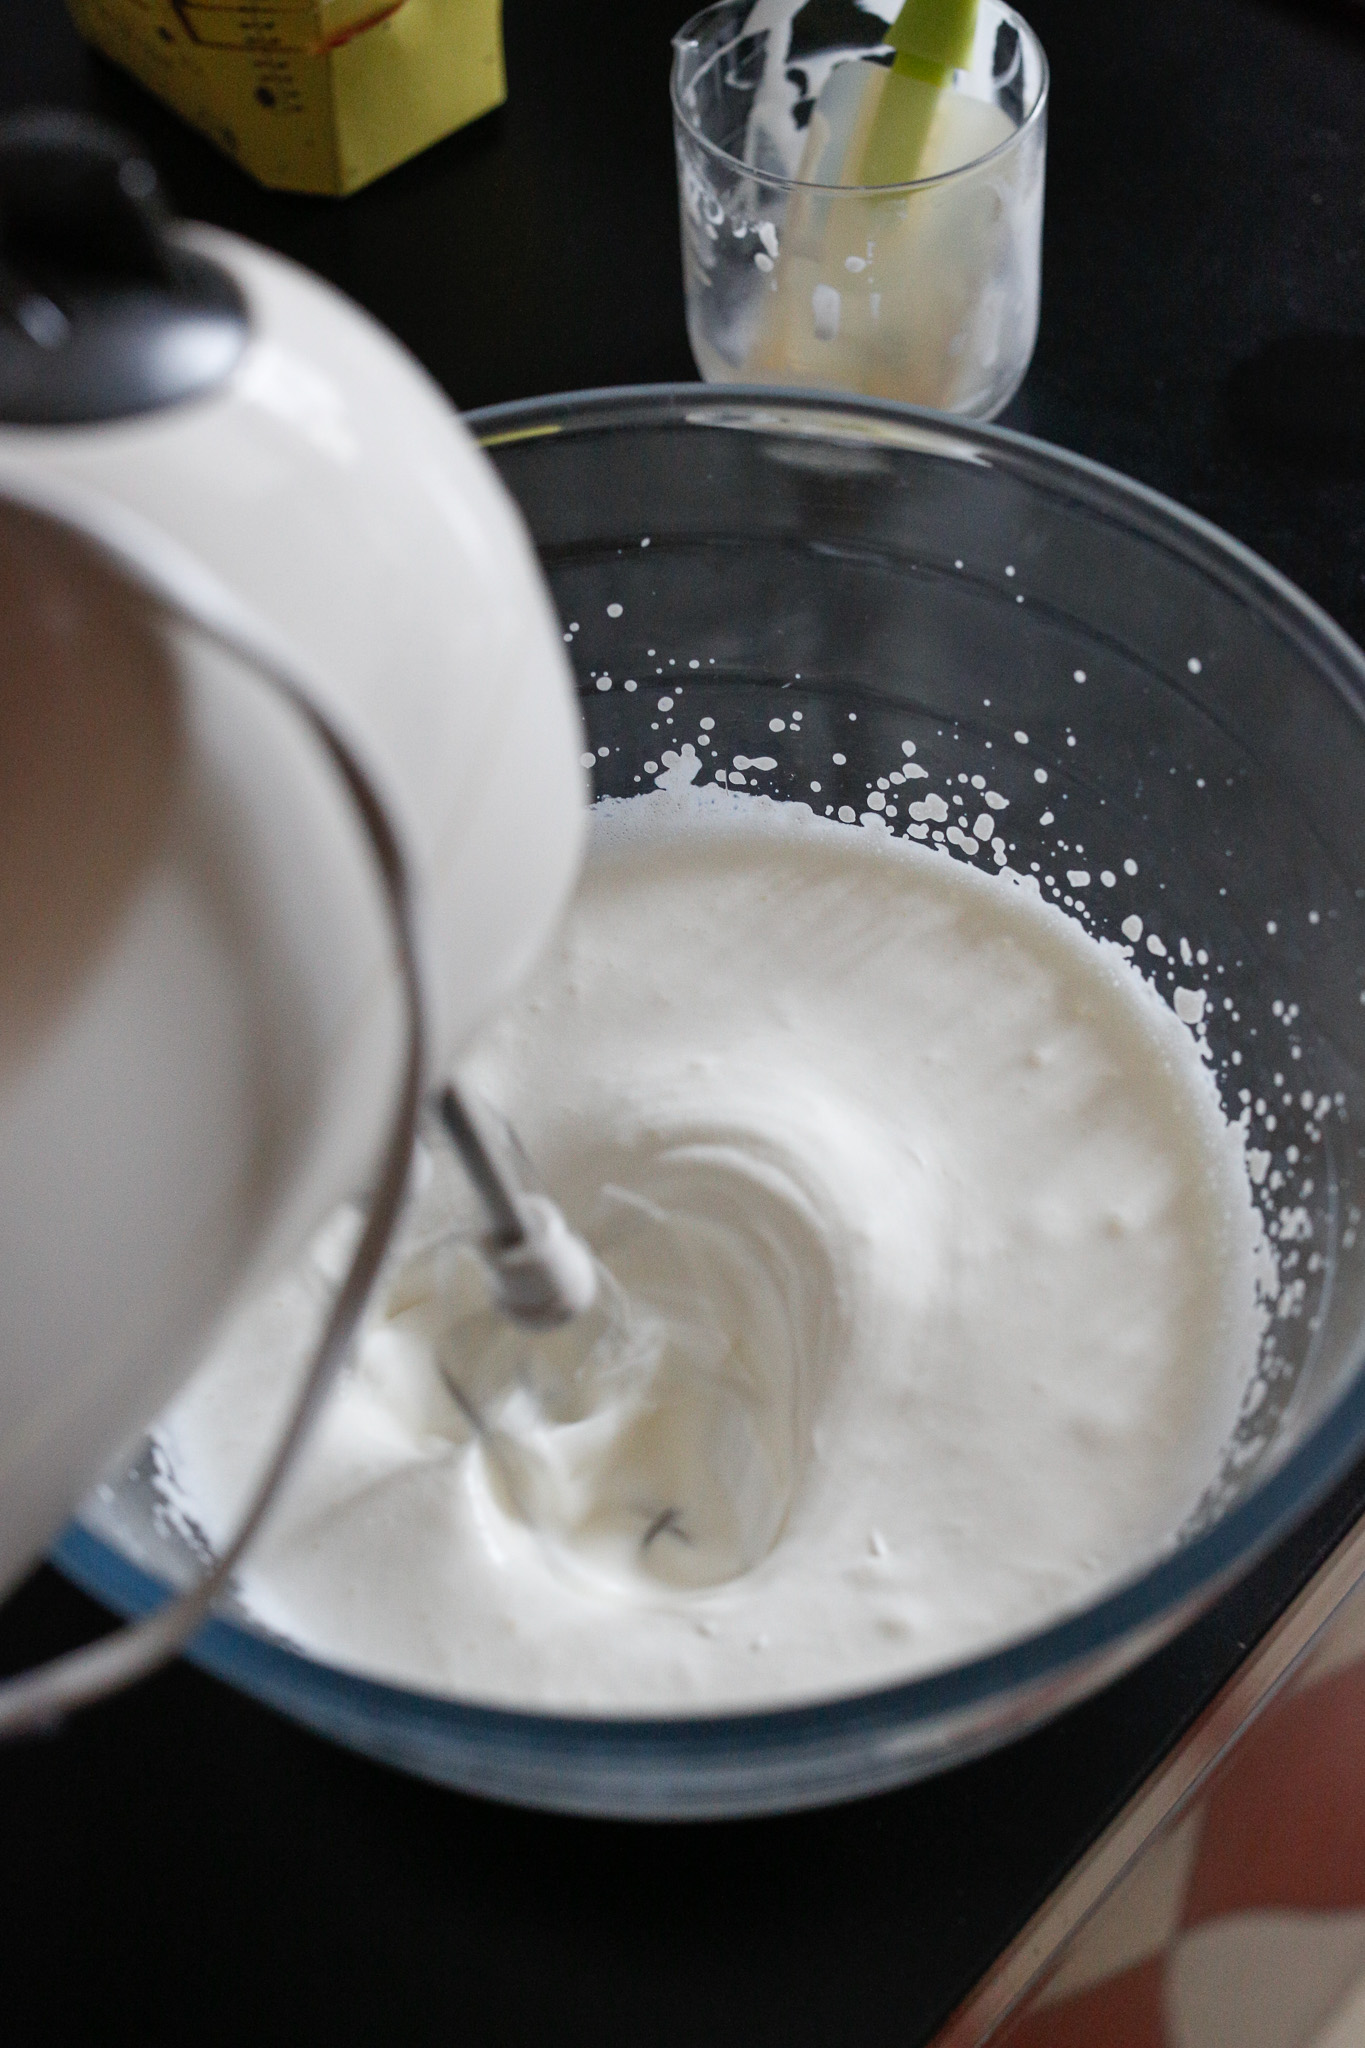
When you start beating your cream on low it may fly out a bit so just be prepared or have a towel around the beater to act as a cover.
As the cream starts to thicken you may increase the speed slowly. After each increase, let it beat for 30s to 1min before increasing again.
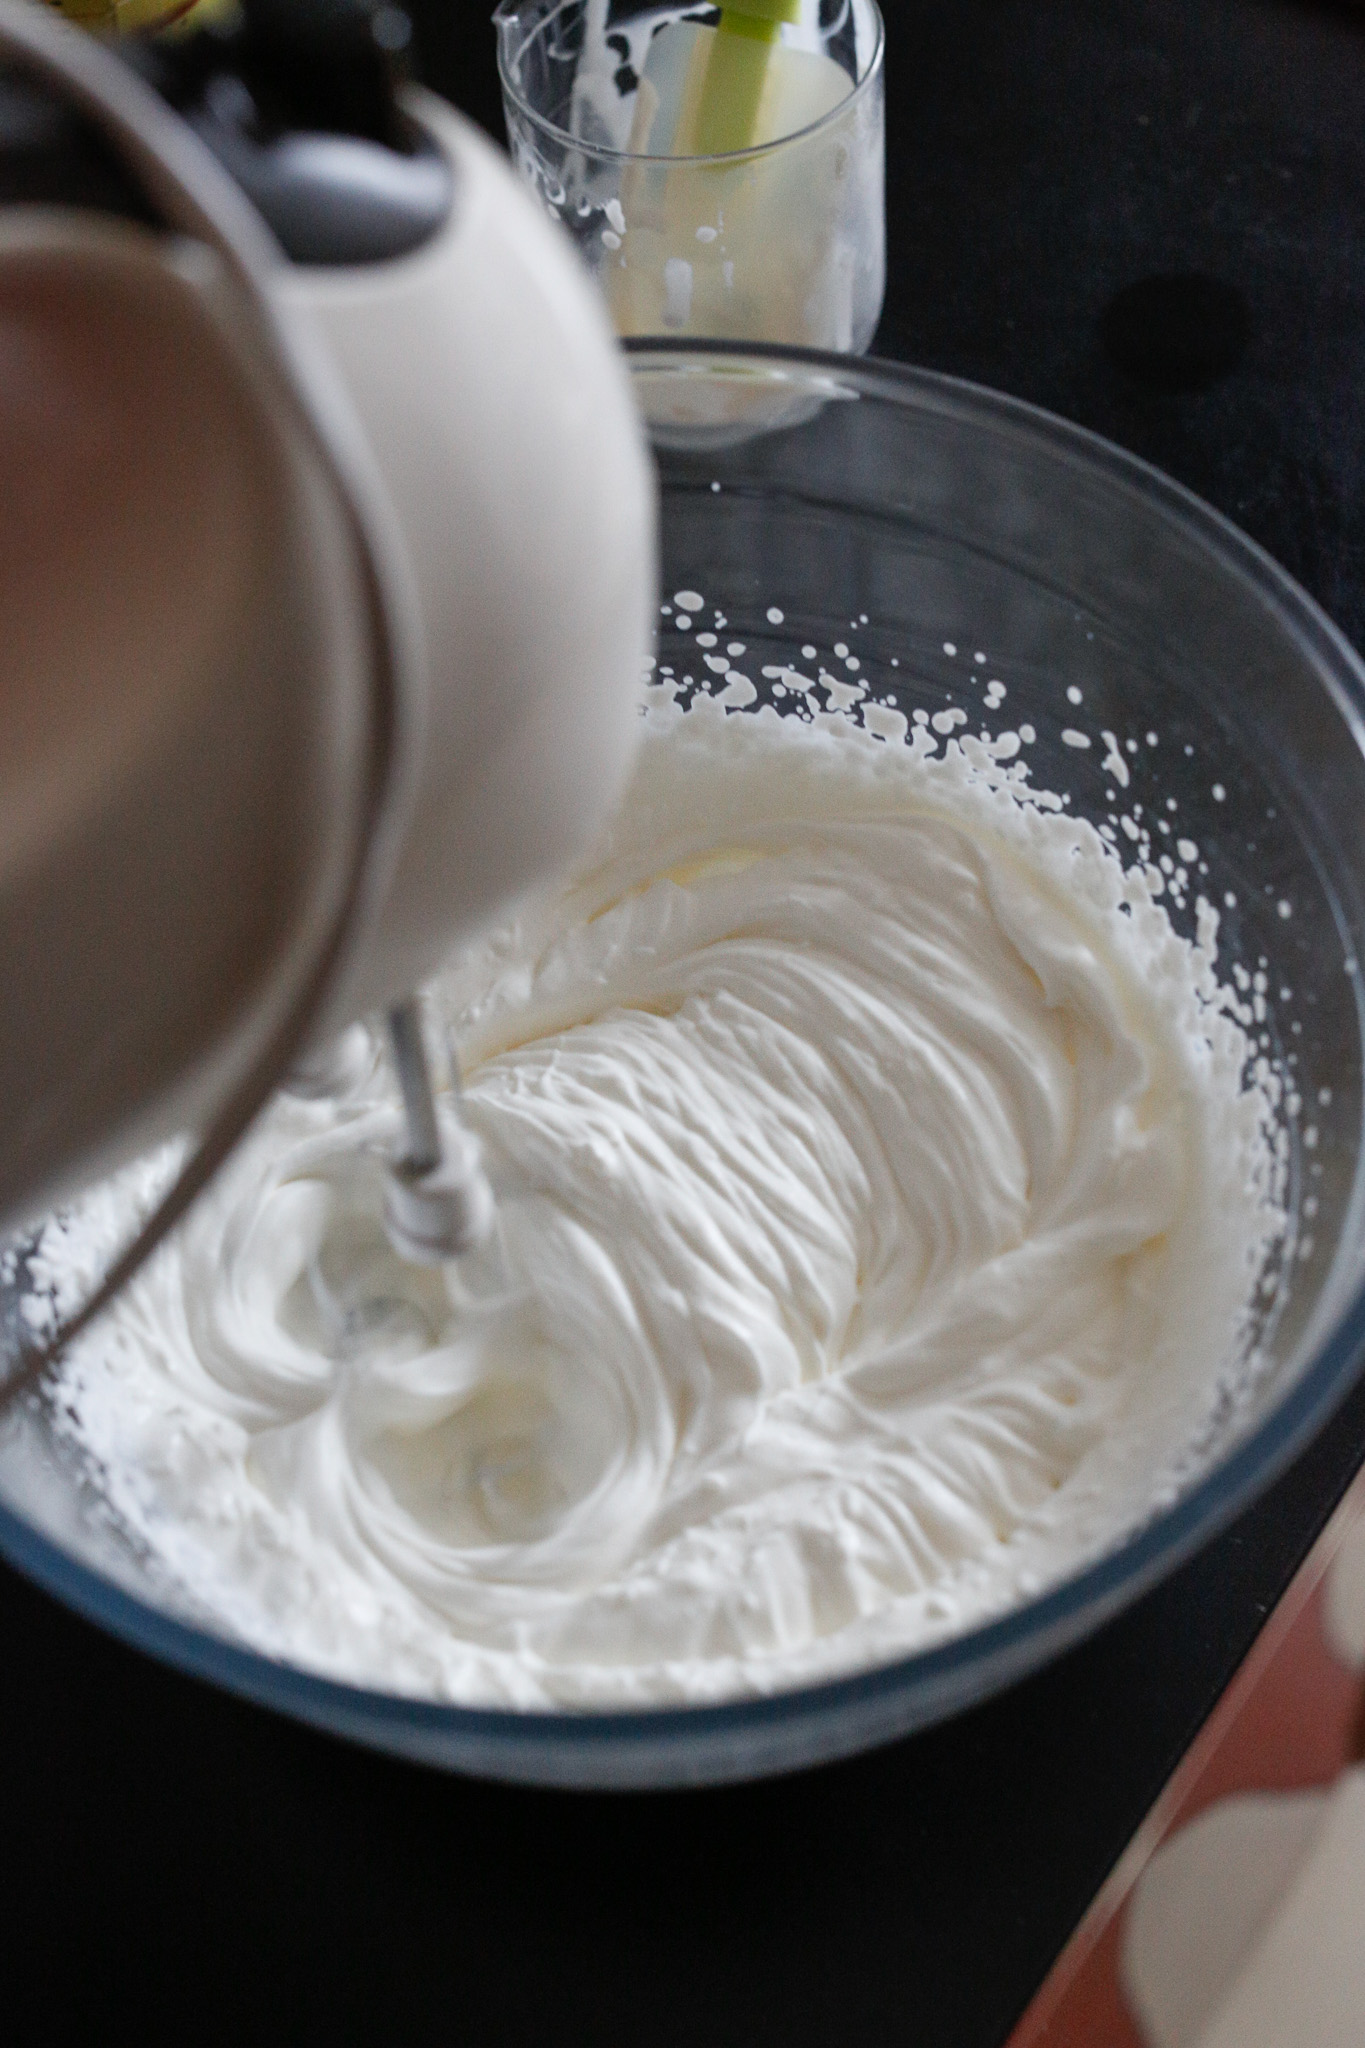
When your cream starts to get pretty thick and make nice waves like this be on guard because it can easily "turn" and get lumpy - this is when it starts going into the stage of butter.
It does take some practice to beat the cream as far as it can go without reaching the point of no return. It should look like this and feel thick.
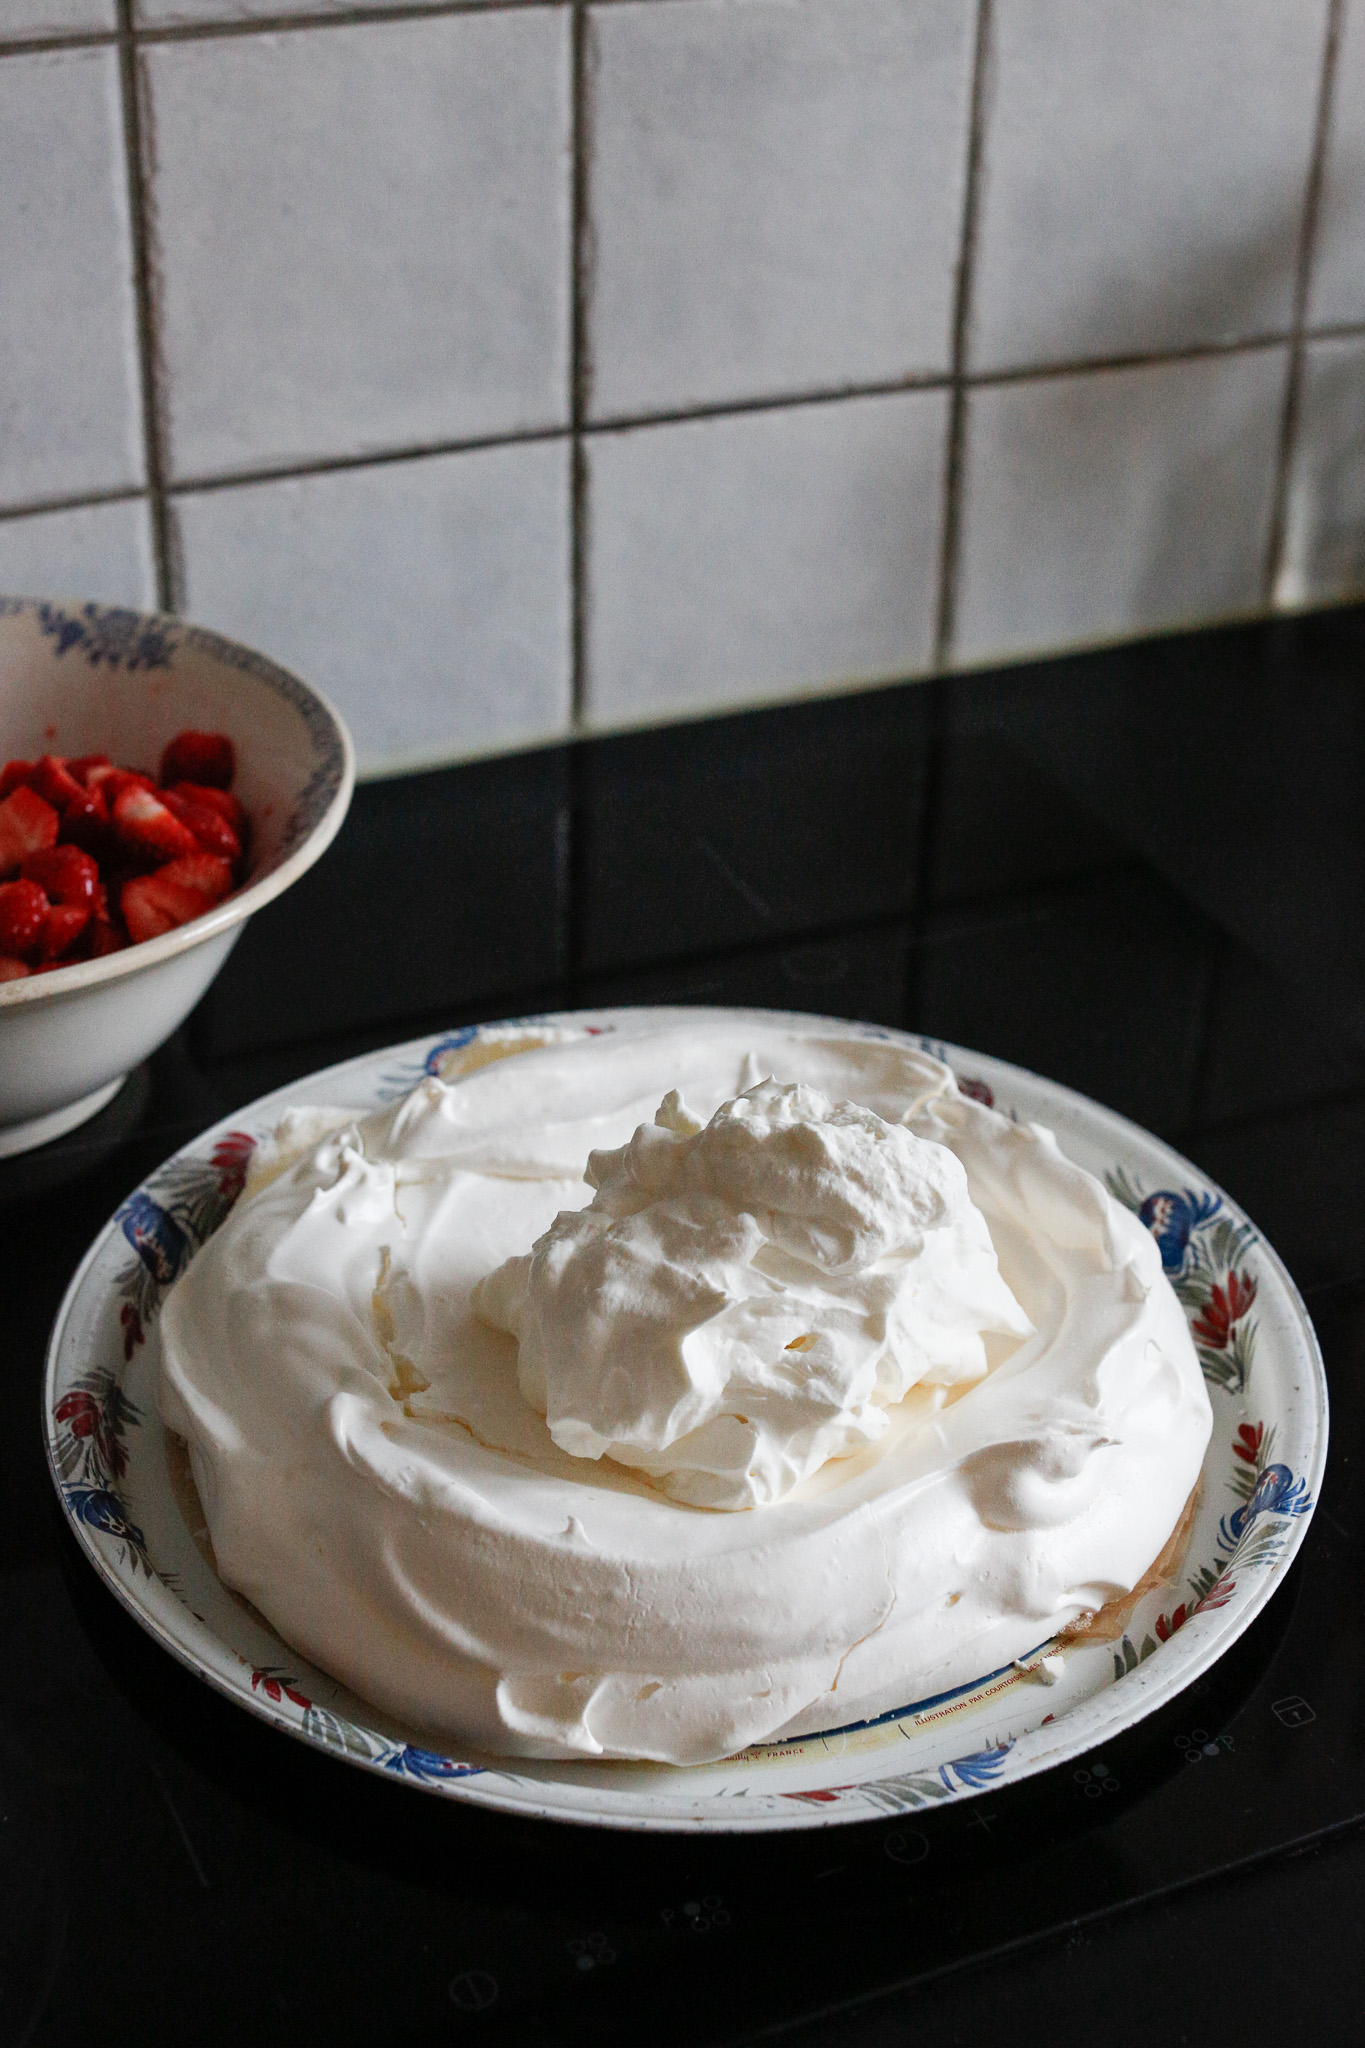
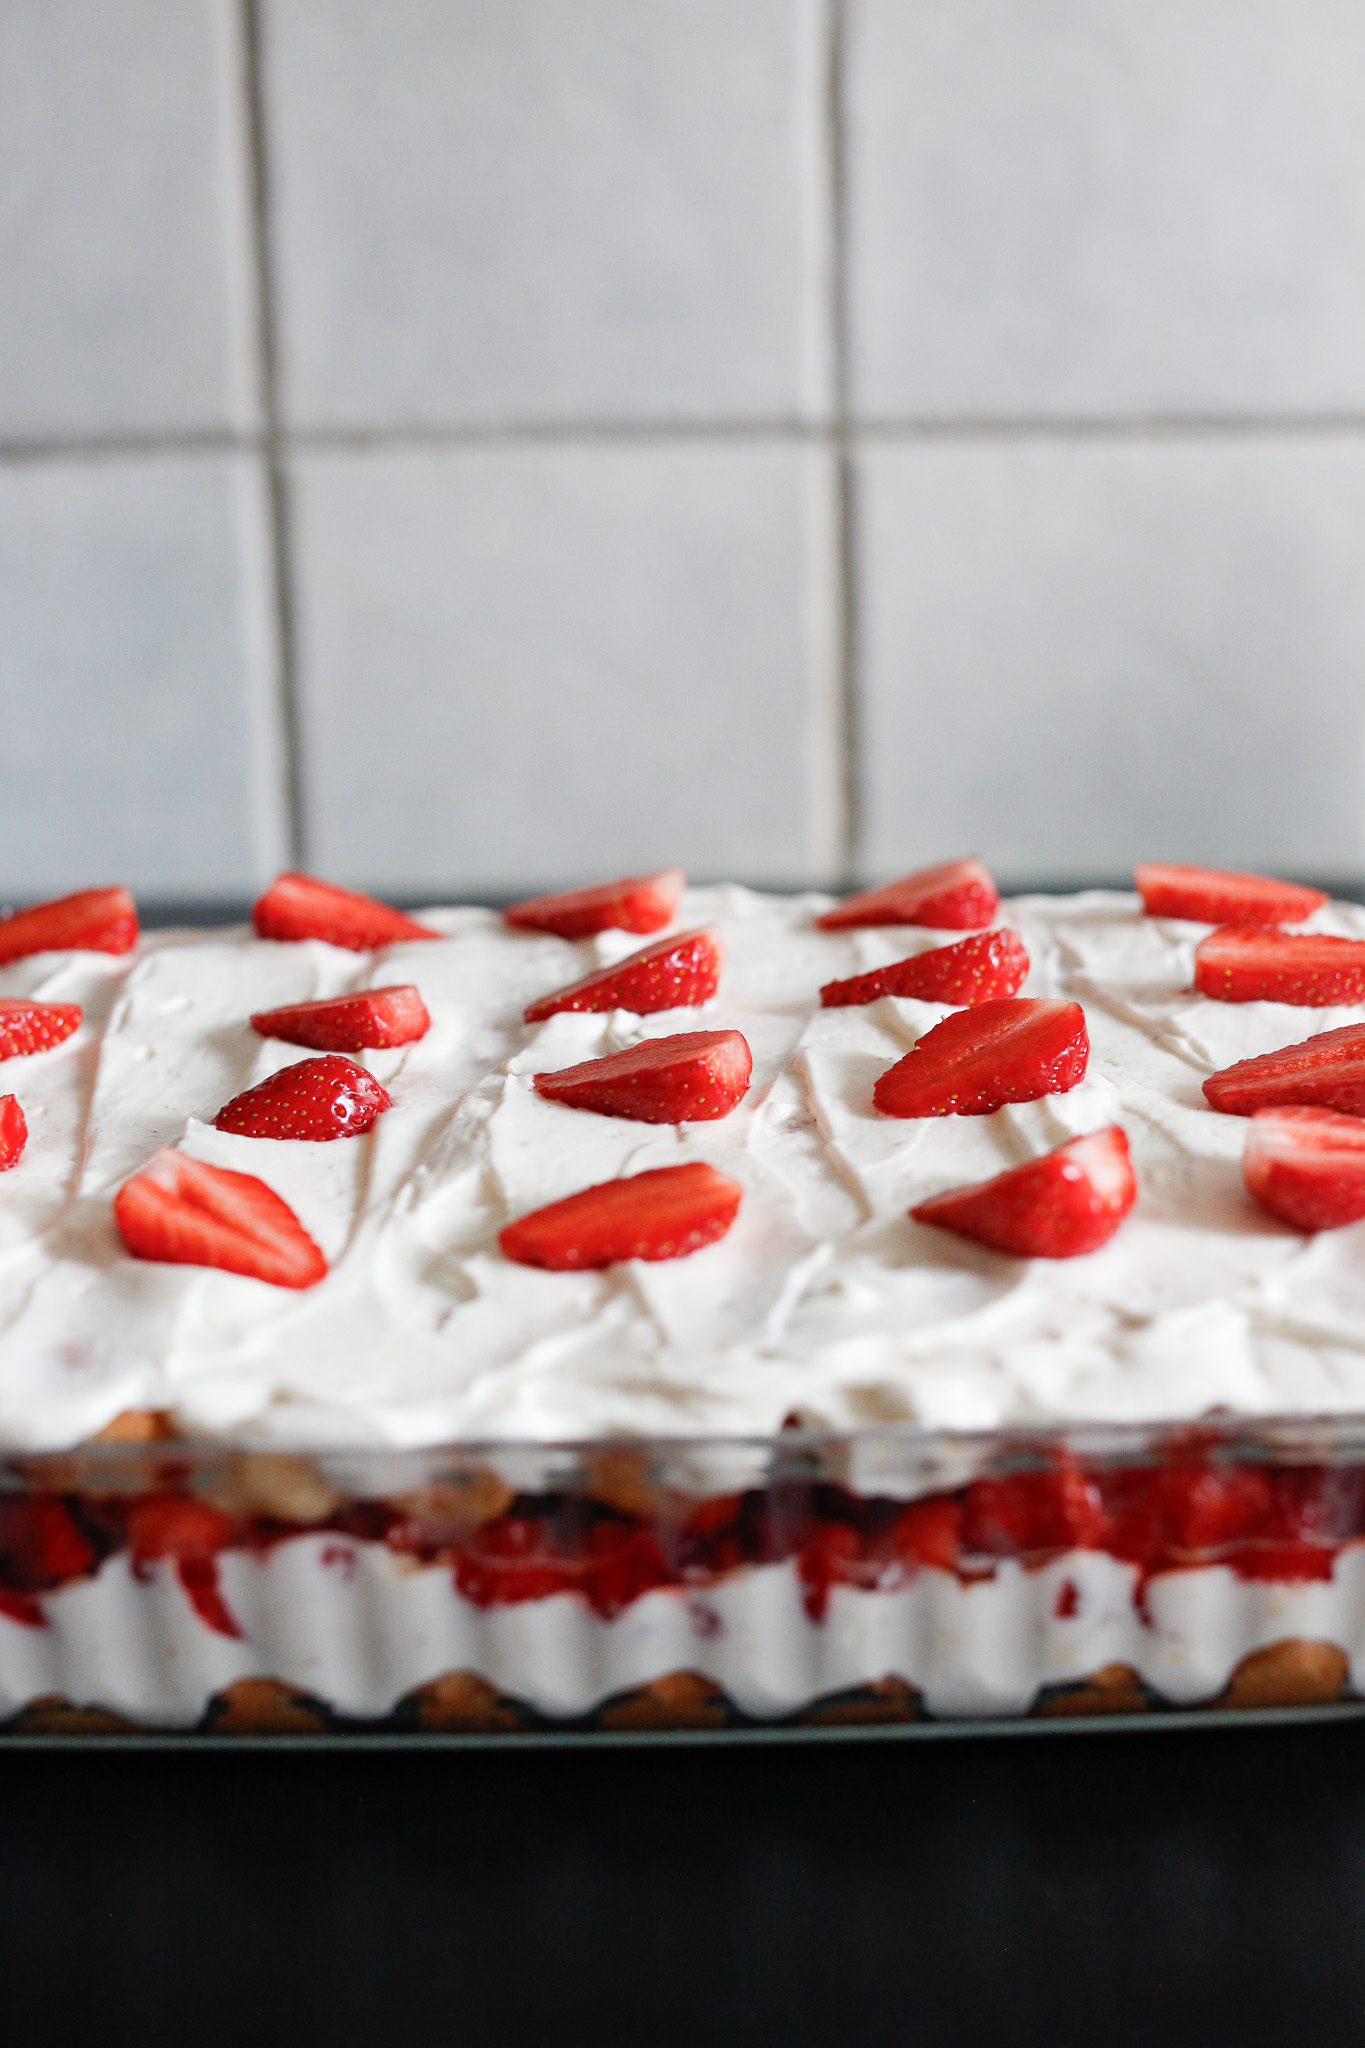
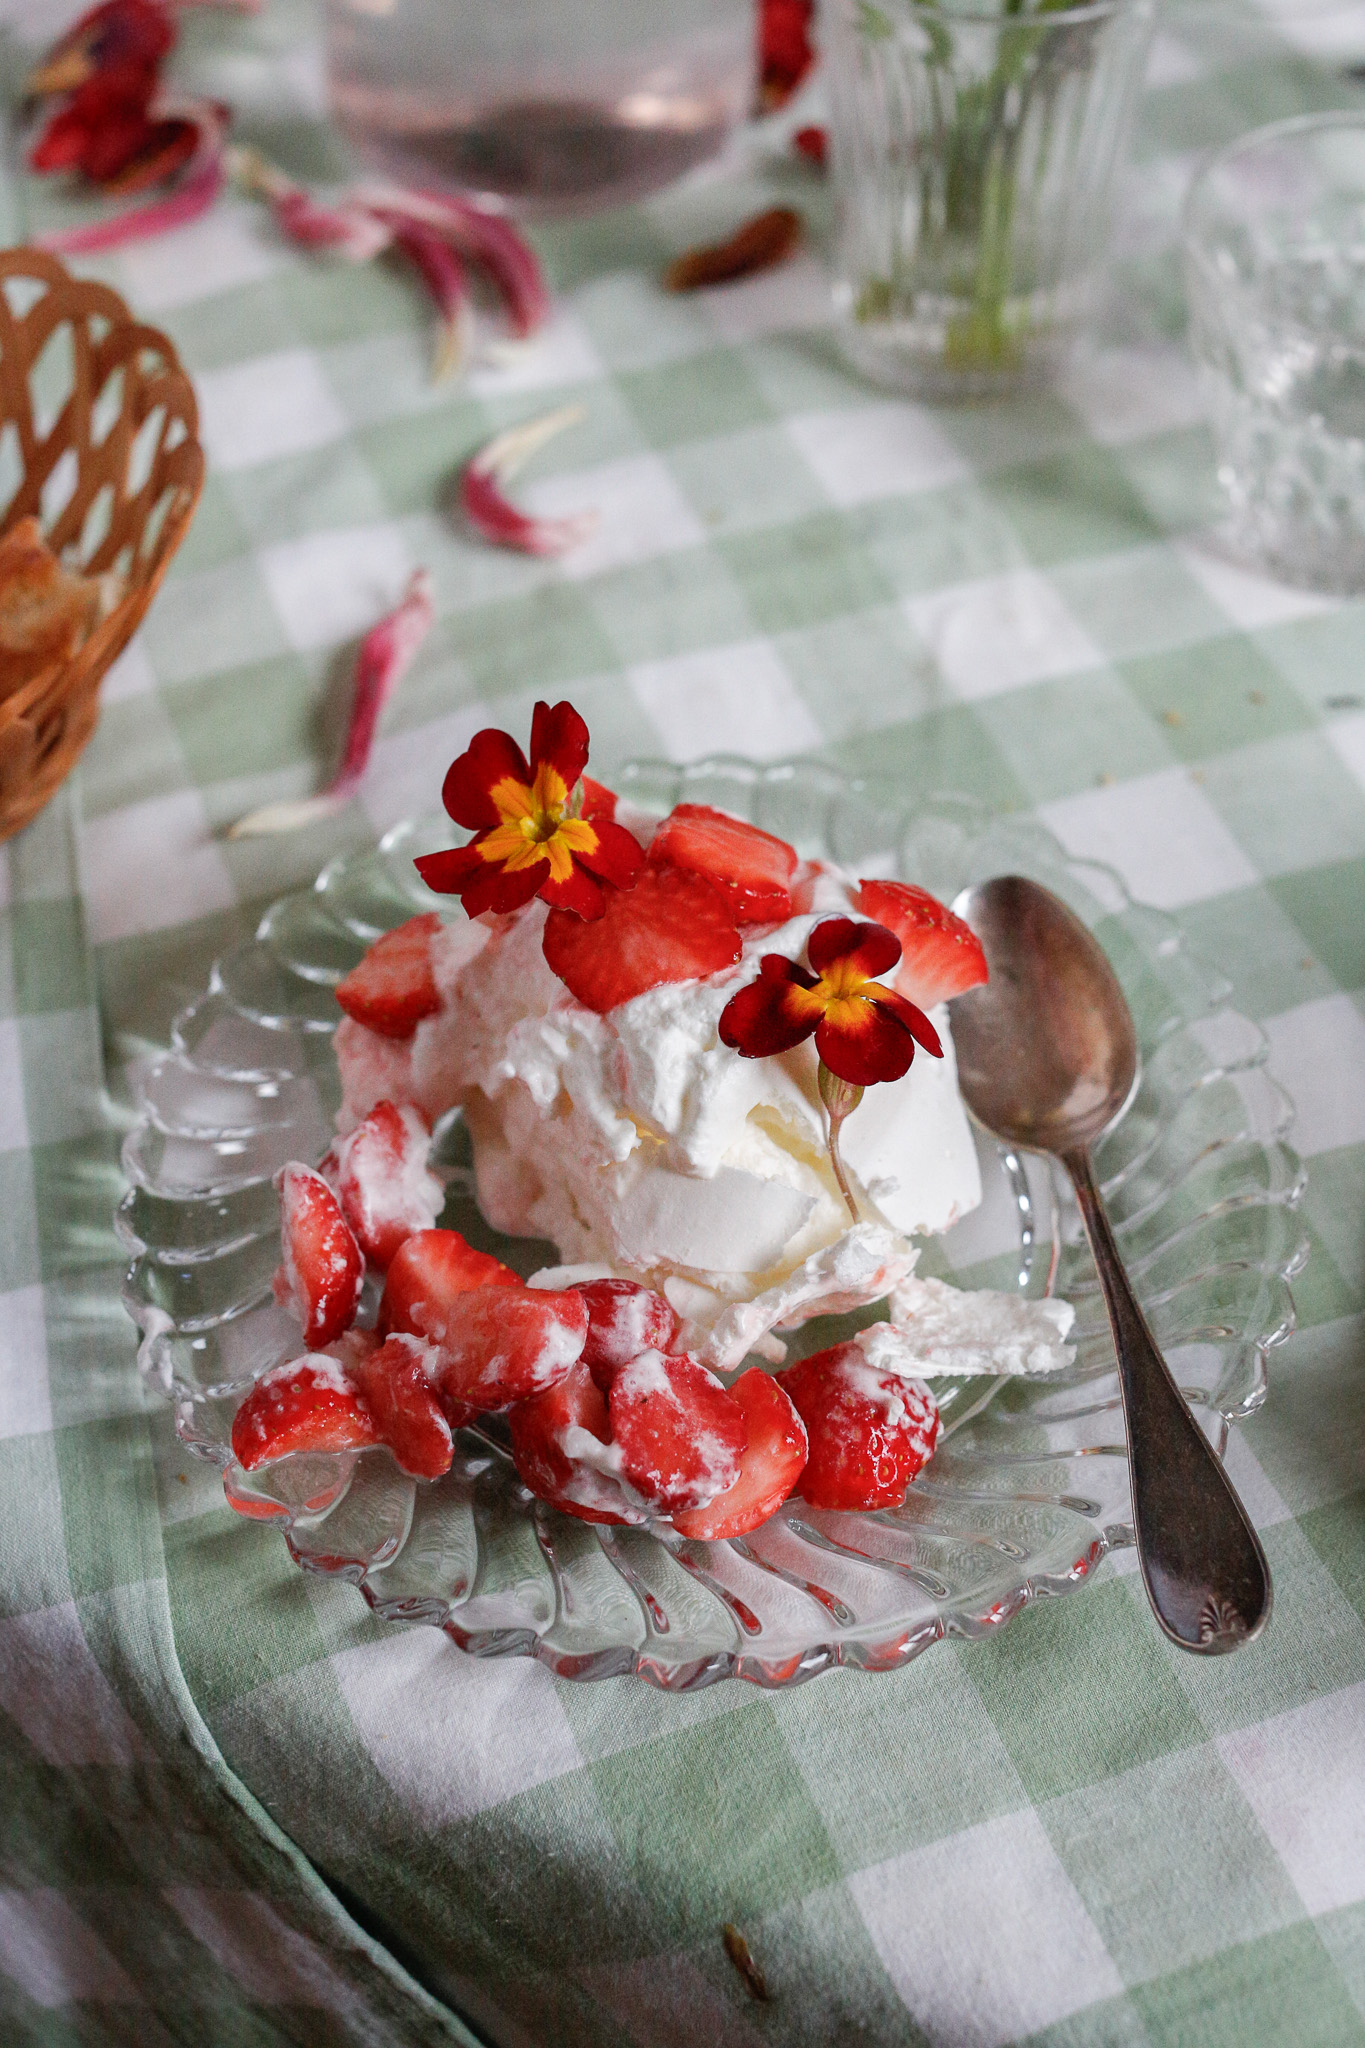
Once your meringue is completely cooled add on your freshly whipped cream.
Spread it out to the edges of your meringue.
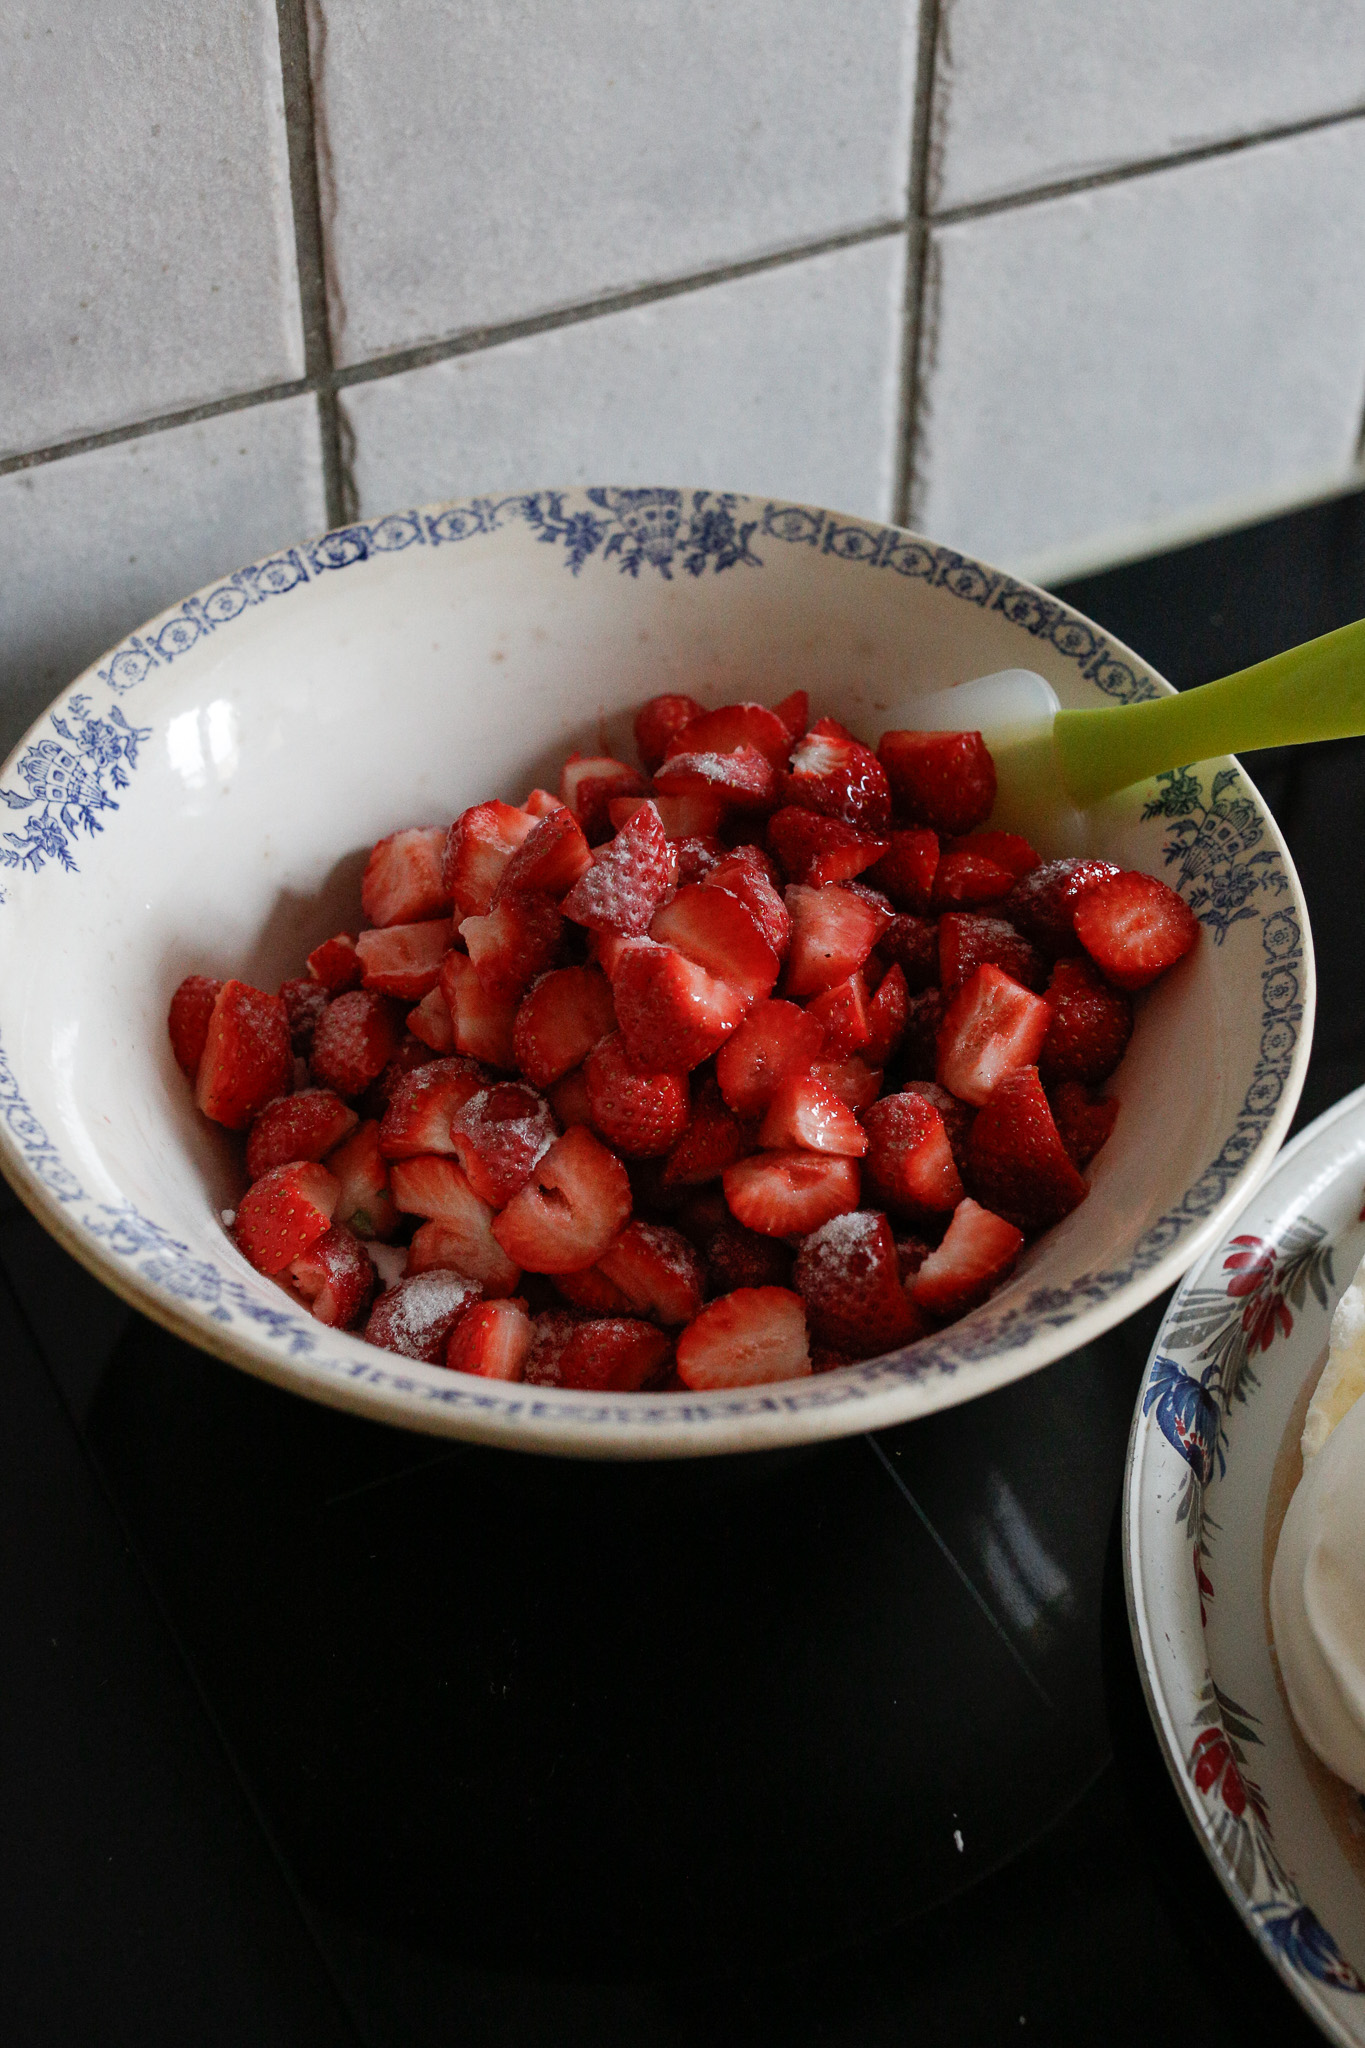
I always sweeten my strawberries a touch. I do this at the last minute because the sugar breaks them down a bit. Make sure to fold them over themselves with a rubber spatula so that you don't smash them.
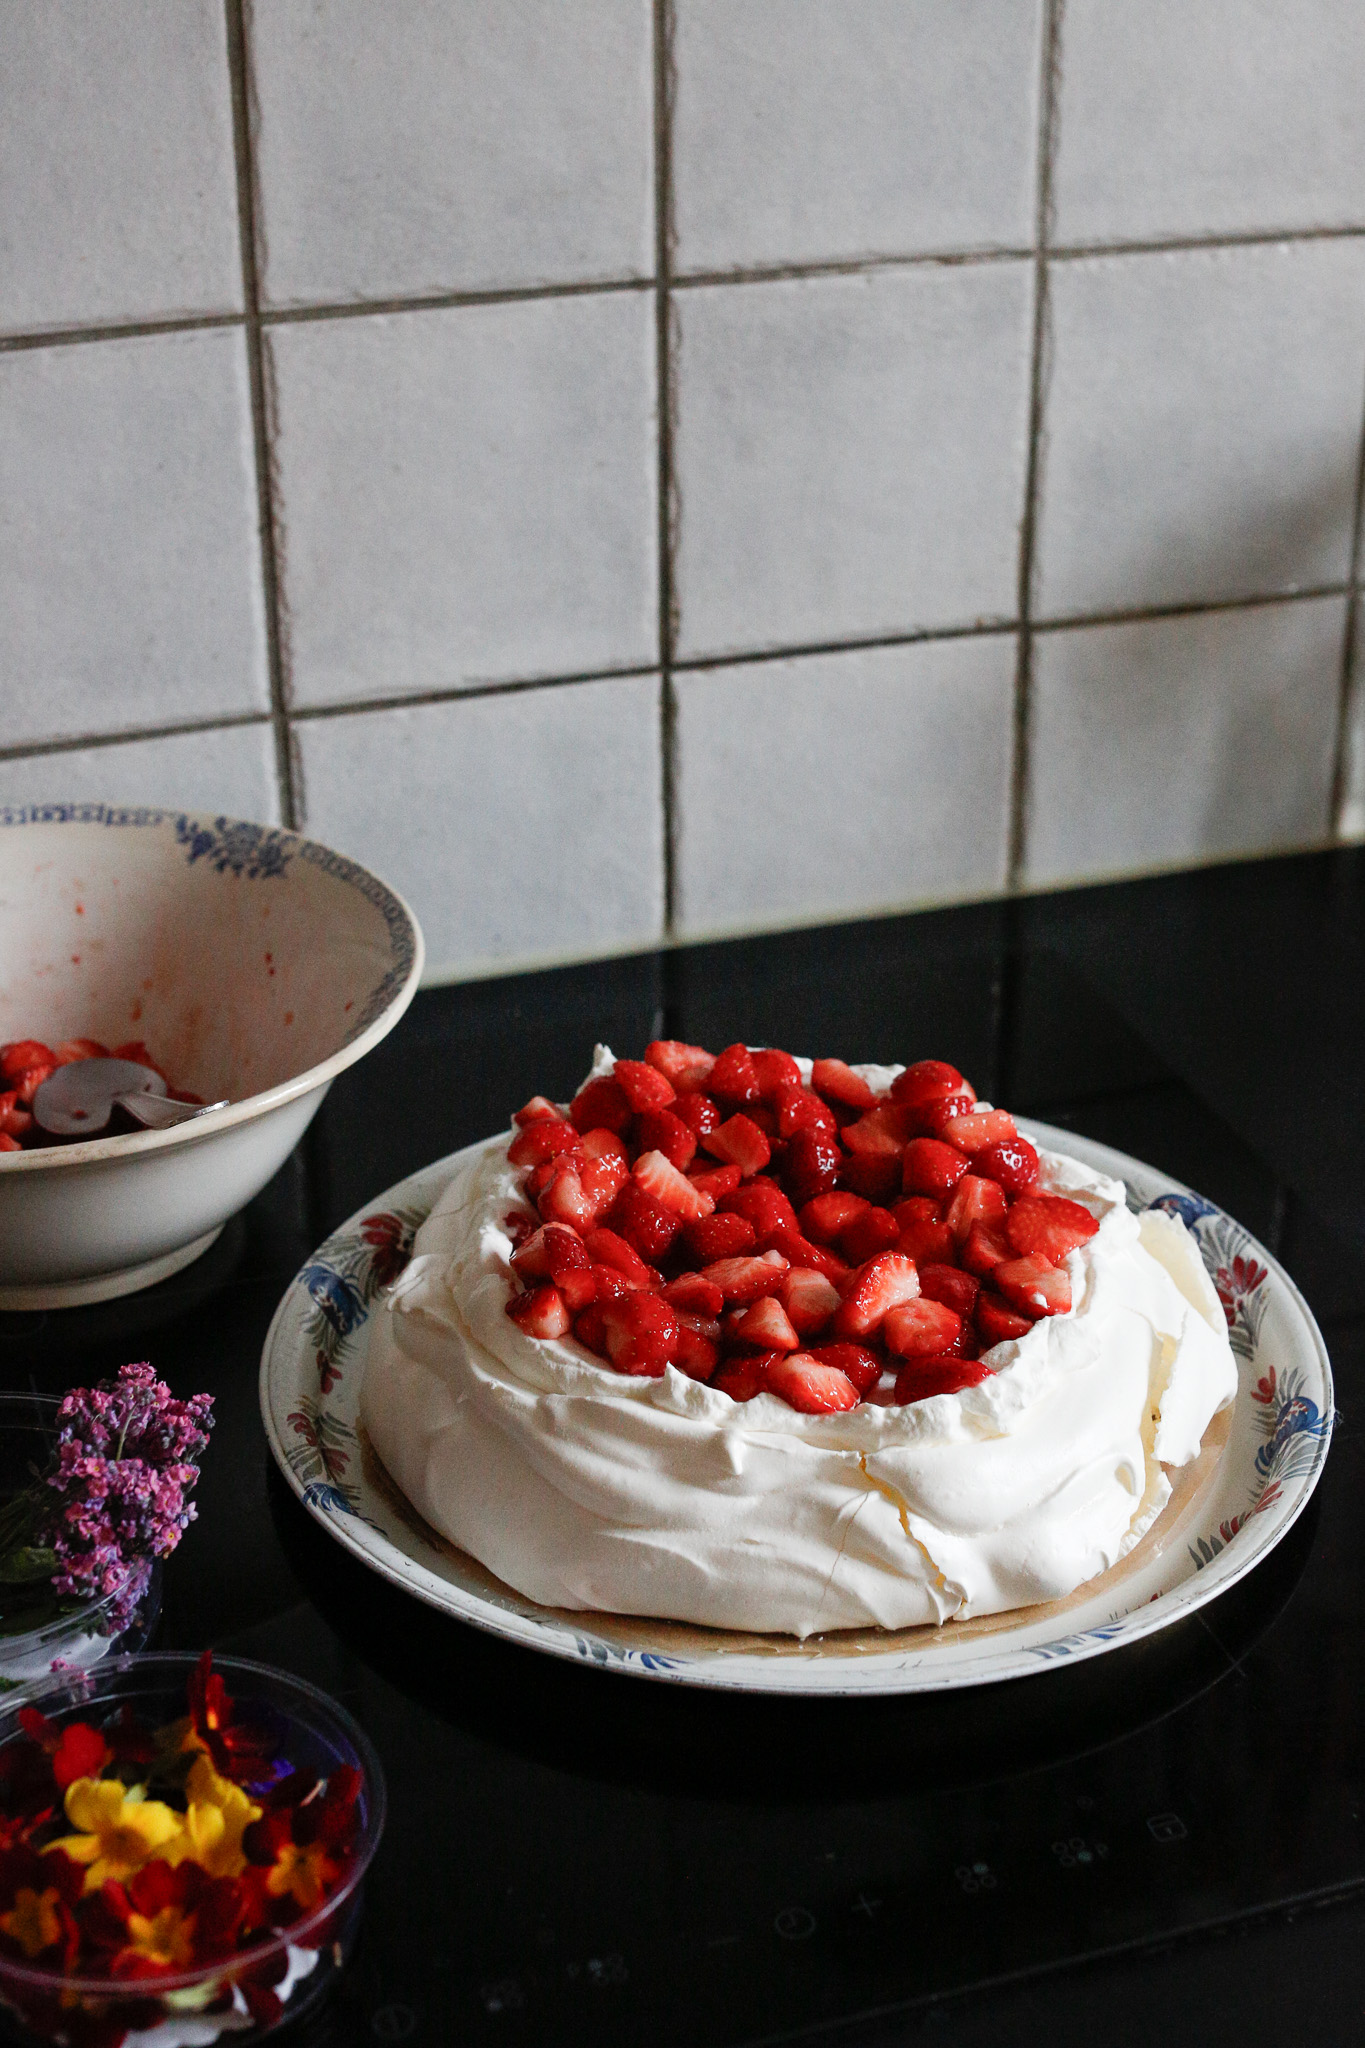
Add your strawberries. You could just keep them in the center like this, keep piling them on and let them "spill over" to give you a rustic look.
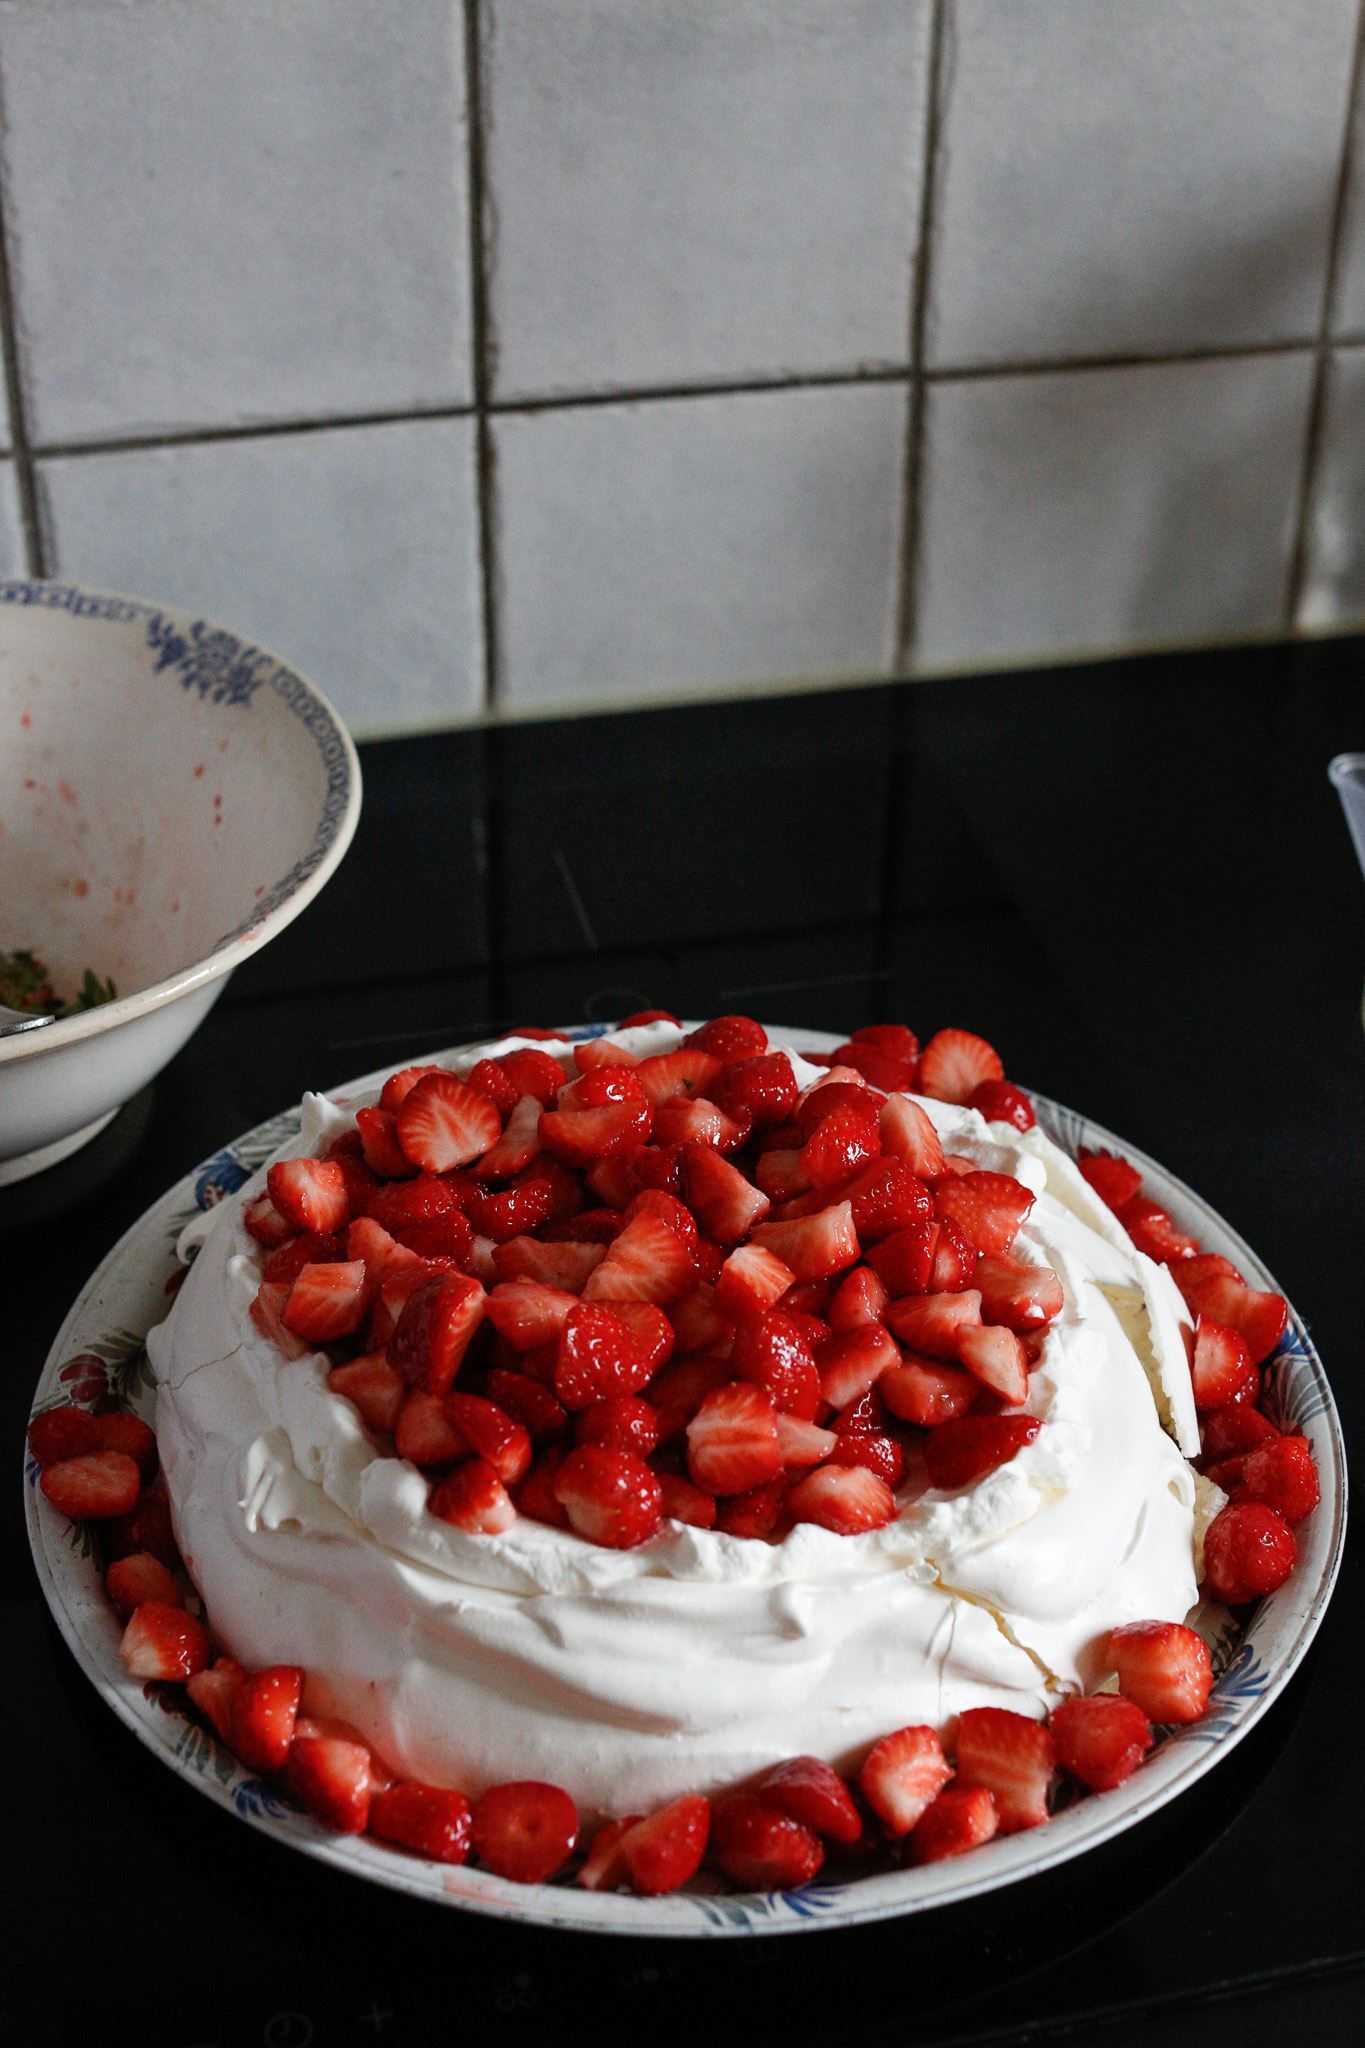
I chose to do an old fashioned style like my grandma would have done. Decorating around the platter. I love doing things in the kitchen that remind of people I love, like this.
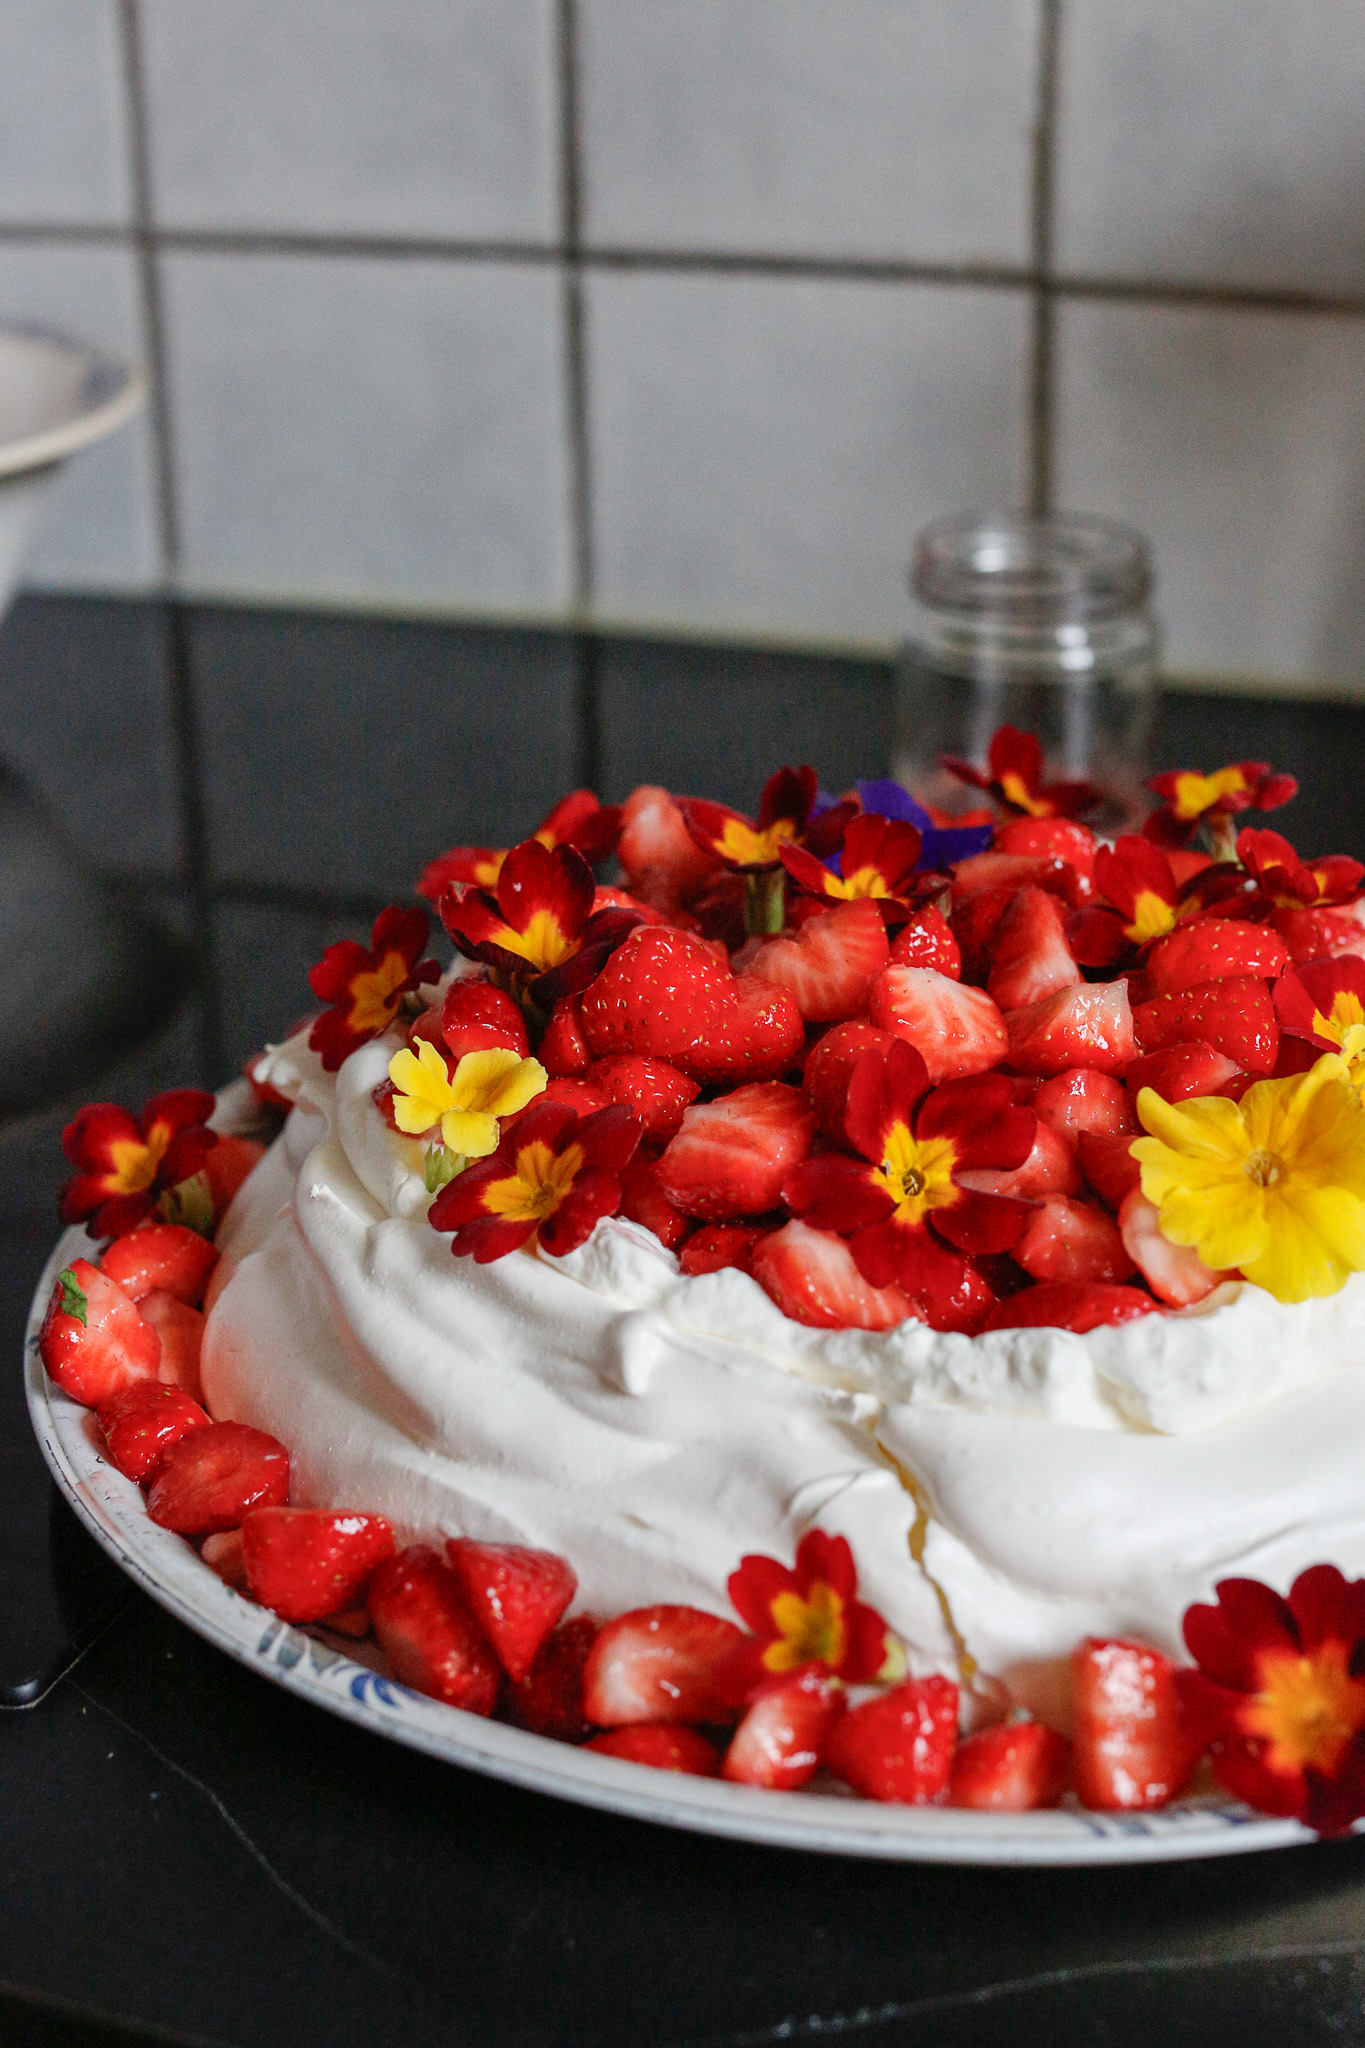
I had gotten some edible flowers for this Pavlova so I added those too. My grandma would have never done this!
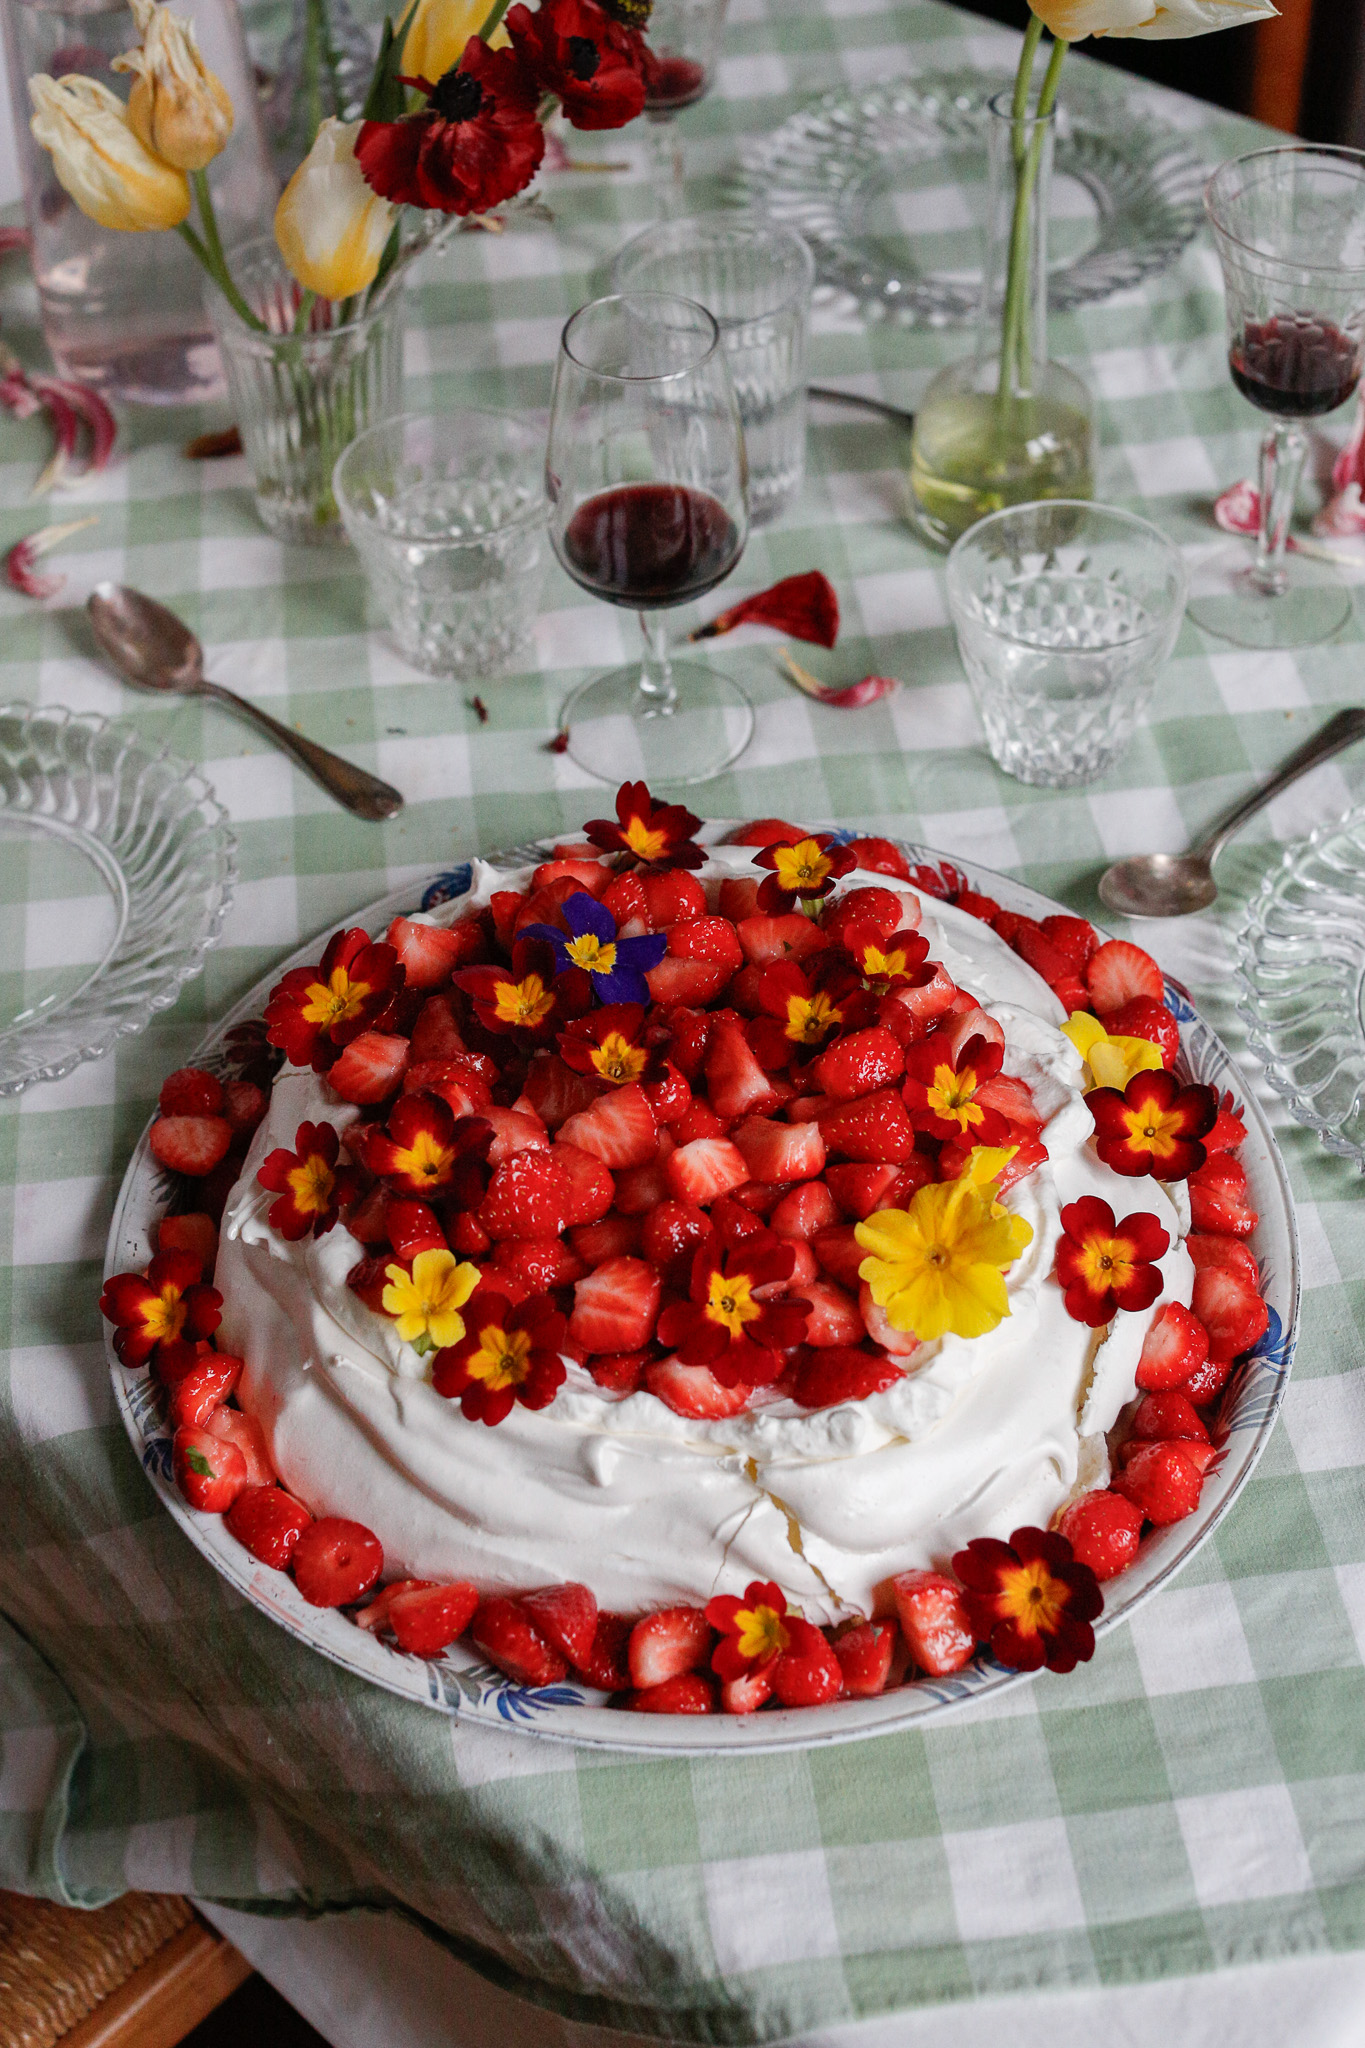
Sheis ready to serve! Your sauce is meant to be served onto each individual slice. So just have it next to you (not shown in photo.)
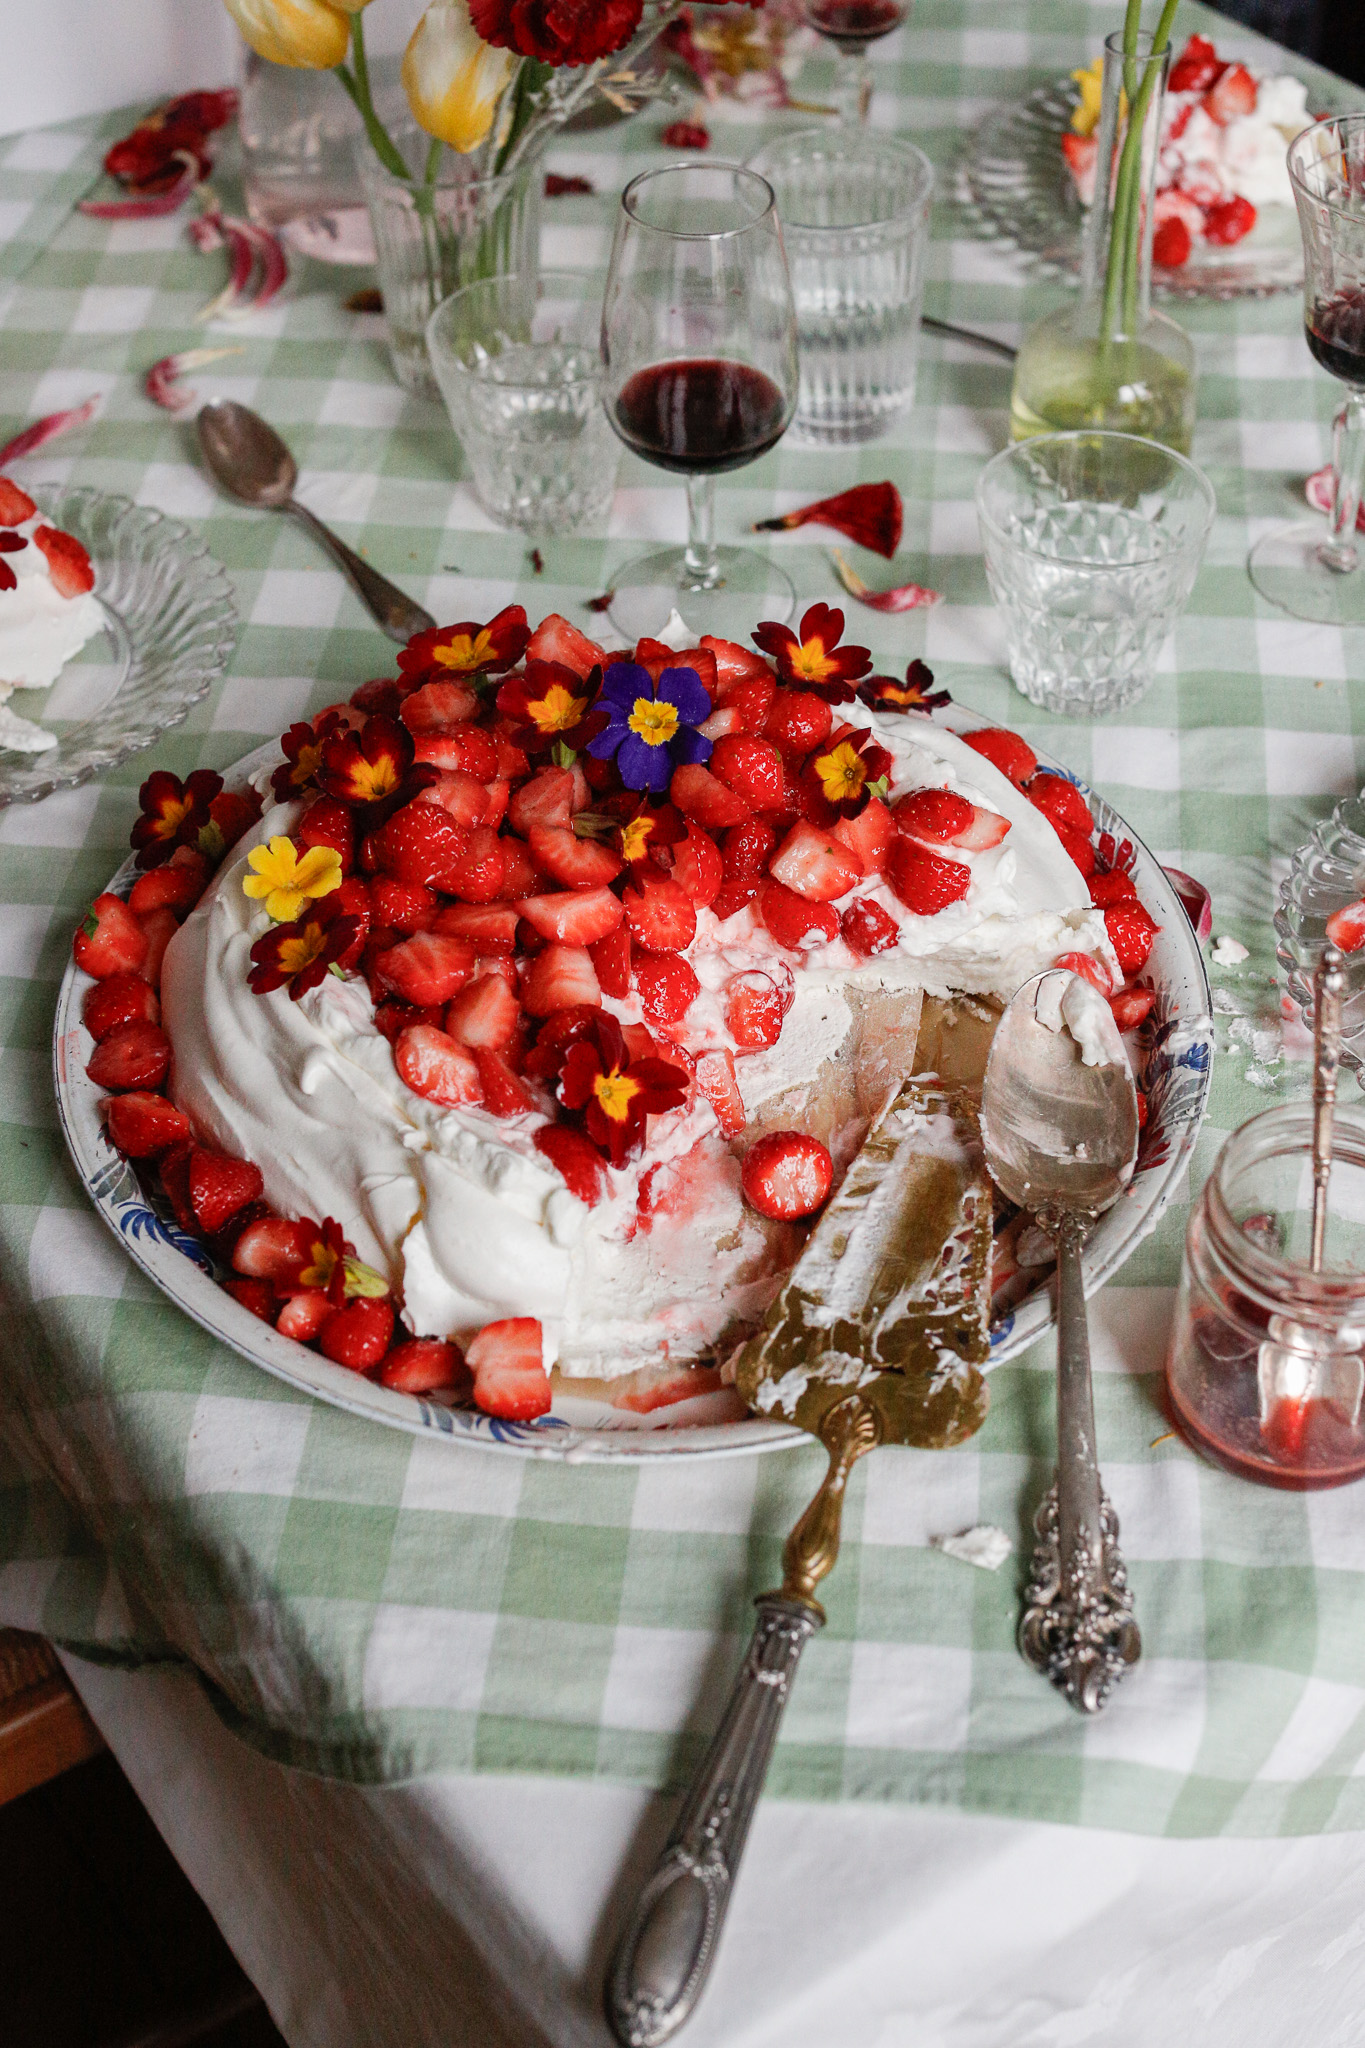
It can be tricky cutting a Pavlova. By the end it's an ugly affair but it's part of it. I find that with a cake knife it works best. If you don't have one you can use a regular knife and a big spoon or spatula. Good luck!
I always ask each guest if they want some Strawberry Pineau sauce before I add it.
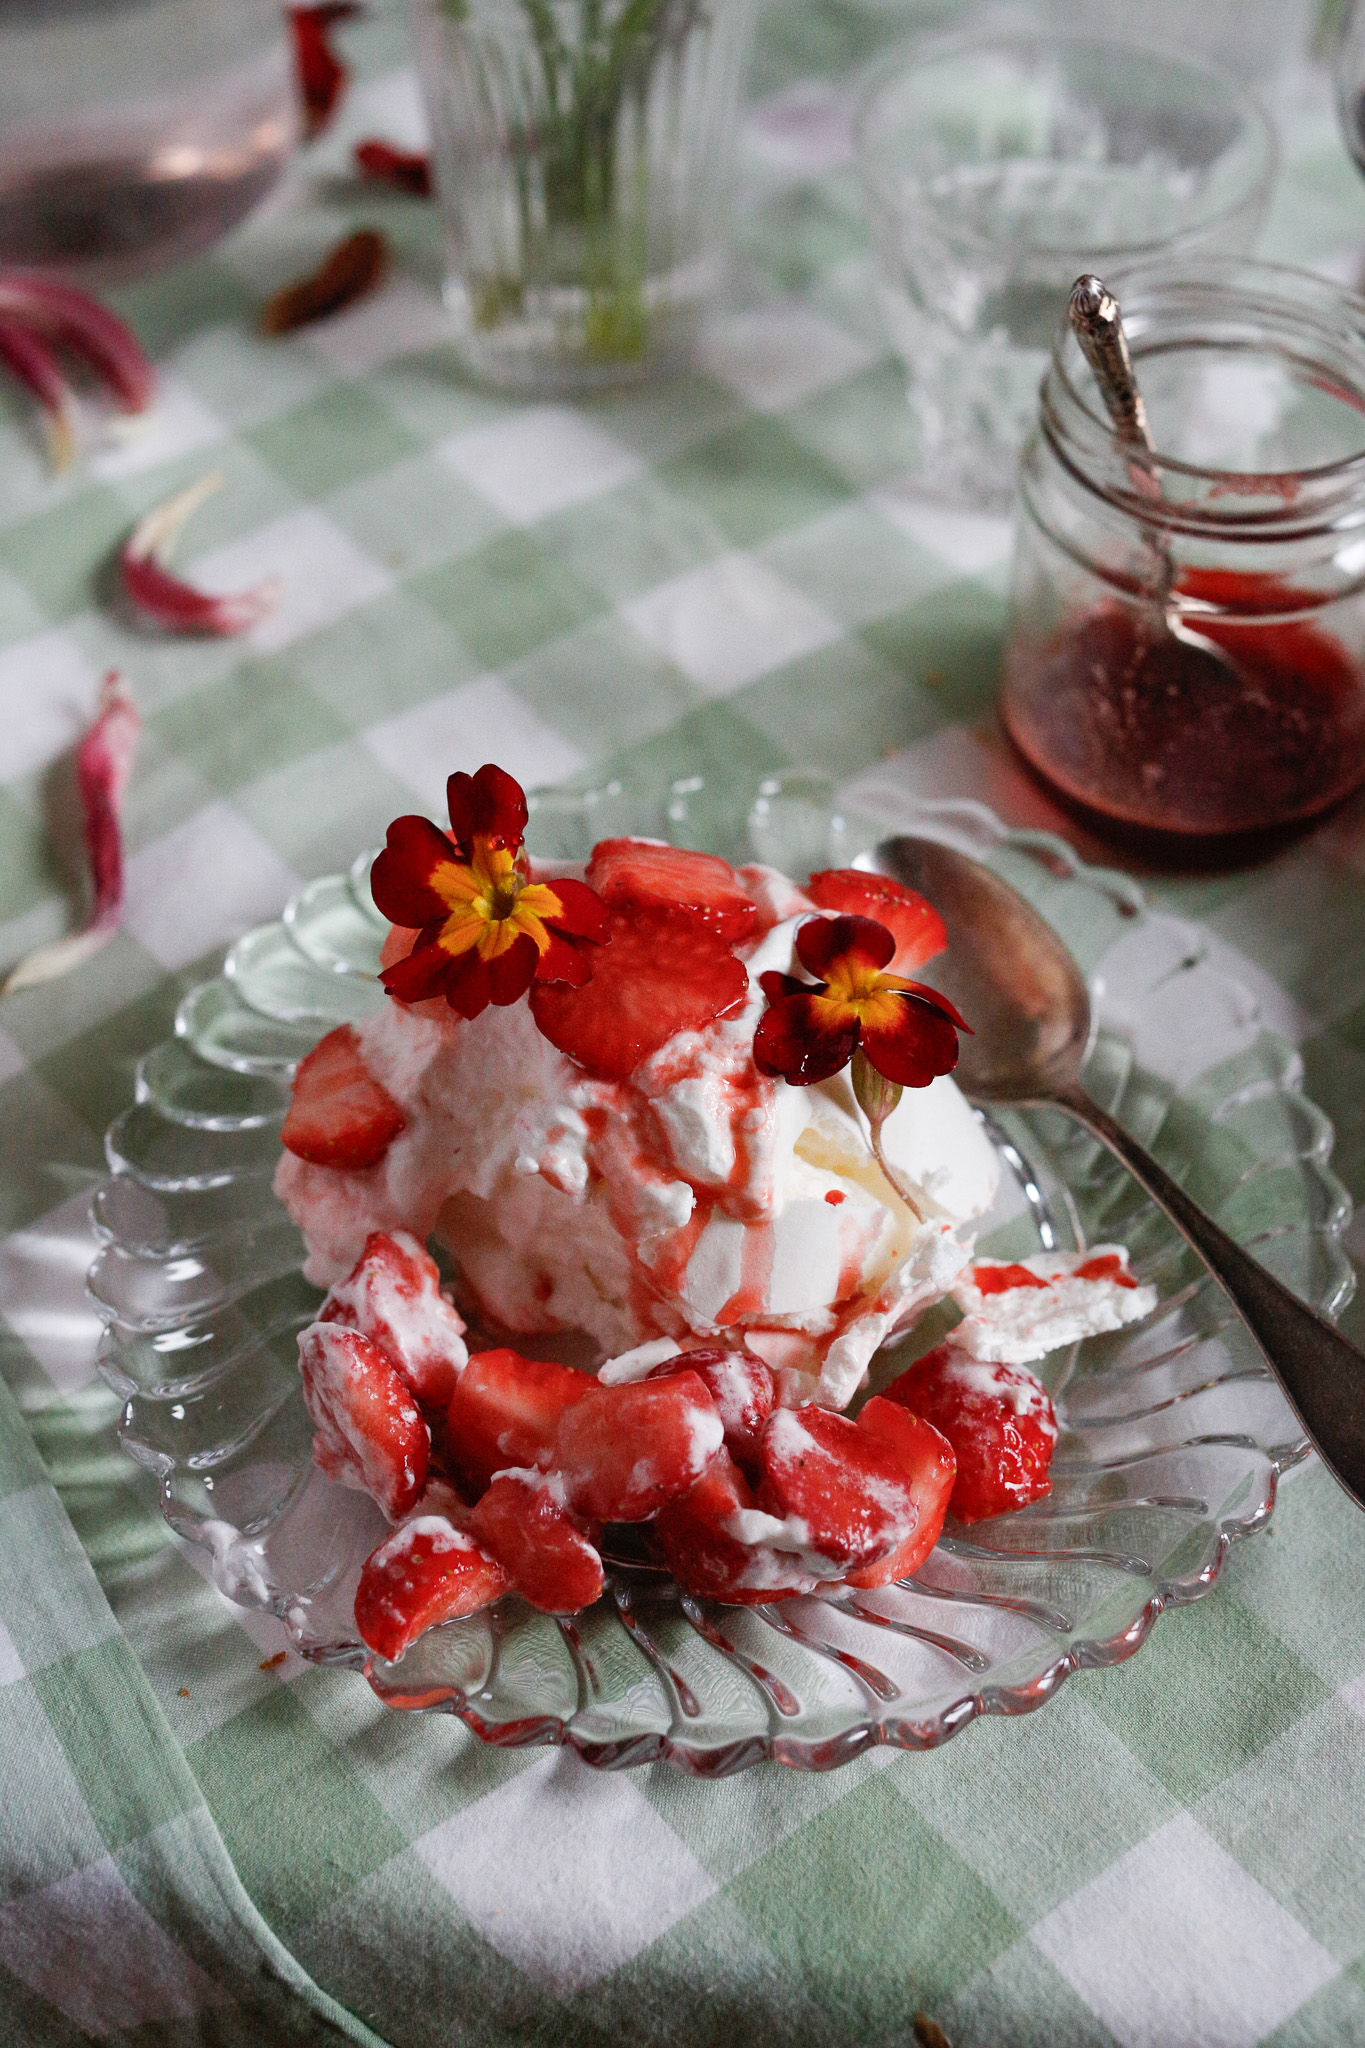
It looks less pretty that's for sure with the sauce on it but it's worth it.